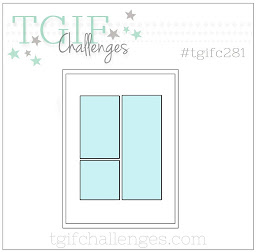
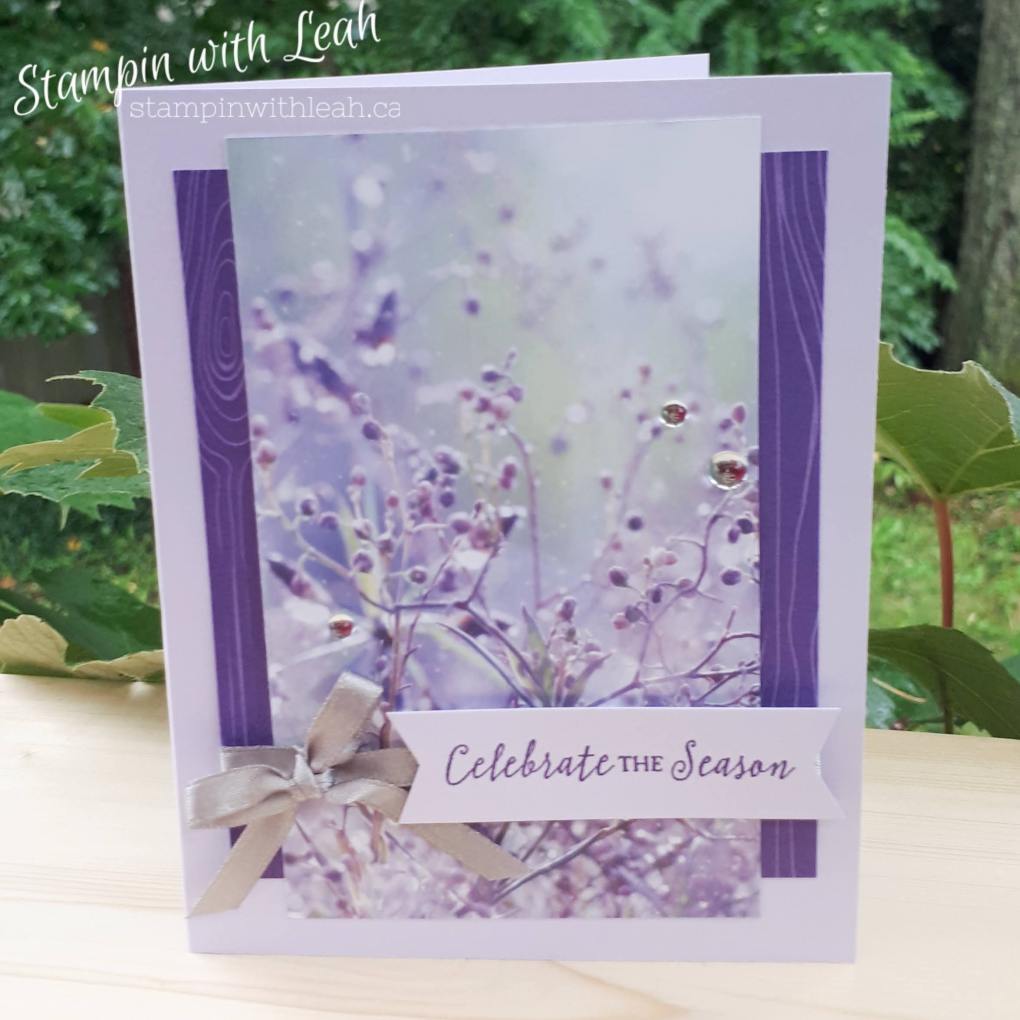
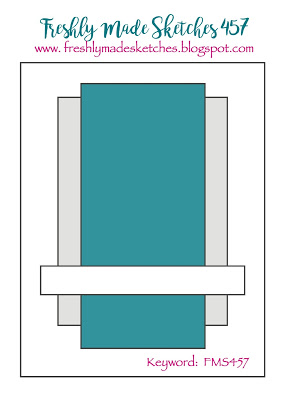
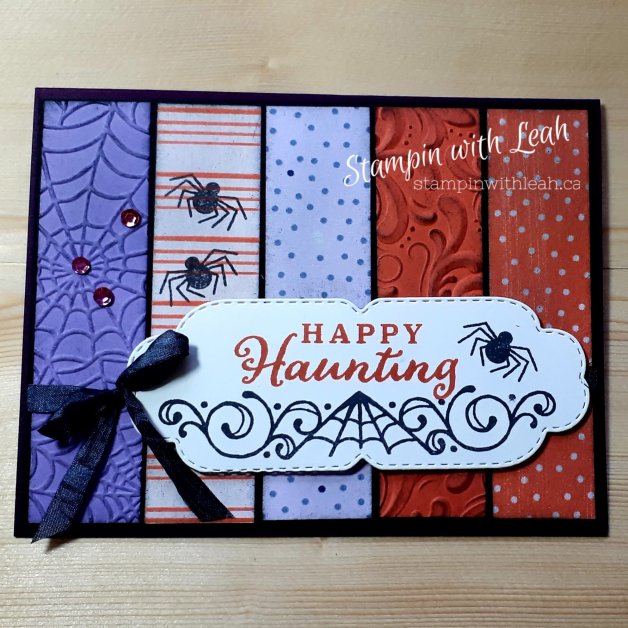
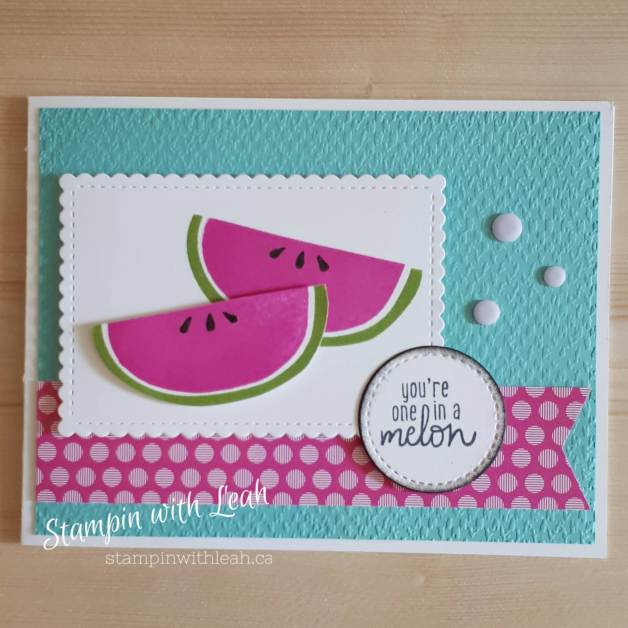
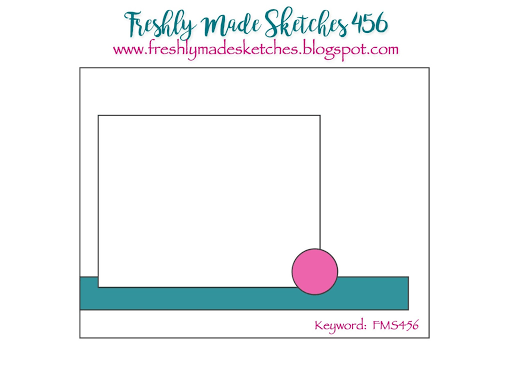
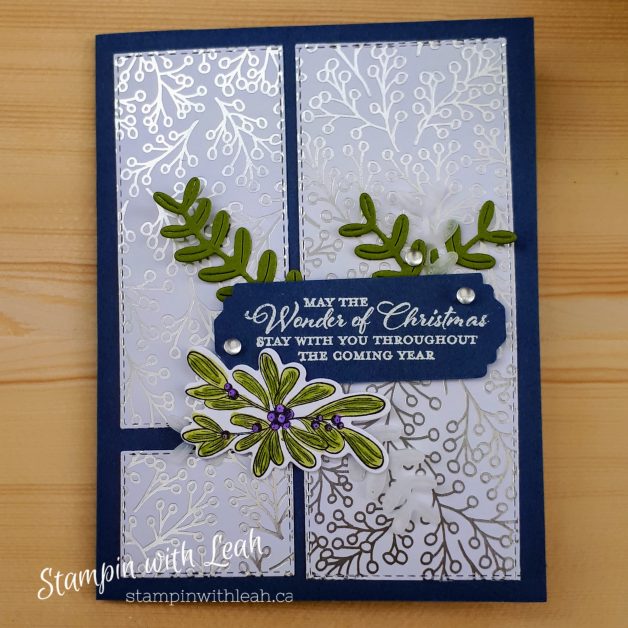
This card is basically two layers of DSP wrapped with a ribbon, a sentiment and some bling. Doesn’t get much easier. 🙂
Here are the dimensions for the card: Purple Posie Cardstock – 5.5″ X 8.5″ ( score at 4.25″) and .75″ X 3″ for the label, Gorgeous Grape Brights 6X6 DSP – 3.75″ X 4.5″, Feels Like Frost DSP – 3″ X 5″.
This month’s Paper pumpkin is incredible! I love the fonts, I love the images and of course, I love Christmas cards 🙂 I recorded a live unboxing of this kit and demonstrated how these beauties were made. You can view it on my You Tube channel ( don’t forget to subscribe while you are there so you never miss a video).
If you live in Canada, I have one extra kit available – just message me to buy it.
If you missed out on this incredible kit, make sure to sign up for Paper Pumpkin and never miss another project. Next month is featured a Gingerbread themed set of gift card carriers ( which could also be made into tags or full cards). https://www.paperpumpkin.com/en-ca/sign-up/?demoid=2189587 . Don’t forget to subscribe before November 10th!
Watch my FB page for alternative project being posted with this kit. The Friday after kits are delivered I hold a little virtual Paper Pumpkin social, we get together online, create our kits, create and share alternatives and generally just unwind after a long week. To join our social evening all you have to do is be part of my Ink Pad Pals Team or subscribe to Paper Pumpkin through me.
I am excited to once again be participating in the West Coast Creators Blog Hop.
I am loving creating for Hallowe’en and especially the orange/purple/black combo (this time I specifically used Calypso Coral and Highland Heather). What makes my card even better is that the Playing With Patterns DSP that I used is on sale!! Check out the full details of the DSP sale here.
Some of the fun techniques I used on this card are:
The Black Ribbon – which is actually Whisper White Crinkled Seam Binding, coloured in using a Black Stampin’ Blend.
Sponging Black Memento ink onto an embossed piece of cardstock to allow it to look tarnished and to let the pattern pop out more. I also sponged the edges and across the front of all the other strips of paper to make them less bright.
Using the Celebration Tidings dies twice to cut one tag down to the size and shape I wanted it to be.
The paper strips are each 1″ wide which allowed for nice spacing on the 5.25″ black card front that was then attached to a 5.5″ wide Blackberry Bliss card base.
This stamp set is blowing me away! I am in love with how you can create fun and silly cards or switch it up and make something very elegant. For all the details on how to make this card you can check out my You Tube Channel or my FB page.
A reminder as well that the DSP used in this card is ON SALE until Oct 31! Head to my shop now to get these deals.
This adorable stamp set is actually not in our main catalogue – it can only be found in our Beginner’s Brochure. It is the easiest stamp set to create with as the images are bold and don’t require any colouring. They line up easily for stamping and are SO CUTE!
I did add a bit of a more advanced technique tot his one by heat embossing the sentiment.
Yet again the inspiration for this card came from a sketch challenge – my favourite way to design. This one was the TGIF Challenge #285
Happy Stampin!
Leah Dixon
You can shop directly with me by clicking any of the product links below.
I have had my eye on purchasing the Cute Fruit stamp set for ages. I finally did it and I’m so happy with this set. The fruit are fun and easy to use and the punny sentiments are fabulous. What’s even better is that for new stampers you can grab the Cute Fruit Project Collection which includes the stamp set, a block, ink and cardstock.
The layout of this card was inspired by the Freshly Made Sketch challenge this week. Check out my FB page this coming week to see a nice variety of Cute Fruit cards.
I am featuring the In The Pines Bundle on my Facebook page this week. Today’s card was an elegant card created using a Silver and White colour scheme. Check out my Facebook page this week to see many other cards ranging from elegant to rustic.
I am also offering an In the Pines card class later this month. You can see all the details here, make sure to RSVP by the 7th of October!
The adhesive sheets that I used in the video are great for putting these intricate trees together. For a full supply list see below.
These Gnomes are the cutest! I just love that you can create a fun Christmas card or change it up entirely to create a Halloween, birthday, or just a whimsical wizard style card.
I had a great time this morning creating a simple card and then slowly making it more detailed and interesting.
I truly love all 3 cards ( I am a sucker for a good simple stamping card – the busy mom that I am I NEED fast a beautiful cards to create).
Here are the three levels of creation. From Beginner, to casual crafter, to avid crafter.
2 inks, 2 cardstock and some adhesive – simple as can be!
Same card – but add some sponging and an embellishment.
Final version I added some die cutting and some heat embossing.
I simply adore the Love of Leaves bundle. The stitching is such an easy thing to add to the cards and makes a huge impact on the look of a card. You can see the video of how I created these cards on my FB page.
Happy first full week back to school! It has been a challenging beginning to school and I am so thankful to have my stamping to keep me calm and give me a break from the chaos. This week I am participating in the monthly sketch challenge at TGIF Challenges and creating with the Wishes & Wonder Bundle – which is being featured in the World Card Making Day Stamp Camp that I am a presenter at on October 3rd, 10am -4pm PST.
If you live in Canada – you can check out the details here or by clicking the image below.