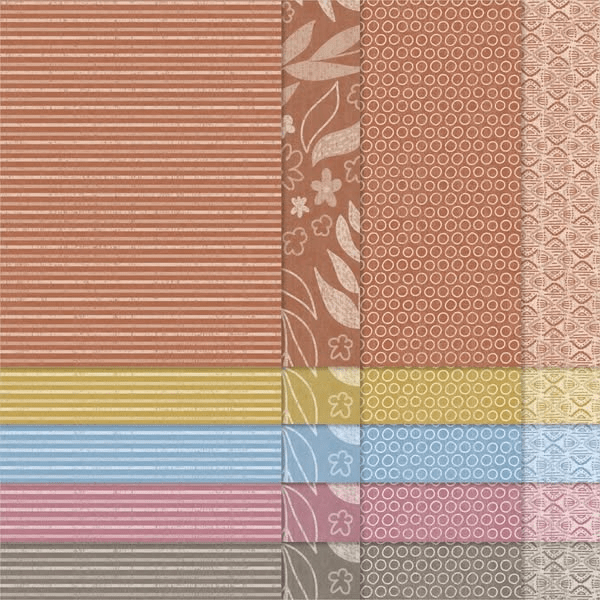
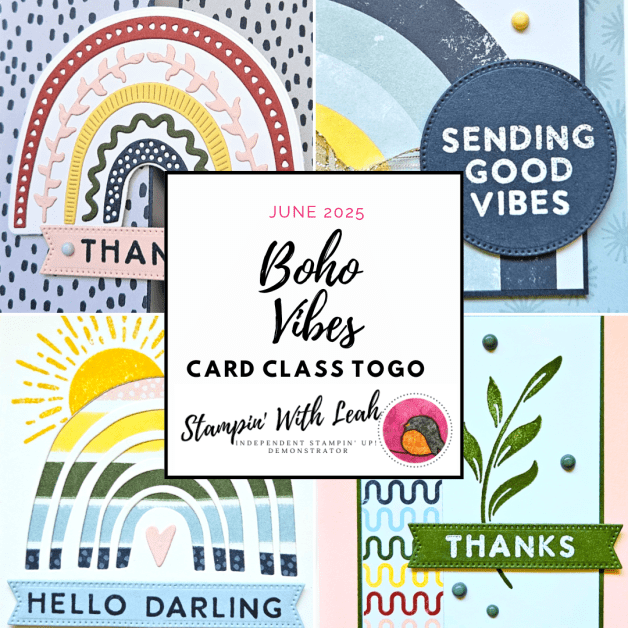
Welcome back, friends! It’s time for another Coast to Coast Creators Blog Hop, and this month we’re celebrating our favourite new products from the 2025–2026 Annual Catalogue. I chose to feature the Boho Vibes Suite, paired with the versatile Everyday Details Arches Dies, to create a vibrant, feel-good card.
🌟 Card Details:
Card base: Secret Sea cardstock
Rainbow: Cut using the Sunshine Vibes Dies in Berry Burst, Timid Tiger, Darling Duckling, and Strawberry Slush
Sentiment: Stamped in Secret Sea ink
Embellishments: Muted Pallette Dots from the suite
Layout: The rainbow is layered inside the stitched arch from the Everyday Details dies. The background DSP (also from the suite) brings a bold graphic flair that contrasts beautifully with the soft whites and vibrant rainbow.
I love how this colour palette and die combo brings instant joy and positivity—just perfect for sending good vibes!
💡 Design Tip: Apply Adhesive Sheets to your cardstock before die-cutting the rainbow pieces. This makes it so much easier to assemble the design—no liquid glue, no sticky fingers, and perfectly clean placement every time!
🌈Hop Along With Us!
Be sure to hop along with us and see what the rest of the Coast to Coast team has created using new Annual Catalogue products. So much inspiration ahead!
🛍️ Don’t Miss This! During June, the BOGO Suite Sale is on! All available suites and suite products from the 2025–2026 Annual Catalog and Online Exclusives are buy one, get one 50% off! If you’ve had your eye on a new suite from the annual catalog or you really like the look of a stamp set from an Online Exclusives suite, you don’t have to choose—you can get both!
Make sure to watch my You Tube live each Wednesday – this week was my monthly card class to go – you can still grab the tutorial in my Card Class To Go section on my blog!
Welcome back to the Coast to Coast Creators Blog Hop! This month, our creative team is thrilled to introduce the brand new 2025–2027 In Colors from Stampin’ Up! These fresh and vibrant hues are perfect for spring and beyond. Whether you love bold brights or softer shades, this new lineup offers something for every style:
Strawberry Slush – a bright, happy pink
Timid Tiger – a soft, orangey-coral
Darling Duckling – a warm, sunny yellow
Cloud Cover – a dreamy, misty blue
Secret Sea – a deep, mysterious navy
Many of the creators in our hop were inspired by a sketch this month… and while I may have missed including the sketch, I didn’t miss the chance to play with these gorgeous new colours!
My Card Set – Textured Notes + In Color Elegance
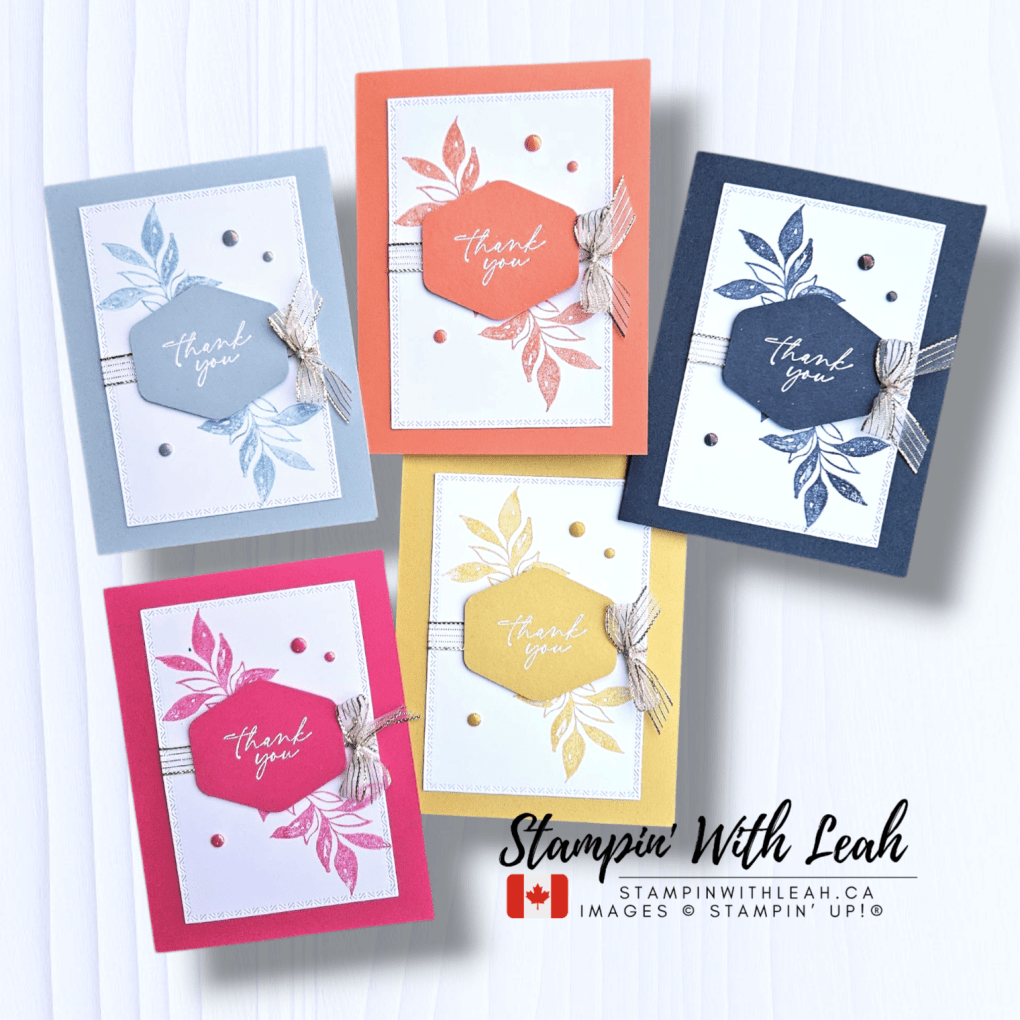
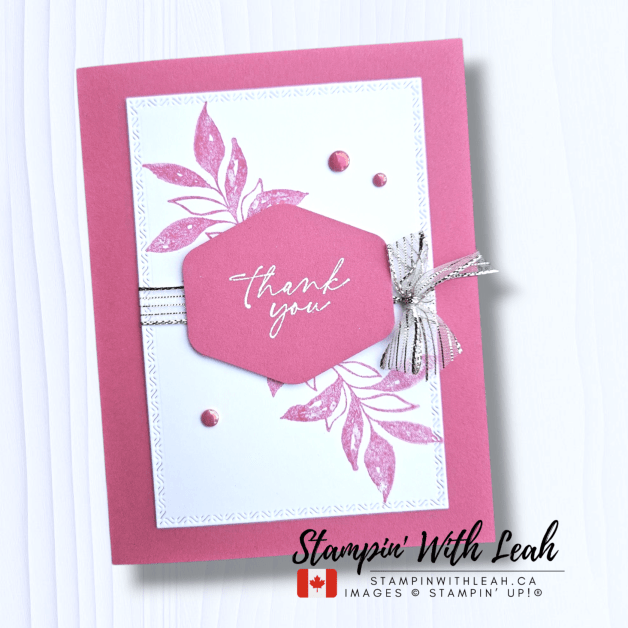
For my projects, I created a set of thank you cards using the new Textured Notes Bundle paired with the Heartfelt Hexagon Punch. I love how the leafy image fills the space without overpowering the sentiment — it makes for a simple, elegant focal point.
Each card features one of the new In Colors as the card base, coordinating stamped foliage, and a bold punched sentiment layer. I embellished each one with:
✨ Gold Striped Trim – adds a beautiful bit of shine ✨ 2025–2027 In Color Flat Pearls – the perfect subtle accent
I kept the layout clean and repeated the design to let the colors shine. This is a great way to create a coordinated set of cards or even prep a bunch to have on hand for gifts!
💙 Hop Along With Us!
You won’t want to miss what the rest of the Coast to Coast Creators have made this month! These demonstrators are so creative and bring a wide range of styles and techniques to inspire you:
👉 Click the link below to visit each blog and leave a little love 💕
Tips for Using Cloud Cover Ink
If you noticed that my Cloud Cover card looks just as soft and dreamy as the other colours—thank the Stampin’ Write Marker! Since a full-sized Cloud Cover Classic Ink Pad isn’t available due to a unique chemical reaction with the firm foam, I used my Stampin’ Write Marker to ink up the stamp directly. This works beautifully, especially with cling stamps like those in the Textured Notes set.
Why no ink pad for Cloud Cover? Stampin’ Up! discovered that when Cloud Cover ink meets the foam in our classic pads, it causes the colour to shift unpredictably. While they can’t reverse this reaction, there are still great options to enjoy this lovely hue:
Use the Cloud Cover Stampin’ Write Marker (available in the 2025–2027 Marker Pack – 165292)
Pair the Cloud Cover Classic Ink Refill l (165279) with Uninked Stampin’ Spots (141822) for consistent results
Look for the Stampin’ Spot Assortment Pack (166716), which includes a felt-based Cloud Cover spot!
While the 5-colour Classic Ink Pad Bundle won’t be available this year, you can still purchase Strawberry Slush, Timid Tiger, Darling Duckling, and Secret Sea ink pads individually. And trust me, Cloud Cover is still just as usable—you’ll simply reach for it a little differently.
Have you been thinking about joining Stampin’ Up!? Now is the perfect time. In May, you can choose $220 worth of products (including new In Color goodies!) and pay only $135 CAD — and there’s no shipping cost!
Whether you’re looking to save on your own orders or start a small business, the Starter Kit is completely customizable and there’s no obligation to sell. Plus, you’ll be part of my friendly and creative team! In Color productsin my online store here — and don’t forget, orders of $75+ qualify for my customer rewards!
Love the new In Colors but want to collect them gradually? My In Color Club is a fun and affordable way to build your collection over 4 months. Each month, you’ll receive a selection of products in all of the In Colors. See the details and register here: https://form.jotform.com/leahdixon41/in-colour-club-2025
✨ Let’s Stay Connected!
💌 Join my email list for early access to card classes, Stampin’ Up! promotions, and exclusive tutorials 📱 Follow me on Facebook and Instagram 🎥 Watch weekly Facebook Lives every Wednesday!
Thanks for stopping by my blog today! Be sure to hop along and check out what the rest of the Coast to Coast Creators have made with these fabulous new colors — you’re sure to be inspired.
Click here to shop my online store. Click here to access & view the current catalogs. Click here to subscribe to Thanks for hopping by! Make sure to pin this post for future reference and share it with your crafty friends.those fun Paper Pumpkin kits of creativity! Click here for more information about joining my Online Monthly Technique Club. Earn even more goodies by joining a club! Click here to learn more about joining my Ink Pad Pals Team. Get the MOST rewards including a discount on future products! Follow me on social media! I share regularly on Pinterest, YouTube, and Facebook! Please subscribe to my newsletter, too!Click here and enter your email. When you include your birthday you will even be added to my birthday card mailing list 🙂
Welcome to the April edition of the Coast to Coast Creators Blog Hop! We’re a group of talented Stampin’ Up! demonstrators from across Canada, and we hop together on the 14th of every month to share creative inspiration and celebrate the art of stamping.
This month, we’re spotlighting the stunning 2023–2025 In Colors, which are retiring soon. If you’ve been holding out on these trendy shades—now’s the time to stock up before they’re gone! *Boho Blue cardstock and ink are already gone!
💗 My Project: Moody Mauve Baby Card
For this hop, I chose to go monochromatic with Moody Mauve, a warm, rich mauve tone that’s perfect for baby cards, floral themes, and soft romantic projects. It’s one of my all-time favorite In Colors, and I’m sad to see it go!
The soft striped background was stamped with the Painted Stripes background stamp in Moody Mauve ink, adding a bold but gentle pattern. I layered a stitched circle from the Stylish Shapes Dies, added the adorable onesie from the Cutest Onesie bundle, and finished it off with gold trim and sequins for a bit of sparkle. 💫
The sentiment, “A big welcome to your new baby,” is perfect for welcoming a sweet little one—and the scattered heart details add an extra dose of love.
💙 Hop Along With Us!
You won’t want to miss what the rest of the Coast to Coast Creators have made this month! These demonstrators are so creative and bring a wide range of styles and techniques to inspire you:
👉 Click the link below to visit each blog and leave a little love 💕
📌 Why Now’s the Time to Shop the 2023–2025 In Colors
These beautiful In Colors—Moody Mauve, Pebbled Path, Wild Wheat, Boho Blue, and Copper Clay—are retiring soon! That means:
Cardstock, ink pads, refills, ribbon, and DSP are only available while supplies last.
These shades won’t be coming back, so don’t miss out!
They’re perfect for coordinating with current and upcoming bundles.
You can shop all the retiring In Color productsin my online store here — and don’t forget, orders of $75+ qualify for my customer rewards!
💌 Join my email list for early access to card classes, Stampin’ Up! promotions, and exclusive tutorials 📱 Follow me on Facebook and Instagram 🎥 Watch weekly Facebook Lives every Wednesday!
Thanks for stopping by my blog today! Whether you’re welcoming a new baby or just saying goodbye to a favorite color, I hope you found a little inspiration. Don’t forget to check out the rest of the blog hop for more ideas using the retiring 2023–2025 In Colors!
Click here to shop my online store. Click here to access & view the current catalogs. Click here to subscribe to Thanks for hopping by! Make sure to pin this post for future reference and share it with your crafty friends.those fun Paper Pumpkin kits of creativity! Click here for more information about joining my Online Monthly Technique Club. Earn even more goodies by joining a club! Click here to learn more about joining my Ink Pad Pals Team. Get the MOST rewards including a discount on future products! Follow me on social media! I share regularly on Pinterest, YouTube, and Facebook! Please subscribe to my newsletter, too!Click here and enter your email. When you include your birthday you will even be added to my birthday card mailing list 🙂
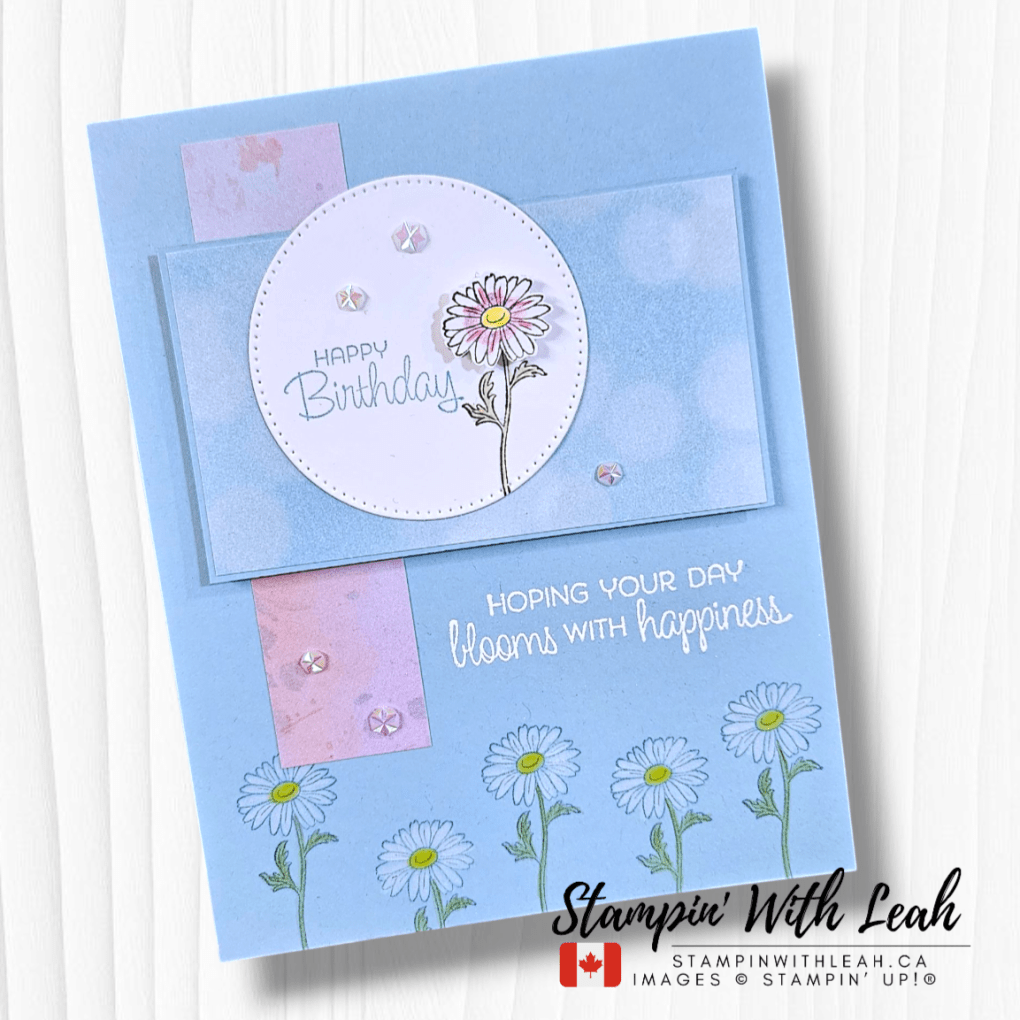
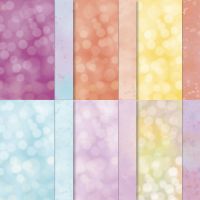
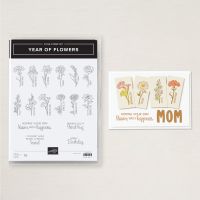
Hello, crafty friends! 🌸 Welcome to this month’s Coast to Coast Creators Blog Hop, where we’re diving into a beautiful colour challenge that has us feeling all the soft, dreamy vibes of spring! This month, I created a delicate floral card using the Year of Flowers stamp set paired with the Beautiful Bokeh DSP—and I am in love with the results! 💙💜💖
This challenge pushed me outside my comfort zone in the best way, and I hope it inspires you to create something fresh and fun! Let’s take a closer look at my project.
🌿 Card Details & Supplies Used
For this card, I wanted to highlight the stunning colours in this challenge while keeping the design soft and elegant. I chose:
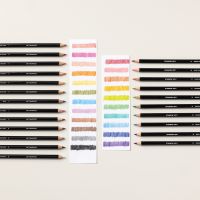
✅ Stamp Set: Year of Flowers ✅ Paper: Beautiful Bokeh DSP, Basic White Cardstock ✅ Colours: Balmy Blue Ink, Watercolour Pencils (White, Melon Mambo, Old Olive and Daffodil Delight) ✅ Embellishments: Iridescent Faceted Gems and Basics Wow! Embossing Powder
Here’s how I put it all together:
1️⃣ Background: I layered two soft Beautiful Bokeh DSP panel onto my card base. The blurred effect of this paper adds so much depth without extra work—so dreamy! ✨At the bottom of the card I stamped the daisy in Balmy Blue Ink and lightly coloured with Watercolour Pencils.
2️⃣ Focal Image: I stamped the daisy from Year of Flowers in Memento Black ink and coloured it with Watercolour Pencils for a soft effect.
3️⃣ Sentiment: The sentiment “Happy Birthday” (also from Year of Flowers) is stamped in Balmy Blue Ink. The larger sentiment is stamped in Versamark and heat embossed with white embossing powder.
4️⃣ Finishing Touches: A few Iridescent Faceted Gems complete the look!
🎨 Playing with Colour Challenges
Colour challenges are a great way to step out of your creative routine and explore new palettes! This one had me mixing soft pastels in a way I hadn’t tried before, and I love how they blend together so seamlessly.
What do you think of this colour combo? Would you try it?
💙 Hop Along for More Inspiration!
The Coast to Coast Creators team has created even more stunning projects with this colour challenge! Be sure to hop along and check out all the inspiration. Click below to visit each creator’s post!
And if you love this card, be sure to save it on Pinterest for later! 💕
Want to recreate this card? You can shop all the supplies I used in my online store!
Here is a list of supplies needed to create these card.
Be sure to subscribe to my newsletter for more crafting tips, project ideas, and updates on upcoming events or check out everything at linktr.ee/stampinwithleah.
Live in Canada, don’t have a demonstrator? Contact me to get a catalogue or find out why right now is a great time to join my team.
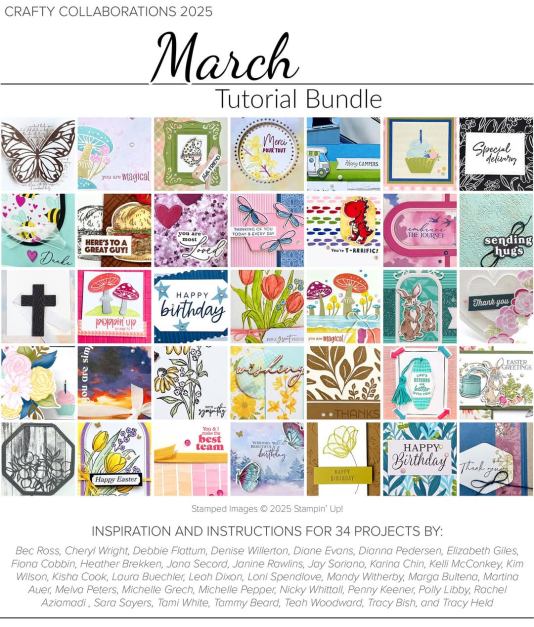
A perk to ordering with me in the month of March is that with any order over $65cdn, you will receive an amazing 30+ project Tutorial Bundle from me as a thank you. Just use the host code below. As a member of my team you get free access to this Tutorial Bundle.
You can see all the benefits of joining my team (the Ink Pad Pals) by clicking the image below.
Click here to shop my online store. Click here to access & view the current catalogs. Click here to subscribe to Thanks for hopping by! Make sure to pin this post for future reference and share it with your crafty friends.those fun Paper Pumpkin kits of creativity! Click here for more information about joining my Online Monthly Technique Club. Earn even more goodies by joining a club! Click here to learn more about joining my Ink Pad Pals Team. Get the MOST rewards including a discount on future products! Follow me on social media! I share regularly on Pinterest, YouTube, and Facebook! Please subscribe to my newsletter, too!Click here and enter your email. When you include your birthday you will even be added to my birthday card mailing list 🙂
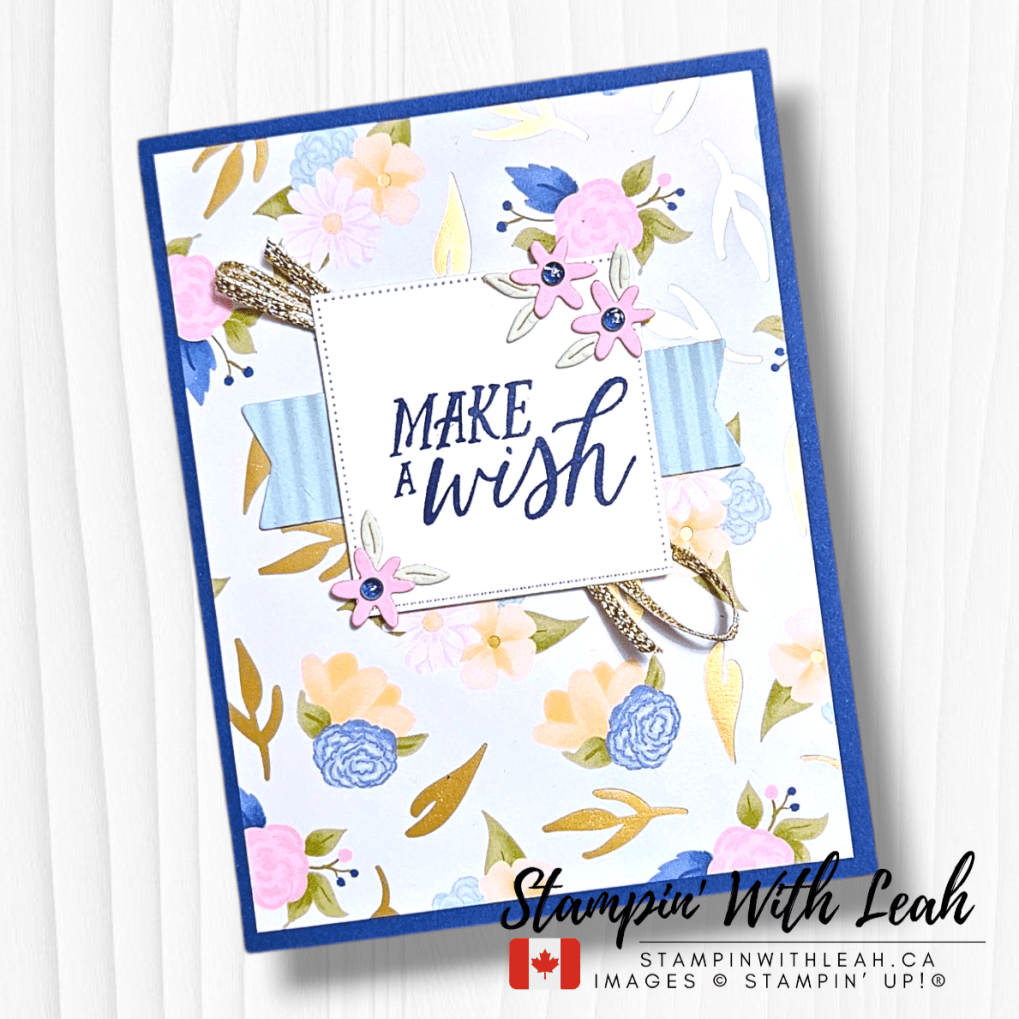
This week at Hand Stamped Sentiments, we’re excited to bring you a sketch challenge! Challenge #458 is all about creativity and interpretation, and I’m using the Birthday Celebration Bundle along with the Wildflower Birthday Designer Series Paper (DSP) to bring this sketch to life.
Here’s the Sketch for This Week’s Challenge:
Here’s the card I created:
A Closer Look at My Card Design
For this festive birthday card, I followed the sketch layout and added my own creative twist using the Birthday Celebration Bundle and Wildflower Birthday DSP. Here are the details:
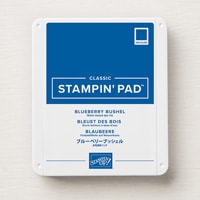
Card Base: I started with a Blueberry Bushel cardstock base, which complements the floral tones in the DSP beautifully.
Layered Elements: The background is a vibrant piece of Wildflower Birthday DSP, with a Pool Party banner added horizontally across the card and Pretty In Pink die cut flowers on the sentiment label.
Banner Detail: The banner was textured using the brand-new Online Exclusive Corrugated 3D Embossing Folder, adding beautiful dimension to the design.
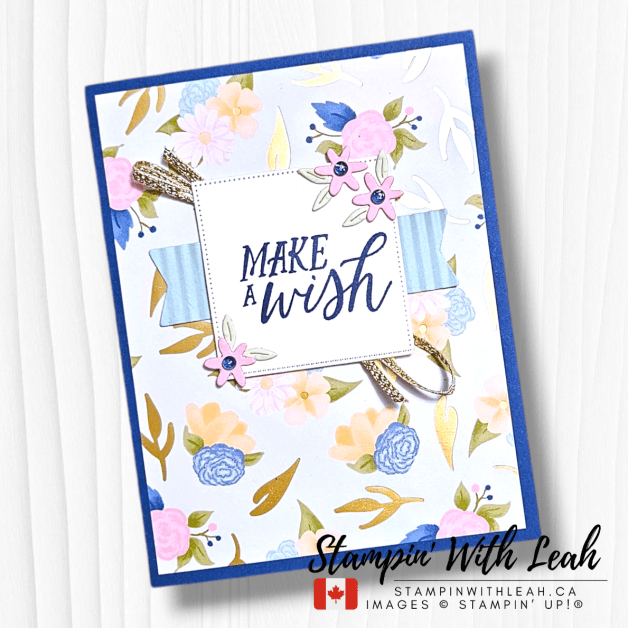
Focal Point: The “Make a Wish” sentiment from the Birthday Celebration stamp set is stamped in Blueberry Bushel ink on a stitched square die-cut. The square was created by double cutting the large banner from the Birthday Celebration dies.
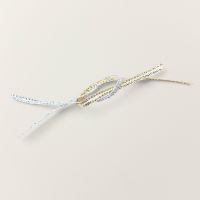
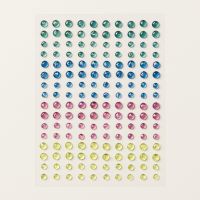
Embellishments: Behind the sentiment, I added a bow made with Gold Trim, giving the card an elegant touch. To complete the look, I accented the card with Blueberry Bushel gems from the Tinsel Gem 4-Pack for extra sparkle.
I hope this inspires you to get crafty and play along with this week’s Hand Stamped Sentiments Sketch Challenge. Let me know in the comments – how will you interpret this sketch? 😊🎉
Now it’s your turn! Use this week’s sketch as inspiration, create your own project, and share it with us at Hand Stamped Sentiments. Don’t forget to check out the amazing designs from the rest of the team!
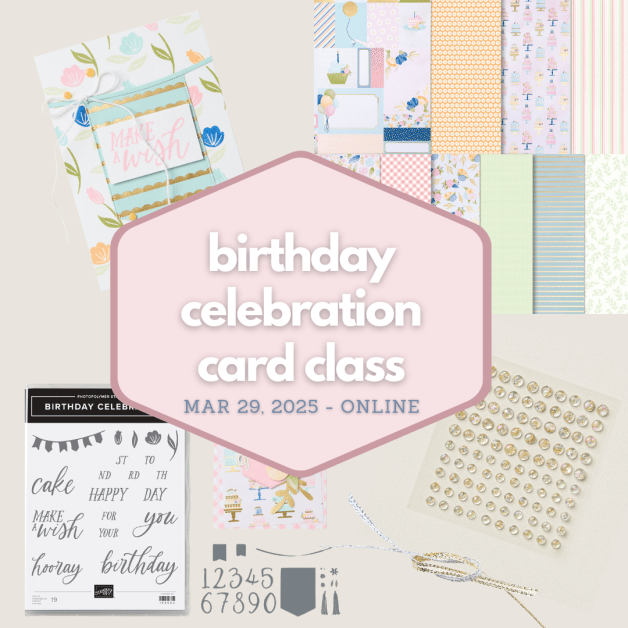
Want to make even more birthday cards? Join my Birthday Celebration Card Class, where we’ll craft six gorgeous birthday designs using the Birthday Celebration Bundle and Wildflower Birthday DSP.
📅 Class Date: March 29, 2025 ⏳ Registration Deadline:Wednesday! 🎨 Includes: Pre-cut supplies, embellishments, and step-by-step instructions 📍 Location: Virtual – on a private FB page
When you use my host code (6HQ62V46) this month, I’ll send you a link to an exclusive 30+ Project Tutorial Bundle as a thank-you!
Upcoming Card Classes
Looking for more crafting fun? Join my March Card Class or April Card Class to learn new techniques and create beautiful projects. Spots are limited, so reserve yours today!
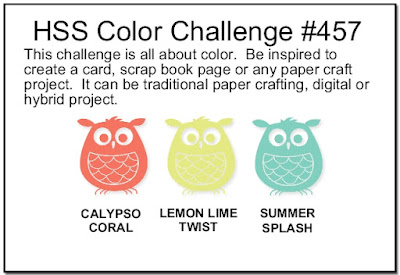
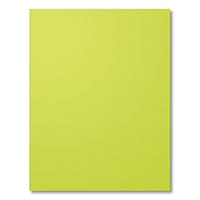
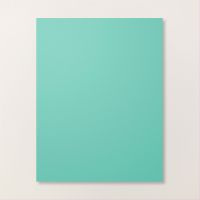
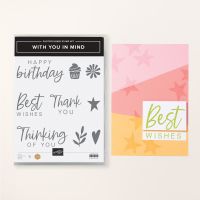
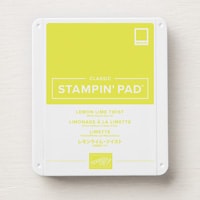
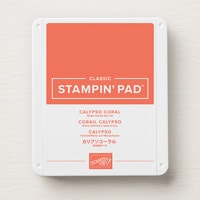
Are you ready for a fun and vibrant colour challenge? This week at Hand Stamped Sentiments , we’re playing with a fresh and cheerful trio: Calypso Coral, Lemon Lime Twist, and Summer Splash! These colours bring a bright, tropical feel to any project, and I had so much fun creating this birthday card featuring the With You In Mind stamp set from Stampin’ Up!
Here’s the card I created:
A Closer Look at My Card Design
For this card, I combined the bold colours of the challenge, layering techniques, and heat embossing to make the elements pop. Here’s how I brought this colour combo to life:
Finishing Touches: A few sparkly embellishments (Iridescent Faceted Gems) add just the right amount of shine!
Background Stamping: I started with a Lemon Lime Twist cardstock base and added subtle tone-on-tone cupcake images using the With You In Mind stamp set.
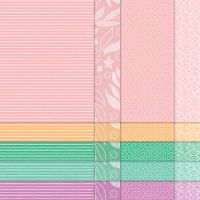
Layered Panels: To add dimension, I layered Summer Splash and 2024-2026 In Colour 6X6 Designer Series Paper (with a Summer Splash geometric pattern) for extra texture.
Cupcake Details: The cupcakes were stamped in Calypso Coral and then I heat embossed the cupcake bottoms with Silver Embossing Powder to give them a shiny, metallic touch.
Sentiment: The ‘Happy Birthday’ sentiment was stamped in Versamark on Summer Splash cardstock, then heat embossed with white embossing powder. Finally I fussy cut it, giving it a crisp and playful look.
Now it’s your turn! Head over to Hand Stamped Sentiments and join this week’s colour challenge. While you’re there, be sure to check out all the amazing cards created by other talented crafters! I can’t wait to see what you create using Calypso Coral, Lemon Lime Twist, and Summer Splash!
Sale-A-Bration is Still On!
Did you know that Sale-A-Bration is happening now? You can earn free Stampin’ Up! products for every $75 CAD you spend until February 28th! It’s the perfect time to stock up on crafting essentials while getting amazing freebies. Don’t miss out on these exclusive rewards!
Special Offers and Upcoming Events
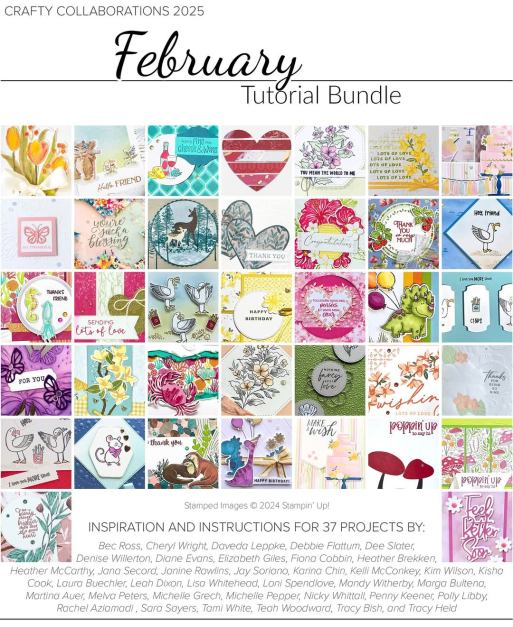
When you use my host code (NSTY47WP) this month, I’ll send you a link to an exclusive 37 Project Tutorial Bundle as a thank-you!
Upcoming Card Classes
Looking for more crafting fun? Join my March Card Class or April Card Class to learn new techniques and create beautiful projects. Spots are limited, so reserve yours today!
Looking for more ways to enjoy stamping? Join my Stampin’ Up! Ink Pad Pals team!
Save 20%+ on your orders.
Get free access to my monthly card class tutorials.
Enjoy our monthly team meetings with stamping fun and collaboration.
During Sale-a-bration there are even more perks to joining.
Option 1 – Join our crafting community as a new demonstrator and you can get $165 CAD worth of products PLUS a choice of two Stampin’ Write Marker Assortments AND the Handmade Designs Cling Stamp Set, an exclusive stamp set designed to work with the markers. That’s a $294 CAD value all for just $135 CAD!
Option 2 – Join Stampin’ Up! during Sale-A-Bration and get $165 CAD worth of product PLUS an additional $41 CAD worth of product of your choice when you join for $135 CAD. That’s a $206 CAD value!
Contact me to find out more or see the details on my website.
Live in Canada and don’t have a demonstrator? Contact me to get a catalog and find out why now is the perfect time to join my team!
Leave a comment below and don’t forget to subscribe to this blog for more crafty inspiration!
Happy crafting, and I can’t wait to see your creations! 💕
Click here to shop my online store. Click here to access & view the current catalogs. Click here to subscribe to those fun Paper Pumpkin kits of creativity! Click here for more information about joining my Online Monthly Technique Club. Earn even more goodies by joining a club! Click here to learn more about joining my Ink Pad Pals Team. Get the MOST rewards including a discount on future products! Follow me on social media! I share regularly on Pinterest, YouTube, and Facebook! Please subscribe to my newsletter, too!Click here and enter your email. When you include your birthday you will even be added to my birthday card mailing list 🙂
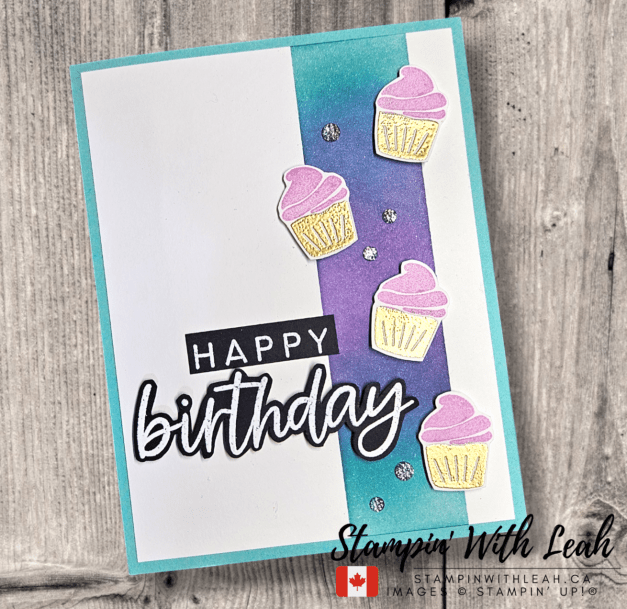
Welcome to the Coast to Coast Creators Blog Hop for February 2025! Each month, our team of talented creators from across Canada shares projects designed to inspire you. This month, we’re featuring projects made with products from the January – April 2025 Mini Catalogue, and I can’t wait to show you my creation!
My Card: A Soft & Elegant Blend with Cupcake Accents
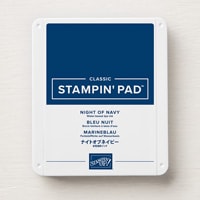
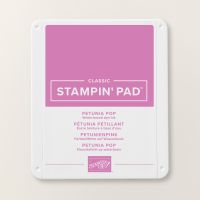
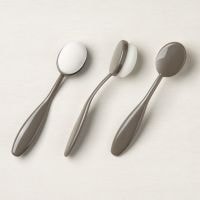
For this month’s project, I played with Coastal Cabana, Night of Navy, and Petunia Pop inks to create a smooth blended colour strip using blending brushes. This was done on a 4” x 5-1/4” Basic White cardstock panel, adding a soft and elegant ombré effect.
I kept the sentiment bold by heat embossing it in white on Black cardstock using Versamark and white embossing powder. Then, I carefully fussy cut around it to give it a custom look.
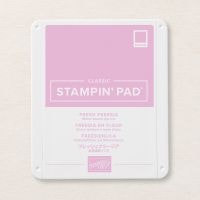
The adorable cupcakes were stamped in Fresh Freesia, but I wanted to add some extra detail, so I re-inked the bottom with Versamark and gold heat-embossed the cupcake liners for a touch of shimmer. These were also fussy cut to add dimension.
To bring the card together, I arranged the cupcakes and sentiment onto my blended background and adhered them using Mini Dimensionals for a layered effect. The entire panel was then glued to a Coastal Cabana card base for a fresh, cohesive look. For a finishing touch, I embellished with Two-Tone Sparkle Gems to add just the right amount of sparkle!
Blending for a Smooth Finish: Use light, circular motions with your blending brushes and build up color gradually for a seamless gradient effect.
Using a Glass Mat & Painter’s Tape for Clean Edges: Secure your cardstock to a glass mat with painter’s tape, using the grid lines to ensure straight and even edges while blending.
Heat Embossing for Extra Detail: To add extra dimension, try heat embossing elements like sentiments or small details on stamped images for a polished look.
Fussy Cutting Like a Pro: Move the paper rather than the scissors for smoother cuts and avoid jagged edges.
Ready to See More?
I hope this project inspires you to get creative with Mini Catalogue products! Be sure to check out the rest of the Coast to Coast Blog Hop for more amazing ideas from my fellow creators. Click the links below to continue hopping and discover even more inspiration!
Don’t Forget About Sale-A-Bration!
Although we’re not specifically featuring Sale-A-Bration items in this hop, don’t forget that the fantastic Sale-A-Bration promotion is on until February 28, 2025! With every $75 order (before tax and shipping), you can earn free exclusive products—so now is the perfect time to stock up on your favorites!
Want to recreate this card? You can shop all the supplies I used in my online store!
Here is a list of supplies needed to create these card.
Be sure to subscribe to my newsletter for more crafting tips, project ideas, and updates on upcoming events or check out everything at linktr.ee/stampinwithleah.
Live in Canada, don’t have a demonstrator? Contact me to get a catalogue or find out why right now is a great time to join my team.
A perk to ordering with me in the month of February is that with any order over $75cdn, you will receive a FREE SAB item and I am emailing out an amazing 37 project Tutorial Bundle. Just use the host code below. As a member of my team you get free access to this Tutorial Bundle.
You can see all the benefits of joining my team (the Ink Pad Pals) by clicking the image below. Right now there are even more perks to joining during Sale-a-bration!
Thanks for hopping by! Make sure to pin this post for future reference and share it with your crafty friends.
Click here to shop my online store. Click here to access & view the current catalogs. Click here to subscribe to Thanks for hopping by! Make sure to pin this post for future reference and share it with your crafty friends.those fun Paper Pumpkin kits of creativity! Click here for more information about joining my Online Monthly Technique Club. Earn even more goodies by joining a club! Click here to learn more about joining my Ink Pad Pals Team. Get the MOST rewards including a discount on future products! Follow me on social media! I share regularly on Pinterest, YouTube, and Facebook! Please subscribe to my newsletter, too!Click here and enter your email. When you include your birthday you will even be added to my birthday card mailing list 🙂
Hello, crafty friends! Today, I’m thrilled to share my project for the Hand Stamped Sentiments Inspiration Challenge #456. This challenge is all about celebrating with festive vibes, and the inspiration image is bursting with cheerful birthday themes – from cupcakes to beautiful cakes and vibrant colors! 🎂✨
Here’s the inspiration image:
The talented Hand Stamped Sentiments Design Team has created stunning projects with this inspirational image. Hop over to their page to see all the amazing creations and join the challenge!
Here’s the card I created:
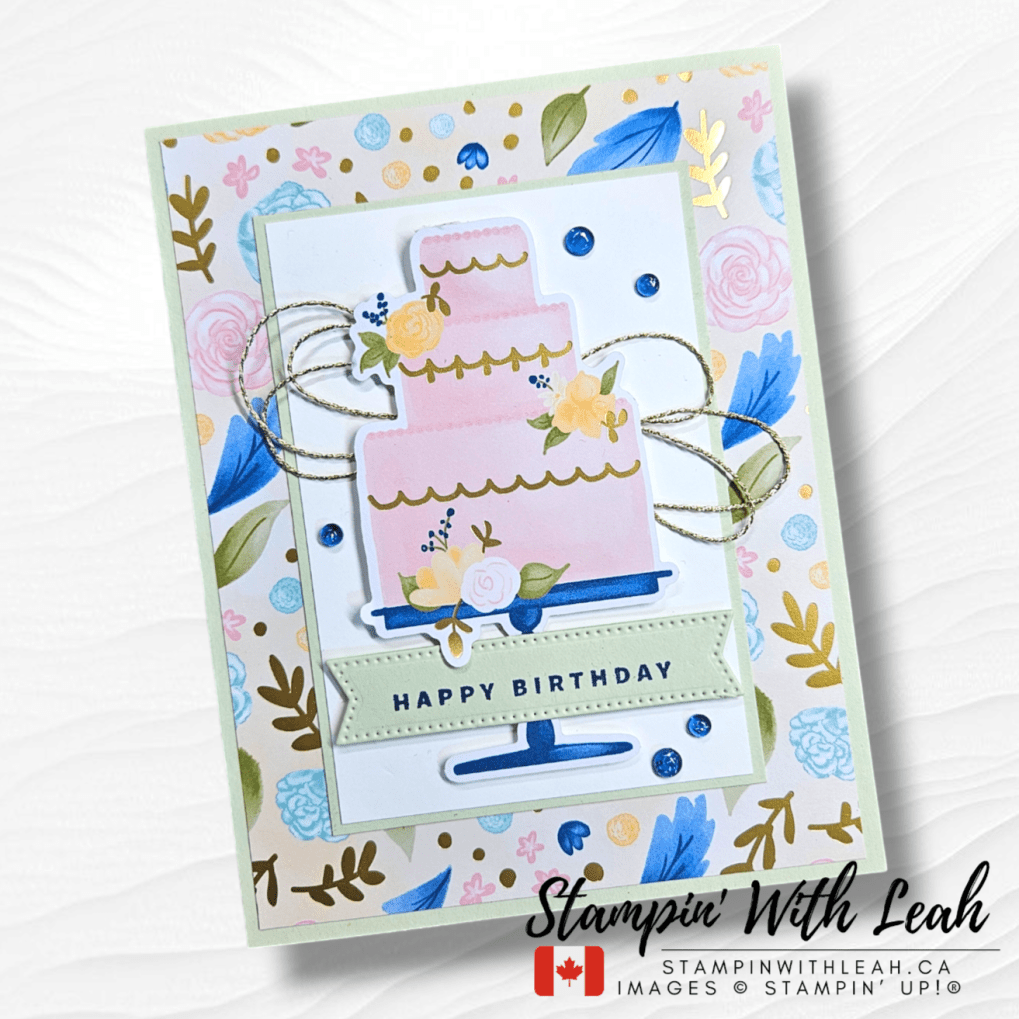
For this card, I used the stunning Wildflower Birthday Designer Series Paper (DSP) by Stampin’ Up! This paper’s delicate floral designs and gold accents perfectly complemented the inspiration’s celebratory feel. The birthday cake die-cut is the star of the show, layered over coordinating patterns and adorned with Gold Twisted Threadfor an elegant touch. To finish, I added a few Tinsel Gems for a hint of sparkle.
Card Details:
Embellishments: Gold Twisted Thread and blue Tinsel Gems enhance the design with subtle texture and shine.
Designer Series Paper: The Wildflower Birthday DSP adds a fresh and cheerful background with its floral motifs and gold foiling.
Focal Point: The layered birthday cake die-cut (from the Wildflower Birthday DSP) is both elegant and playful, matching the inspiration perfectly.
Join the Inspiration Challenge!
Feeling inspired? Join the fun by participating in the Hand Stamped Sentiments Inspiration Challenge #456. Visit the Hand Stamped Sentiments blog to see more fabulous projects from the design team and participants. I’d love to see what you create!
Don’t Miss Out on Sale-A-Bration!
It’s the perfect time to stock up on your favorite crafting supplies during Sale-A-Bration. For every $75 CAD you spend, you’ll earn free rewards, like exclusive DSP and stamps! Don’t wait—Sale-A-Bration only runs until February 28th. Shop now and start earning those rewards!
Special Offers and Upcoming Events
When you use my host code (NSTY47WP) this month, I’ll send you a link to an exclusive 30+Project Tutorial Bundle as a thank-you!
February Card Class
Looking for more crafting fun? Join my February Card Classto learn new techniques and create beautiful projects. Spots are limited, so reserve yours today! Click here for more details.
Looking for more ways to enjoy stamping? Join my Stampin’ Up! Ink Pad Pals team!
Save 20%+ on your orders.
Get free access to my monthly card class tutorials.
Enjoy our monthly team meetings with stamping fun and collaboration.
During Sale-a-bration there are even more perks to joining.
Option 1 – Join our crafting community as a new demonstrator and you can get $165 CAD worth of products PLUS a choice of two Stampin’ Write Marker Assortments AND the Handmade Designs Cling Stamp Set, an exclusive stamp set designed to work with the markers. That’s a $294 CAD value all for just $135 CAD!
Option 2 – Join Stampin’ Up! during Sale-A-Bration and get $165 CAD worth of product PLUS an additional $41 CAD worth of product of your choice when you join for $135 CAD. That’s a $206 CAD value!
Contact me to find out more or see the details on my website.
Live in Canada and don’t have a demonstrator? Contact me to get a catalog and find out why now is the perfect time to join my team!
Leave a comment below and don’t forget to subscribe to this blog for more crafty inspiration!
Happy crafting, and I can’t wait to see your creations! 💕
Click here to shop my online store. Click here to access & view the current catalogs. Click here to subscribe to those fun Paper Pumpkin kits of creativity! Click here for more information about joining my Online Monthly Technique Club. Earn even more goodies by joining a club! Click here to learn more about joining my Ink Pad Pals Team. Get the MOST rewards including a discount on future products! Follow me on social media! I share regularly on Pinterest, YouTube, and Facebook! Please subscribe to my newsletter, too!Click here and enter your email. When you include your birthday you will even be added to my birthday card mailing list 🙂
Hello, stamping friends! I’m excited to welcome you to another Coast to Coast Creators Blog Hop! This monthly hop is a creative celebration, consistently held on the 14th of each month, where talented crafter friends showcase their unique takes on a shared theme. This month’s theme? An optional sketch challenge and Sale-a-bration 2025!
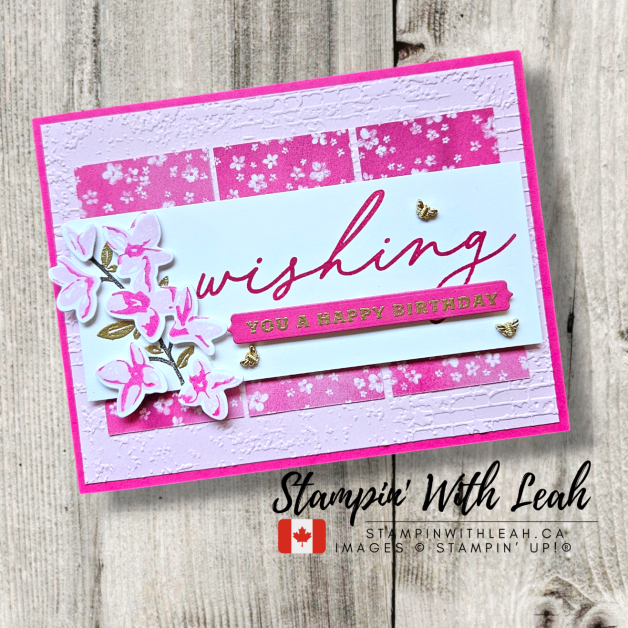
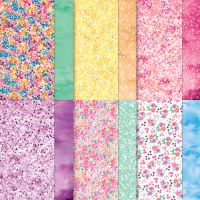
If you’re new here, welcome! I’m Leah from Stampin’ With Leah, and today I’m thrilled to share not one, but four cards I created using the FREE Bloom Impressions 12×12 Designer Series Paper from Stampin’ Up!’s Sale-a-Bration promotion. Let’s dive into the details of this colorful collection and see how a simple sketch can spark endless creativity!
Sale-a-Bration Highlights
Did you know that during Stampin’ Up!’s Sale-a-Bration, you can earn FREE exclusive products with qualifying purchases? Here in Canada, you’ll get to choose items like the Bloom Impressions DSP with every $75 CAD spent, or even higher-tier rewards with $150 CAD purchases. It’s the perfect time to stock up on your crafting essentials while adding these gorgeous goodies to your collection!
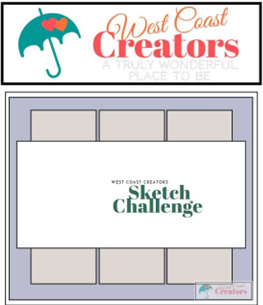
The Sketch
This month’s sketch challenge is all about bold panels and balanced layers. It provided the perfect framework to let the vibrant patterns of the Bloom Impressions DSP shine. Whether you love soft pastels or bold, bright tones, this paper pack has something for everyone. Let’s take a closer look at my interpretations of the sketch.
The Cards: Delightful Wishes Birthday Cards
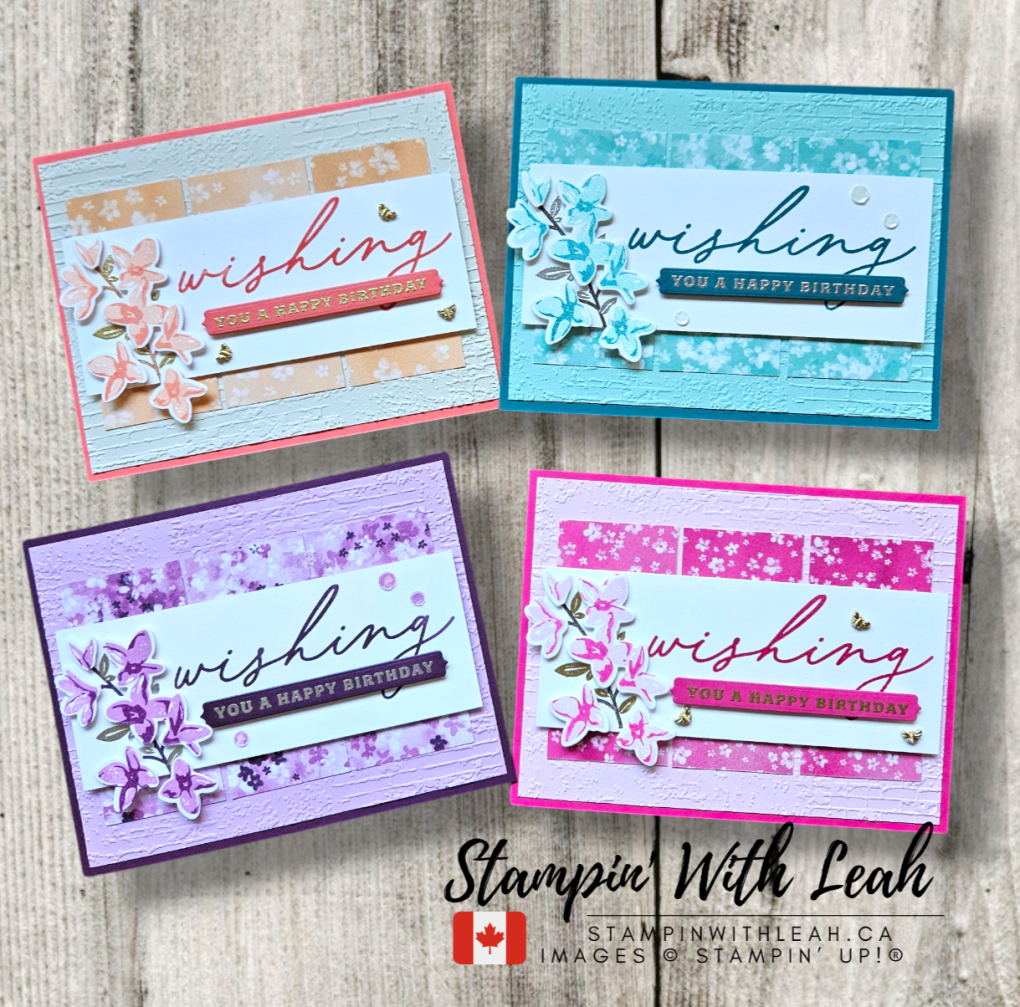
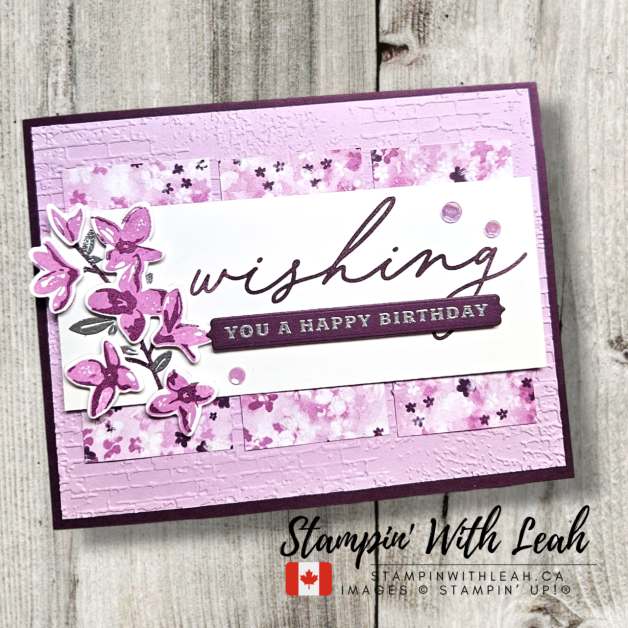
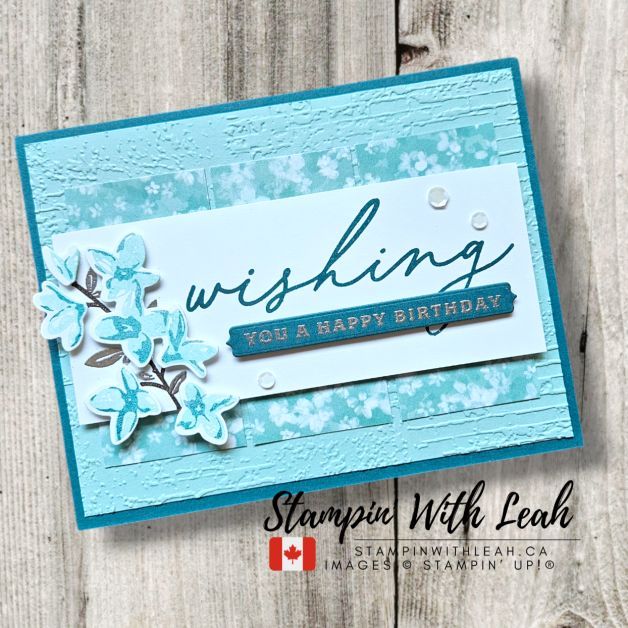
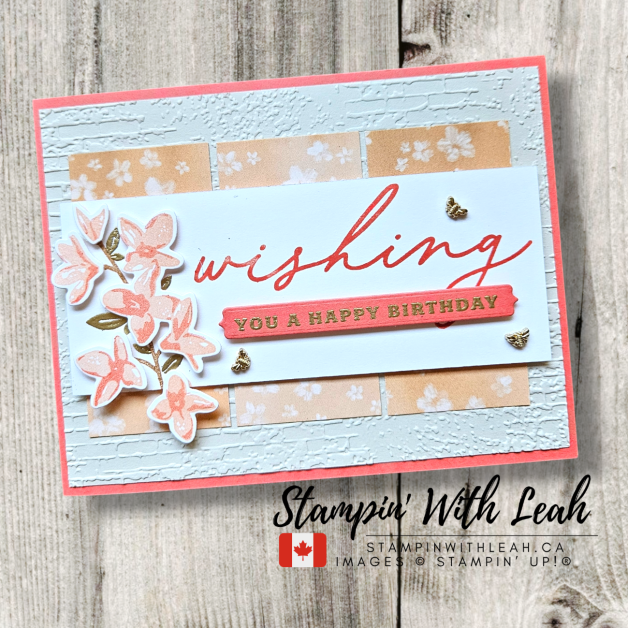
For this set, I focused on creating four distinct yet cohesive cards by pairing different patterns from the Bloom Impressions DSP with complementary cardstock and embellishments. Here’s how I brought the sketch to life:
Materials:
Cardstock: Basic White, coordinating colors (e.g.,Calypso Coral, Basic Beige, Pretty Peacock, Pool Party, Blackberry Bliss, Fresh Freesia, Melon Mambo and Bubble Bath)
DSP: Bloom Impressions 12×12 DSP (FREE with Sale-a-Bration!)
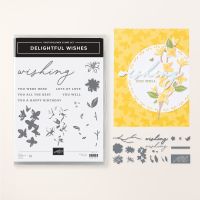
Stamps and Dies: Sentiment and floral images from the Delightful Wishes Bundle
Adhesive: Mini Stampin’ Dimensionals and Multipurpose Liquid Glue
Instructions:
Background Layers: Emboss coordinating cardstock (4″ X 5-1/4″) using the Exposed Brick 3D Embossing Folder for texture. Trim the Bloom Impressions DSP into 1-1/2″ X 3″ panels and adhere them to the embossed layer.
Sentiment: Stamp the “Wishing” sentiment in coordinating ink on a 2″ X 5″ piece of Basic White CS and the “You a Happy Birthday” can be heat embossed and die-cut on a coordinating CS. Layer the sentiment across the DSP panels, add the smaller sentiment using Dimensionals for added depth.
Floral Details: Stamp and die-cut floral images from the Delightful Wishes Bundle in complementary colors to coordinate with the patterned paper. Stamp the stem in a dark colour and emboss the leaves with metallics. Arrange the flowers around the stem and sentiment, attached with Dimensionals.
Finishing Touches: Mount the card fronts onto 4-1/4″ X 11″, scored at 5-1/2″ card bases and add embellishments as desired for balance and interest.
Tips for Success
Use Coordinating Colors: Let the DSP inspire your color palette for a cohesive look.
Layer with Dimension: Using Dimensionals adds depth and makes your elements pop.
Add Texture: Embossed backgrounds add subtle interest without overwhelming the design.
Explore More Creations
The creativity doesn’t stop here! Be sure to check out the other talented creators in this month’s Coast to Coast Blog Hop. Each project is a unique interpretation of the sketch, and you’re sure to walk away brimming with inspiration. Click the links below to hop along:
Shop and Earn Free Products!
Ready to dive into Sale-a-Bration and earn the beautiful Bloom Impressions DSP for free? Head over to my online store to shop your favorite Stampin’ Up! products. With every $75 CAD purchase, you’ll unlock exclusive rewards to enhance your crafting collection.
Let’s Get Inspired!
I hope these cards inspire you to try this month’s sketch challenge and explore the possibilities with the Bloom Impressions DSP. Don’t forget to share your creations—I’d love to see how you interpret the sketch!
Thanks for hopping by! Be sure to subscribe to my newsletter for more crafting tips, project ideas, and updates on upcoming events.
Here is a list of supplies needed to create these card.
A perk to ordering with me in the month of January is that with any order over $75cdn, you will receive a FREE SAB item and I am emailing out an amazing 38 project Tutorial Bundle. Just use the host code below. As a member of my team you get free access to this Tutorial Bundle.
Featuring the Delightful Wishes Bundle
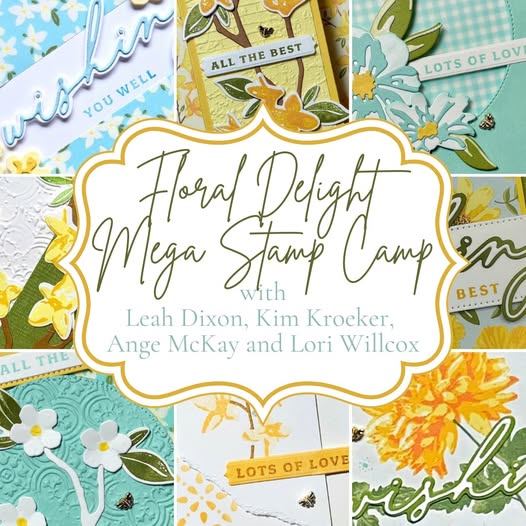
Excited about the Delightful Wishes Bundle? You’ll love its versatility in creating stunning cards for any occasion. Plus, this bundle will be a highlight in my upcoming Floral Delight Stamp Camp happening on January 25-26, 2025! During this event, you’ll have the opportunity to explore the Delightful Wishes Bundle in depth, creating even more beautiful projects.
Want more details? Click the image below to learn more and sign up for this exciting event. The original deadline has passed, but the whole event will be recorded – so you can still register – you just might not have your supplies by the event date. Spots are limited, so don’t wait! If you live outside of Canada – you can register right up to the 24th of January!
To make sure you learn about all my upcoming events and don’t miss any sales join my newsletter or check out everything at linktr.ee/stampinwithleah.
Live in Canada, don’t have a demonstrator? Contact me to get a catalogue or find out why right now is a great time to join my team.
You can see all the benefits of joining my team (the Ink Pad Pals) by clicking the image below. Right now there are even more perks to joining during Sale-a-bration!
Thanks for hopping by! Make sure to pin this post for future reference and share it with your crafty friends.
Click here to shop my online store. Click here to access & view the current catalogs. Click here to subscribe to Thanks for hopping by! Make sure to pin this post for future reference and share it with your crafty friends.those fun Paper Pumpkin kits of creativity! Click here for more information about joining my Online Monthly Technique Club. Earn even more goodies by joining a club! Click here to learn more about joining my Ink Pad Pals Team. Get the MOST rewards including a discount on future products! Follow me on social media! I share regularly on Pinterest, YouTube, and Facebook! Please subscribe to my newsletter, too!Click here and enter your email. When you include your birthday you will even be added to my birthday card mailing list 🙂
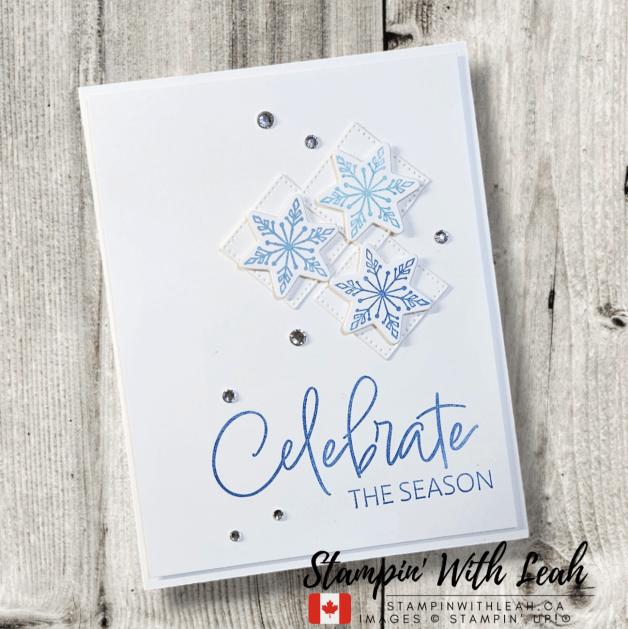
Hello, stamping friends! I’m thrilled to join you for another exciting Coast to Coast Creators Blog Hop. This hop consistently takes place on the 14th of every month, making it a regular date for creativity and inspiration. This month, the theme is all about a sketch challenge that inspires us to think outside the box and create something uniquely our own.
If you’re new here, welcome to Stampin With Leah! I’m Leah, an avid Stampin’ Up! demonstrator passionate about bringing creativity and inspiration to your crafting journey. Let’s jump into the details of this month’s project and explore how you can interpret a sketch to design stunning cards.
Working with the Sketch
Sketch challenges are a fantastic way to kickstart your creativity. They provide a layout framework while allowing endless customization to suit your style. For this hop, I used the provided sketch to guide my design process, blending clean lines, subtle colors, and a touch of sparkle to bring the layout to life.
Here’s how I brought the design to life:
Materials:
Cardstock: Basic White and Thick Basic White
Ink Pads: Balmy Blue, Blueberry Bushel, Boho Blue
Stamps and Dies: Snowflake image, sentiment, and dies from the Iconic Imagery Bundle
Stylish Shapes Dies: Smallest square for stitched diamonds
Adhesive: Stampin’ Dimensionals and Multipurpose Liquid Glue
Embellishments: Rhinestone Basic Jewels
Instructions:
Base Layer: Start with an A2 card base (5-1/2” x 8-1/2”, scored at 4-1/4”) in Thick Basic White and a 4″ x 5-1/4″ layer to create on.
Focal Elements: Die-cut three stitched diamond shapes from Basic White cardstock using the smallest square die from the Stylish Shapes Dies. Stamp snowflake designs one in Balmy Blue, one in Blueberry Bushel, and one in Boho Blue. Die cut the images and attach to the squares using Dimensionals for added depth. Arrange the diamonds in a cluster at the center of the 4″ X 5-1/4″ Basic White layer, adhering with Liquid Glue.
Sentiment: Stamp the “Celebrate the Season” sentiment in Blueberry Bushel directly onto the card front, slightly offset below the snowflake cluster to follow the sketch’s layout. Once all the stamping is done, use Dimensionals to adhere the layer tot he card base.
Finishing Touches: Add Rhinestone Basic Jewels around the snowflakes and sentiment for a touch of sparkle and elegance.
Tips for Success
Keep It Clean: A clean design lets the sketch shine while emphasizing the stamped details.
Play with Placement: Arrange your elements to create balance and harmony within the sketch framework.
Add Subtle Sparkle: Rhinestones are perfect for adding a festive touch without overpowering the design.
Explore More Creations
Don’t stop here! Be sure to check out the other talented creators participating in the Coast to Coast Blog Hop. Each crafter has put their own spin on this month’s sketch, and you’re bound to find endless inspiration.
Join the Fun!
I hope this project inspires you to take on a sketch challenge and create something beautiful. Leave a comment below to share how you’re using sketches to inspire your crafting—I’d love to see your creations!
And don’t forget to subscribe to my newsletter for the latest updates on classes, promotions, and exclusive tutorials.
Here is a full list of supplies needed to create this card.
A perk to ordering with me in the month of December is that with any order over $65cdn, I am emailing out an amazing 29 project Tutorial Bundle. Just use the host code below. As a member of my team you get free access to this Tutorial Bundle.
To make sure you learn about all my upcoming events and don’t miss any sales join my newsletter or check out everything at linktr.ee/stampinwithleah.
Live in Canada, don’t have a demonstrator? Contact me to get a catalogue or find out why right now is a great time to join my team.
You can see all the benefits of joining my team (the Ink Pad Pals) by clicking the image below.
Thanks for hopping by! Make sure to pin this post for future reference and share it with your crafty friends.
Click here to shop my online store. Click here to access & view the current catalogs. Click here to subscribe to Thanks for hopping by! Make sure to pin this post for future reference and share it with your crafty friends.those fun Paper Pumpkin kits of creativity! Click here for more information about joining my Online Monthly Technique Club. Earn even more goodies by joining a club! Click here to learn more about joining my Ink Pad Pals Team. Get the MOST rewards including a discount on future products! Follow me on social media! I share regularly on Pinterest, YouTube, and Facebook! Please subscribe to my newsletter, too!Click here and enter your email. When you include your birthday you will even be added to my birthday card mailing list 🙂



![Secret Sea 8 1/2" X 11" Cardstock [ 165624 ]](https://assets1.tamsnetwork.com/images/EC042017NF/165624s.jpg "Secret Sea 8 1/2\" X 11\" Cardstock [ 165624 ]")
![Basic White 8 1/2" X 11" Cardstock [ 166780 ]](https://assets1.tamsnetwork.com/images/EC042017NF/166780s.jpg "Basic White 8 1/2\" X 11\" Cardstock [ 166780 ]")
![Berry Burst 8-1/2" X 11" Cardstock [ 144243 ]](https://assets1.tamsnetwork.com/images/EC042017NF/144243s.jpg "Berry Burst 8-1/2\" X 11\" Cardstock [ 144243 ]")
![Timid Tiger 8 1/2" X 11" Cardstock [ 165626 ]](https://assets1.tamsnetwork.com/images/EC042017NF/165626s.jpg "Timid Tiger 8 1/2\" X 11\" Cardstock [ 165626 ]")
![Darling Duckling 8 1/2" X 11" Cardstock [ 165622 ]](https://assets1.tamsnetwork.com/images/EC042017NF/165622s.jpg "Darling Duckling 8 1/2\" X 11\" Cardstock [ 165622 ]")
![Strawberry Slush 8 1/2" X 11" Cardstock [ 165625 ]](https://assets1.tamsnetwork.com/images/EC042017NF/165625s.jpg "Strawberry Slush 8 1/2\" X 11\" Cardstock [ 165625 ]")
![Florals In Bloom 12" X 12" (30.5 X 30.5 Cm) Designer Series Paper [ 165175 ]](https://assets1.tamsnetwork.com/images/EC042017NF/165175s.jpg "Florals In Bloom 12\" X 12\" (30.5 X 30.5 Cm) Designer Series Paper [ 165175 ]")
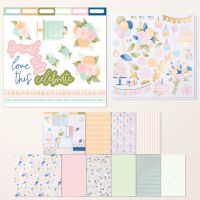
![Boho Vibes Suite Collection (English) [ 165156 ]](https://assets1.tamsnetwork.com/images/EC042017NF/165156s.jpg "Boho Vibes Suite Collection (English) [ 165156 ]")
![Secret Sea Classic Stampin' Pad [ 165285 ]](https://assets1.tamsnetwork.com/images/EC042017NF/165285s.jpg "Secret Sea Classic Stampin' Pad [ 165285 ]")
![Adhesive Sheets [ 152334 ]](https://assets1.tamsnetwork.com/images/EC042017NF/152334s.jpg "Adhesive Sheets [ 152334 ]")
![Multipurpose Liquid Glue [ 110755 ]](https://assets1.tamsnetwork.com/images/EC042017NF/110755s.jpg "Multipurpose Liquid Glue [ 110755 ]")
![Stampin' Dimensionals [ 104430 ]](https://assets1.tamsnetwork.com/images/EC042017NF/104430s.jpg "Stampin' Dimensionals [ 104430 ]")
![Everyday Arches Dies [ 164629 ]](https://assets1.tamsnetwork.com/images/EC042017NF/164629s.jpg "Everyday Arches Dies [ 164629 ]")
![Stampin' Cut & Emboss Machine [ 149653 ]](https://assets1.tamsnetwork.com/images/EC042017NF/149653s.jpg "Stampin' Cut & Emboss Machine [ 149653 ]")
![Basic White Medium Envelopes [ 159236 ]](https://assets1.tamsnetwork.com/images/EC042017NF/159236s.jpg "Basic White Medium Envelopes [ 159236 ]")







![2025–2027 In Color™ 8 1/2" X 11" Cardstock [ 165623 ]](https://assets1.tamsnetwork.com/images/EC042017NF/165623s.jpg "2025–2027 In Color™ 8 1/2\" X 11\" Cardstock [ 165623 ]")
![Textured Notes Bundle (English) [ 165556 ]](https://assets1.tamsnetwork.com/images/EC042017NF/165556s.jpg "Textured Notes Bundle (English) [ 165556 ]")
![Heartfelt Hexagon Punch [ 162888 ]](https://assets1.tamsnetwork.com/images/EC042017NF/162888s.jpg "Heartfelt Hexagon Punch [ 162888 ]")
![Gold Striped 3/8" (1 Cm) Mesh Ribbon [ 165599 ]](https://assets1.tamsnetwork.com/images/EC042017NF/165599s.jpg "Gold Striped 3/8\" (1 Cm) Mesh Ribbon [ 165599 ]")
![2025–2027 In Color™ Flat Pearls [ 165192 ]](https://assets1.tamsnetwork.com/images/EC042017NF/165192s.jpg "2025–2027 In Color™ Flat Pearls [ 165192 ]")
![Strawberry Slush Classic Stampin' Pad [ 165286 ]](https://assets1.tamsnetwork.com/images/EC042017NF/165286s.jpg "Strawberry Slush Classic Stampin' Pad [ 165286 ]")
![Timid Tiger Classic Stampin' Pad [ 165278 ]](https://assets1.tamsnetwork.com/images/EC042017NF/165278s.jpg "Timid Tiger Classic Stampin' Pad [ 165278 ]")
![Darling Duckling Classic Stampin' Pad [ 165277 ]](https://assets1.tamsnetwork.com/images/EC042017NF/165277s.jpg "Darling Duckling Classic Stampin' Pad [ 165277 ]")
![2025–2027 In Color™ Stampin' Write Markers [ 165292 ]](https://assets1.tamsnetwork.com/images/EC042017NF/165292s.jpg "2025–2027 In Color™ Stampin' Write Markers [ 165292 ]")
![Versamark Pad [ 102283 ]](https://assets1.tamsnetwork.com/images/EC042017NF/102283s.jpg "Versamark Pad [ 102283 ]")
![Heat Tool (Us And Canada) [ 129053 ]](https://assets1.tamsnetwork.com/images/EC042017NF/129053s.jpg "Heat Tool (Us And Canada) [ 129053 ]")
![Embossing Additions Tool Kit [ 159971 ]](https://assets1.tamsnetwork.com/images/EC042017NF/159971s.jpg "Embossing Additions Tool Kit [ 159971 ]")
![Basics Wow! Embossing Powder [ 165679 ]](https://assets1.tamsnetwork.com/images/EC042017NF/165679s.jpg "Basics Wow! Embossing Powder [ 165679 ]")