Merry & Bright for HSS Color Challenge #475

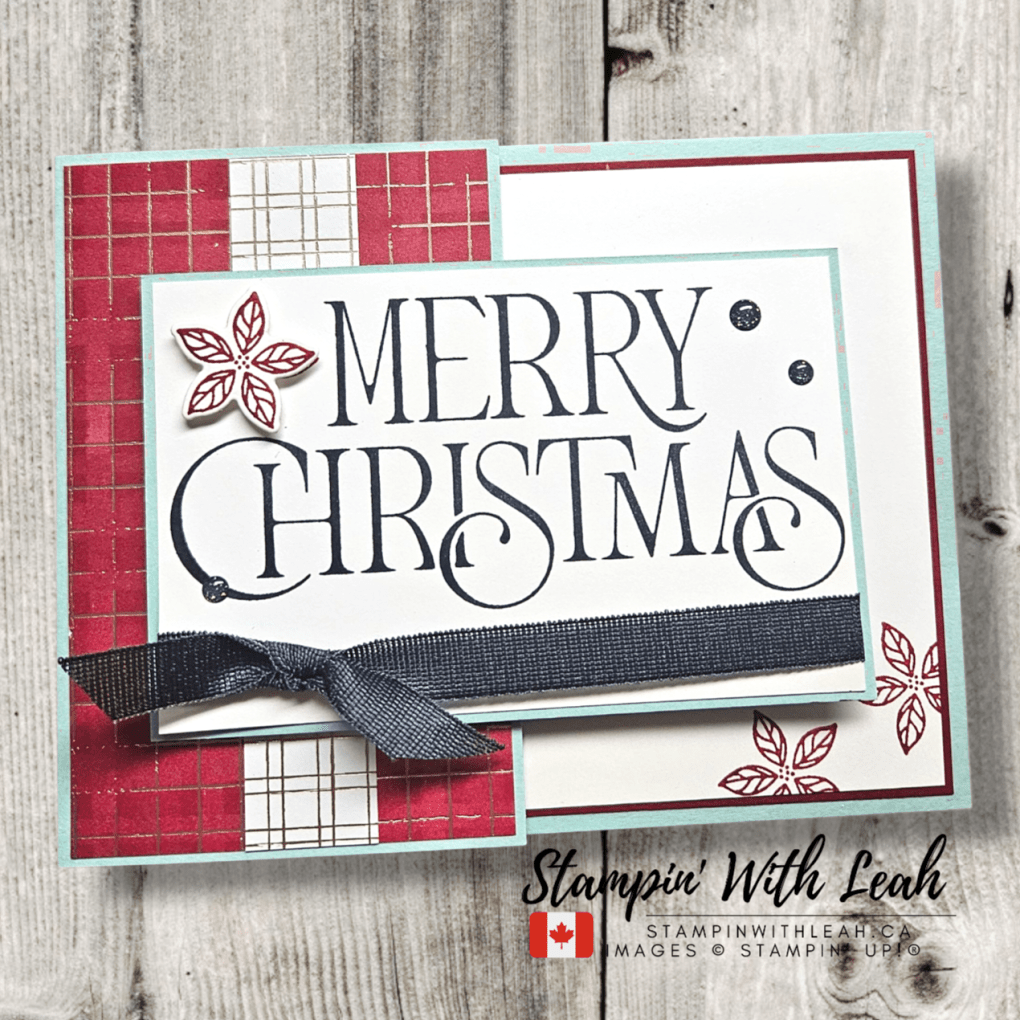
This week’s Hand Stamped Sentiments Colour Challenge is a gorgeous one — featuring Cherry Cobbler, Secret Sea, and Pool Party. These colours come together beautifully for a rich, festive look that’s perfect for holiday cardmaking.

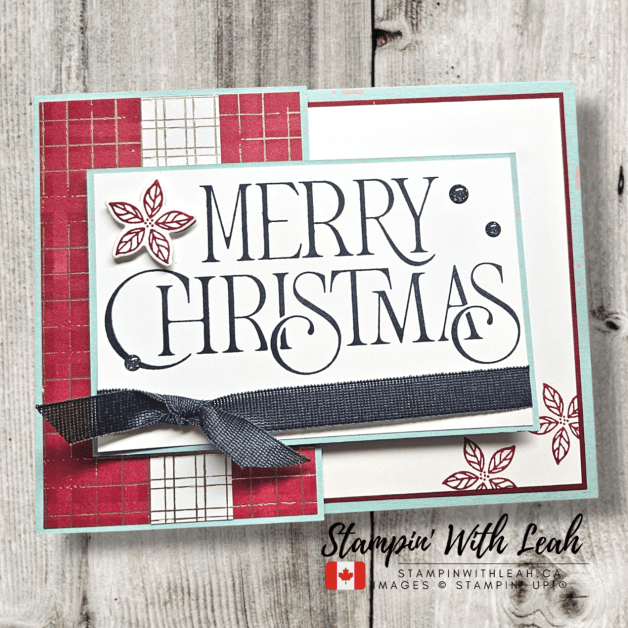
For my project, I pulled out the Merry Christmas stamp set — I just love that elegant, bold font! I paired it with the sweet poinsettia image from the Jolly Holly stamp set for a touch of classic Christmas charm.

The background layers showcase the Regal Distressed Designer Series Paper — that subtle pattern adds just the right amount of texture and warmth. To finish off the design, I tied on some Secret Sea ribbon for a soft pop of colour and shimmer.

A few stamped poinsettias and low profile sparkle dots complete the look for a simple yet stunning holiday greeting card.

If you haven’t yet, hop over to the Hand Stamped Sentiments Challenge Blog to see the rest of the design team’s creations — and play along with us this week!

Here’s a full list of supplies used as well as a printable card recipe.

Product List

This cheerful card is perfect for holiday giving—and so much fun to create!

Want to Stamp With Me?

Join my November Card Class to learn new techniques and create beautiful projects. Spots are limited, so reserve yours today!


Looking for even more inspiration and more ways to enjoy stamping? Join my Stampin’ Up! Ink Pad Pals team!

  • Save 20%+ on your orders.
  • Get free access to my monthly card class tutorials.
  • Enjoy our monthly team meetings with stamping fun and collaboration.

Right now we also have 2 great starter kits deals to choose from! This is too good to pass up.

Contact me to find out more or see the details on my website.


GDP518 Sketch Challenge – Nests of Winter & Misty Moonlight Magic

There’s something so elegant about a cool winter palette, and today’s card for the Global Design Project #518 Sketch Challenge captures that perfectly! I paired the Nests of Winter Designer Series Paper with Misty Moonlight, silver-edged ribbon, and rhinestones for a frosty, festive feel.

The sentiment from Jolly Holly was stamped in Misty Moonlight and layered on a Spotlight on Nature circle for the perfect focal point. This simple but striking design really lets the patterned paper and soft shimmer take center stage.

If you’d like to recreate this look, here’s a full list of supplies used as well as a printable card recipe.


I love how the sketch challenge layout gave me the perfect framework to build a clean and elegant holiday card that’s quick to assemble but still full of detail.

👉 Check out all the amazing inspiration from the Global Design Project #518 Challenge here and try the sketch yourself!

💙 Tip: If you love this colour combo, stock up on Misty Moonlight cardstock and ink before the holidays—they’re perfect for winter crafting projects.

Want to Stamp With Me?

Join my October Card Class to learn new techniques and create beautiful projects. Spots are limited, so reserve yours today!

Don’t live nearby? You can find many PDF Tutorials in my shop:
👉 https://payhip.com/StampinWithLeahCardCardClassestoGo

Looking for even more inspiration and more ways to enjoy stamping? Join my Stampin’ Up! Ink Pad Pals team!

There are two great ways to join right now and so many reasons to be a part of my Ink Pad Pals team!

  • Save 20%+ on your orders.
  • Get free access to my monthly card class tutorials.
  • Enjoy our monthly team meetings with stamping fun and collaboration.

Contact me to find out more or see the details on my website.


Festive Friday – Modern Christmas Elegance

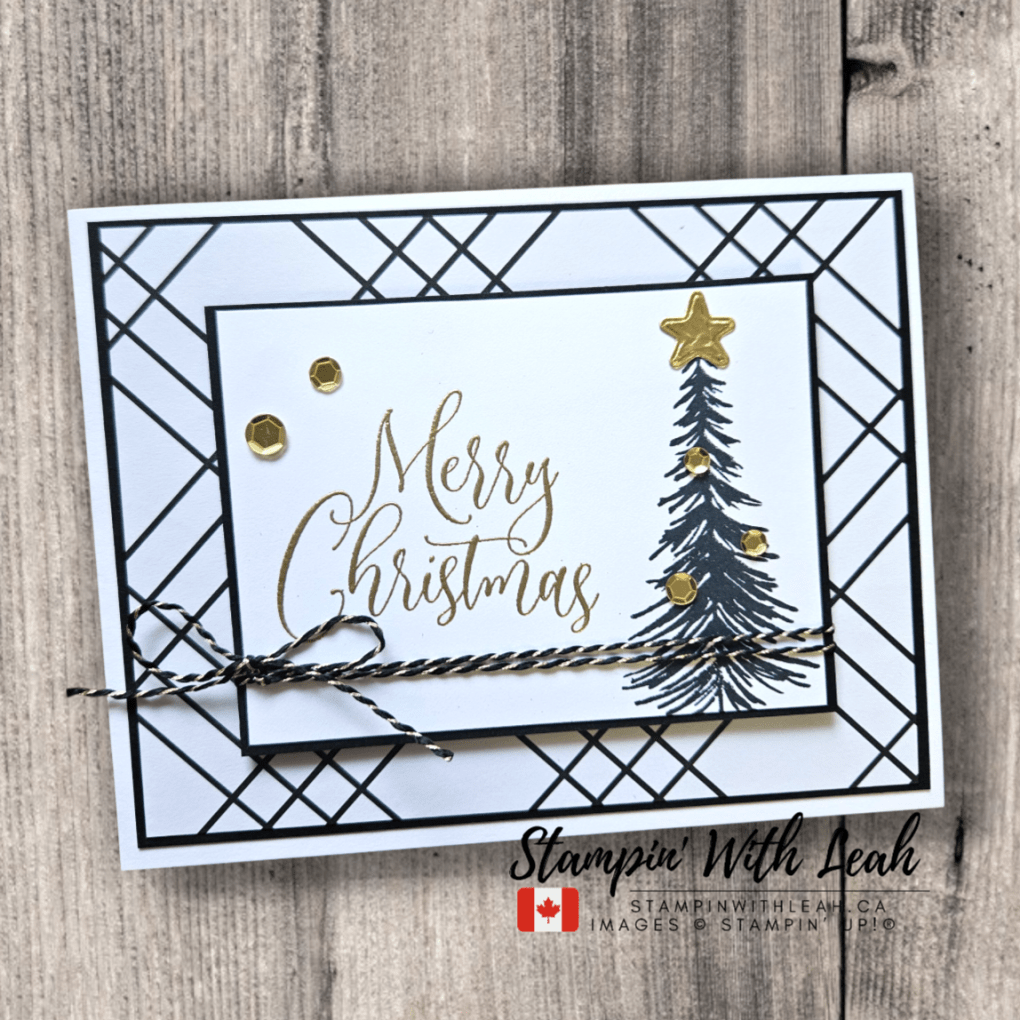
It’s time for another Festive Friday inspiration! Today’s card showcases the Modern Christmas Bundle—a gorgeous set that captures the beauty of minimal design and festive sparkle.

I started with a clean black-and-white palette, adding a crisp geometric background to make the gold sentiment and tree details truly shine. A few gold sequins and metallic twine finish the look with a hint of glam.

This card is a perfect example of how less can be more! If you love elegant holiday cards that are quick to make but still make a statement, this bundle is a must-have.

🛒 Want to recreate this card?
Head to my online store or contact me today to grab your supplies.

✨ Stampin’ Up! Supplies Used:

  • Modern Christmas Bundle
  • Gold Foil and Loose Gold Sequins
  • Basic White & Basic Black Cardstock
  • Black and Gold Twine

👉 Try this look for your next round of Christmas cards and let your creativity sparkle!

📦 Want to create more with me?

Check out this months Card Class To Go

You can also find me in person ( In Port Coquitlam, BC)

Looking for even more ways to enjoy stamping? Join my Stampin’ Up! Ink Pad Pals team! There are two fabulous starte r kit deals right now!

  • Save 20%+ on your orders.
  • Get free access to my monthly card class tutorials.
  • Enjoy our monthly team meetings with stamping fun and collaboration.

Contact me to find out more or see the details on my website.

❤️ Thanks for crafting with me!
Be sure to subscribe so you never miss a Festive Friday!

Click here to shop my online store.
Click here to access & view the current catalogs.
Click here to subscribe to those fun Paper Pumpkin kits of creativity!
Click here for more information about joining my Online Monthly Technique Club. Earn even more goodies by joining a club!
Click here to learn more about joining my Ink Pad Pals Team. Get the MOST rewards including a discount on future products!
Follow me on social media! I share regularly on Pinterest, YouTube, and Facebook!
Please subscribe to my newsletter, too! Click here and enter your email. When you include your birthday you will even be added to my birthday card mailing list 🙂


HSS Sketch Challenge – Gingerbreadman Bundle

I’m so excited to share my project for this week’s Hand Stamped Sentiments Sketch Challenge #473. For this card, I featured the Gingerbreadman Bundle from Stampin’ Up! to create a whimsical holiday design.

This card is full of sweet details:

  • A gingerbreadman, heat embossed in white on Pecan Pie cardstock.
  • A bold red banner stamped with “Season’s Eatings”.
  • Bright, cheerful die cut gumdrops.
  • Candy stripes from the Turtle-y Cute DSP for extra festive fun.

This project combines playful colors with holiday cheer and is a perfect way to spread smiles this season!

Here’s a full list of supplies used as well as a printable card recipe.


This cheerful card is perfect for holiday giving—and so much fun to create!

Want to Stamp With Me?

Join my October Card Class to learn new techniques and create beautiful projects. Spots are limited, so reserve yours today!

Looking for even more inspiration and more ways to enjoy stamping? Join my Stampin’ Up! Ink Pad Pals team!

  • Save 20%+ on your orders.
  • Get free access to my monthly card class tutorials.
  • Enjoy our monthly team meetings with stamping fun and collaboration.

Contact me to find out more or see the details on my website.


Modern Christmas Suite – Wishing You Peace & Joy

I had so much fun creating this beautiful Christmas card during my Live today! The Modern Christmas Suite is full of timeless holiday images and coordinating dies, making it perfect for elegant cards like this one. Pairing gold with black and white creates a bold, festive look that really shines.

Here’s how you can make this card yourself:

  • Start with a Thick Basic White card base (5-1/2″ X 8-1/2″, scored at 4-1/4″).
  • Adhere the Modern Christmas DSP (tree pattern – 4″ X 5-1/4″) to the card front.
  • Die cut the 4th largest Everyday Arch in both Basic Black cardstock and the 5th largest in Basic White cardstock. Layer the two so the black peeks out slightly behind the white for dimension. Adhere to the cardfront.
  • Fussy cut the three ornament images from the DSP and adhere to the arch using Dimensionals.
  • Stamp the sentiment “Wishing You Peace & Joy” in Versamark and heat emboss with gold on a Basic White strip.
  • Make a large bow from the black-and-gold twine and attach to the back of the sentiment strip.
  • Adhere the sentiment strip and bow across the bottom of the arch with Dimensionals.
  • Add gold sequins for a finishing touch.

Here is a full supply list ( or just scroll down to register for the stamp camp!):


Catch the replay of today’s Live where I walk you through the steps and share extra tips:

Want even more inspiration with this beautiful suite? I’m joining a group of talented demonstrators to bring you the Modern Christmas Mega Stamp Camp! You’ll receive tutorials, projects, and a whole day of creative fun.

See the details and register here – I will order your supplies asap so you can have them on time!

Looking for more ways to stamp with me?

Join my October Card Class to learn new techniques and create beautiful projects. Spots are limited, so reserve yours today!

  • Save 20%+ on your orders (including the virtual album and the suite sale items!!)
  • Get free access to my monthly card class tutorials.
  • Enjoy our monthly team meetings with stamping fun and collaboration.

Click here to shop my online store.
Click here to access & view the current catalogs.
Click here to subscribe to those fun Paper Pumpkin kits of creativity!
Click here for more information about joining my Online Monthly Technique Club. Earn even more goodies by joining a club!
Click here to learn more about joining my Ink Pad Pals Team. Get the MOST rewards including a discount on future products!
Follow me on social media! I share regularly on Pinterest, YouTube, and Facebook!
Please subscribe to my newsletter, too! Click here and enter your email. When you include your birthday you will even be added to my birthday card mailing list 🙂


Festive Friday: Ornamental Christmas Bundle

This week’s Festive Friday card features the Ornamental Christmas Bundle, part of the stunning Modern Christmas Suite coming September 3rd in the Stampin’ Up! Sept–Dec Mini Catalogue! I will be sharing details very soon about a Stamp Camp featuring this Suite, so stay tuned.

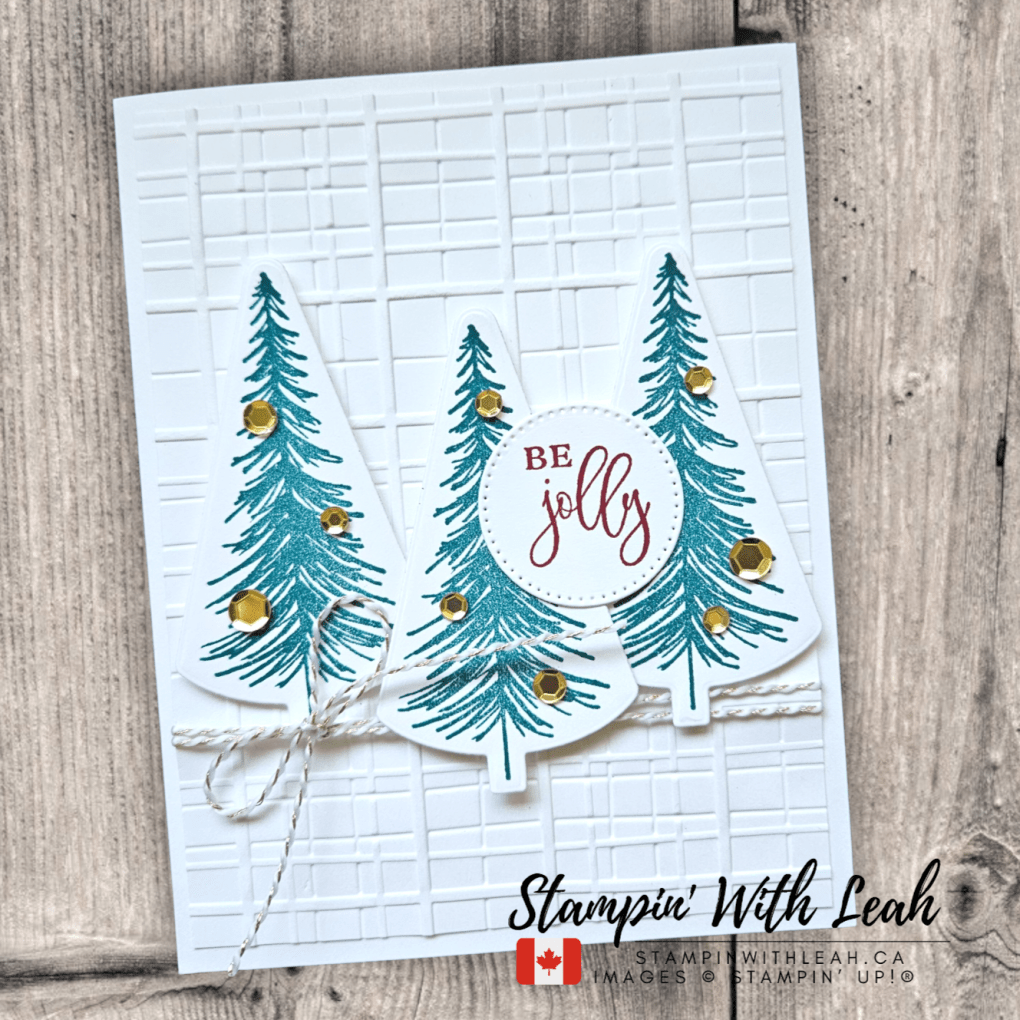
For this card, I stamped the trees in Pretty Peacock and the sentiment in Cherry Cobbler for a traditional yet modern Christmas look. The Forever Plaid embossed background adds depth, while a few sequins and a white/gold twine bow provide the perfect finishing touches.

✨ Whether you’re creating for friends, family, or holiday markets, this bundle makes it simple to craft festive cards that shine.

Shop the Modern Christmas Suite starting September 3rd! Don’t forget to check back later today for more info on my upcoming Stamp Camp featuring this suite.

🛒 Want to recreate this card?
Head to my online store on September 3rd or contact me today to become demonstrator to grab your supplies today. Pre-ordering is just one perk of being part of my team.

✂️ How to Make This Card

Supplies Used:

  • Ornamental Christmas Bundle (part of the Modern Christmas Suite)
  • Pretty Peacock & Cherry Cobbler Classic Ink
  • Basic White Cardstock
  • Forever Plaid Embossing Folder
  • Stylish Shapes Dies (circle for sentiment)
  • Loose Gold Sequins
  • White/Gold Baker’s Twine (part of the Modern Christmas Suite)

Instructions:

  1. Cut a Basic White card base (8 ½” x 5 ½”, scored at 4 ¼”).
  2. Emboss a 4” x 5 ¼” piece of Basic White cardstock using the Forever Plaid embossing folder.
  3. Wrap twine around the embossed layer and make a bow on the left. Adhere to the card base.
  4. Stamp three trees in Pretty Peacock on Basic White cardstock. Die cut using the coordinating tree dies from the Ornamental Christmas Bundle.
  5. Stamp the sentiment “Be Jolly” in Cherry Cobbler on a Basic White scrap. Die cut with a stitched circle from the Stylish Shapes Dies.
  6. Arrange and adhere the trees with dimensionals. Add the sentiment over the trees.
  7. Embellish with Gold Sequins for sparkle.

And you’re done—a quick, modern, and festive Christmas card! 🎄

📦 Want to create more with me?

Check out this weeks Card Class To Go

You can also find me in person ( In Port Coquitlam, BC)

Other great stampin opportunities are coming soon – and these ones have passed – but you can access the replays:

GET YOUR KIT HERE!

Looking for even more ways to enjoy stamping? Join my Stampin’ Up! Ink Pad Pals team!

  • Save 20%+ on your orders.
  • Get free access to my monthly card class tutorials.
  • Enjoy our monthly team meetings with stamping fun and collaboration.

Contact me to find out more or see the details on my website.

❤️ Thanks for crafting with me!
Be sure to subscribe so you never miss a Festive Friday!

Click here to shop my online store.
Click here to access & view the current catalogs.
Click here to subscribe to those fun Paper Pumpkin kits of creativity!
Click here for more information about joining my Online Monthly Technique Club. Earn even more goodies by joining a club!
Click here to learn more about joining my Ink Pad Pals Team. Get the MOST rewards including a discount on future products!
Follow me on social media! I share regularly on Pinterest, YouTube, and Facebook!
Please subscribe to my newsletter, too! Click here and enter your email. When you include your birthday you will even be added to my birthday card mailing list 🙂


Throwback Thursday: Festive Christmas Truck Card

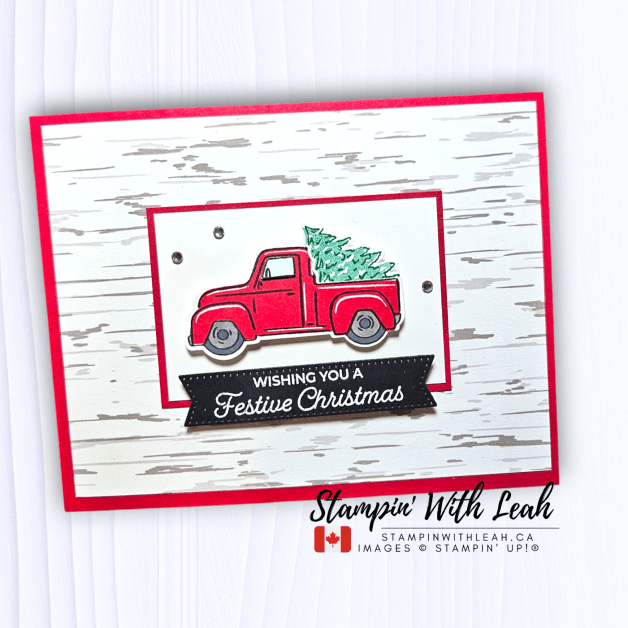
It’s time for another Throwback Thursday card idea, and this week I’m reaching for a favorite retired set—the Trucking Along stamp set and coordinating Truck Builder Punch. I couldn’t resist pairing this cheerful little truck with the current Nests of Winter 12×12 Designer Series Paper for a rustic, woodgrain background.

I finished the card with a few sparkling rhinestones, and of course, that bold red truck carrying a Christmas tree sets the perfect festive mood. This card is the kind you’ll want to recreate for holiday greetings, gift tags, or even a scrapbook layout.

✨ Why you’ll love this card:

  • Combines a beloved retired Stampin’ Up! set with current designer paper
  • Perfect DIY handmade Christmas card inspiration
  • Quick layers and a simple punch make assembly easy
  • The bright red truck adds timeless festive charm

I was inspired to pull this set out because of a new Stampin’ Up! kit coming September 3rd—it features a similar holiday vibe, and I can’t wait to share it with you! 🎄

👉 Be sure to pop back after the long weekend to see the exciting new Kits Collection, fresh Online Exclusives, and the brand-new September–December Mini Catalogue. There’s so much festive inspiration coming your way!

Before the month is over though – make sure to stock up on your favourite in-colors. The In Color Sale ends Aug 31st! Items include all the usual ink, ribbono, cardstock, but it also has kits, DSP packs and more. You’ll earn Stampin’ Rewards on your purchase too!

📹 Want more inspiration? Be sure to follow me on YouTube or Facebook for tutorials, lives, and more!

👉 Looking for other ways to stamp with me?

If you are local – join my in person card class!

Looking for even more ways to enjoy stamping? Join my Stampin’ Up! Ink Pad Pals team!

  • Save 20%+ on your orders.
  • Get free access to my monthly card class tutorials.
  • Enjoy our monthly team meetings with stamping fun and collaboration.

Contact me to find out more or see the details on my website.

Stampin’ Up! Product Update

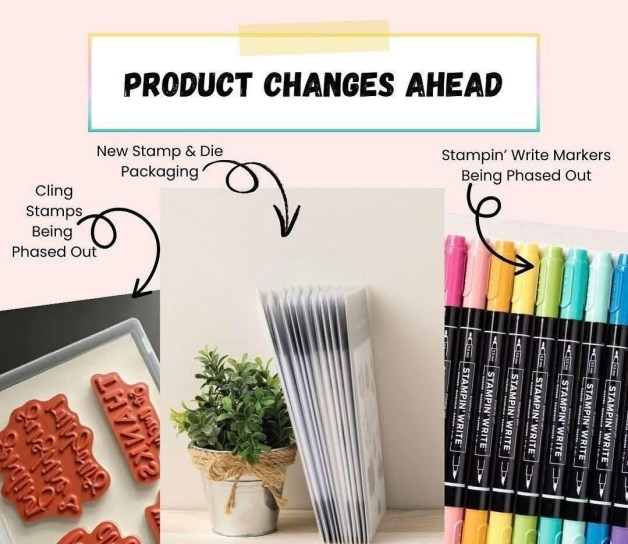
Heads-up: Stampin’ Up! is phasing out red rubber stamps and markers and introducing refreshed packaging as part of ongoing improvements. Contact me for more details.

➡️ Subscribe to my newsletter at https://mailchi.mp/f1809c680508/subscribe-to-stampin-with-leahs-newsletter


Festive Friday Sneak Peek – Modern Christmas Suite

It’s Festive Friday, and today I’m giving you an exciting sneak peek of the brand-new Modern Christmas Suite—available September 3rd in the upcoming Stampin’ Up! Online Exclusives! This suite is full of contemporary holiday flair, with Designer Series Paper, stamps and dies, and gorgeous black/gold and white/gold twine that will take your Christmas projects to the next level.

Here’s the festive card I created using this suite:

🛒 Want to recreate this card?
Head to my online store on September 3rd or contact me today to become demonstrator to grab your supplies today. Pre-ordering is just one perk of being part of my team.

Supplies:

  • Modern Christmas Suite (DSP, stamp set, dies, twine) – available Sept 3
  • Cardstock: Pretty Peacock
  • Ink: Pretty Peacock
  • Embossing Powder: Gold
  • Embellishment: Loose Gold Sequins

Instructions:

  1. Cut a Pretty Peacock card base (5-1/2″ X 8-1/2″, scored at 4-1/4″).
  2. Cut eight 1-1/4” squares of the Modern Christmas Designer Series Paper and arrange them in a grid pattern on the card front.
  3. Stamp “Merry Christmas” in Pretty Peacock ink on a Basic White square, using the suite’s coordinating white/gold twine, wrap it around the square and tie a bow.
  4. Adhere the square to the cardfront using Dimensionals.
  5. Die cut a Pretty Peacock tree, heat emboss it in gold, and adhere with Dimensionals.
  6. Add Loose Gold Sequins for extra sparkle.

This clean and modern design makes for quick and stylish Christmas cards—perfect for mass producing this holiday season!

✨ Stay tuned for details about my upcoming Stamp Camp featuring the Modern Christmas Suite—a perfect way to get your hands on this fabulous suite and create festive projects together!

📦 Want to create more with me?

Join me online next week for my Card Class To Go ( 9am Wednesday, August 27th)

You can also find me in person ( In Port Coquitlam, BC)

Other great stampin opportunities are coming soon – and these ones have passed – but you can access the replays:

GET YOUR KIT HERE!

Looking for even more ways to enjoy stamping? Join my Stampin’ Up! Ink Pad Pals team!

  • Save 20%+ on your orders.
  • Get free access to my monthly card class tutorials.
  • Enjoy our monthly team meetings with stamping fun and collaboration.

Contact me to find out more or see the details on my website.

❤️ Thanks for crafting with me!
Be sure to subscribe so you never miss a Festive Friday!

Click here to shop my online store.
Click here to access & view the current catalogs.
Click here to subscribe to those fun Paper Pumpkin kits of creativity!
Click here for more information about joining my Online Monthly Technique Club. Earn even more goodies by joining a club!
Click here to learn more about joining my Ink Pad Pals Team. Get the MOST rewards including a discount on future products!
Follow me on social media! I share regularly on Pinterest, YouTube, and Facebook!
Please subscribe to my newsletter, too! Click here and enter your email. When you include your birthday you will even be added to my birthday card mailing list 🙂


Festive Friday with Humble Home

For this week’s Festive Friday project, I’m spotlighting the Humble Home stamp set from Stampin’ Up!—a true gem on the Last Chance list. While the coordinating punch has retired, this stamp set is still an adorable must-have for creating handmade Christmas cards that radiate warmth and nostalgia.

I paired the sweet gingerbread-style house image with Regal Distressed Patterns 12″ x 12″ Designer Series Paper, letting the deep red and gold grid pattern set the stage for a cozy, festive feel. The house is stamped in Early Espresso Ink and coloured in Pecan Pie directly on a circle from the Spotlight on Nature dies.

The sentiment “Merry Christmas” was stamped beneath the image in Cherry Cobbler Ink, while “From our house to yours” is stamped directly on the Crumb Cake card base in Early Espresso Ink for an extra heartfelt touch. A scattering of gold sequins adds just the right amount of holiday sparkle.

✨ Cardmaking Tips:

  • When working with distressed patterned paper, let it peek through as part of your design—it adds texture without needing extra layers.
  • Gold sequins are a quick way to elevate a simple card without overpowering the stamped image.

This clean and classic design is perfect for mass-producing your Christmas cards—and since Humble Home is retiring soon, you’ll want to grab it before it’s gone!

🛒 Want to recreate this card?
Head to my online store to grab your supplies or click on the supplies listed below:

Product List

📦 Want to create more with me? Join my online Card Class to Go this week and receive all the pre-cut supplies and tutorials to make some beautiful coneflower cards!

You can also find me in person ( In Port Coquitlam, BC)

Other great stampin opportunities are coming soon – and these ones have passed – but you can access the replays:

GET YOUR KIT HERE!

Looking for even more ways to enjoy stamping? Join my Stampin’ Up! Ink Pad Pals team!

  • Save 20%+ on your orders.
  • Get free access to my monthly card class tutorials.
  • Enjoy our monthly team meetings with stamping fun and collaboration.

Contact me to find out more or see the details on my website.

❤️ Thanks for crafting with me!
Be sure to subscribe so you never miss a Festive Friday!

Click here to shop my online store.
Click here to access & view the current catalogs.
Click here to subscribe to those fun Paper Pumpkin kits of creativity!
Click here for more information about joining my Online Monthly Technique Club. Earn even more goodies by joining a club!
Click here to learn more about joining my Ink Pad Pals Team. Get the MOST rewards including a discount on future products!
Follow me on social media! I share regularly on Pinterest, YouTube, and Facebook!
Please subscribe to my newsletter, too! Click here and enter your email. When you include your birthday you will even be added to my birthday card mailing list 🙂


Throwback Thursday: Free as a Bird with Fresh In Colors

If you’ve been crafting with me for a while, you know Free as a Bird is one of my all-time favorite retired Stampin’ Up! stamp sets. This week, I dusted it off for Throwback Thursday and gave it a fresh twist with the 2025–2027 In Color Designer Series Paper, the 2025–2027 In Color Flat Pearls, and the crisp White ¼” Ribbon.

To bring it all together, I reached for the Spotlight on Nature Dies and created a pretty circular focal point for my sweet bluebirds. The color combo of Darling Duckling, Poppy Parade, and Pool Party comes straight from the Global Design Project #509 color challenge – and it’s perfect for a bright, happy friendship card.

Step-by-Step Instructions:

  • Cut a Basic White card base (4 ¼” x 11”, scored at 5 ½”).
  • Cut a Darling Duckling DSP layer to 4” x 5 ¼”.
  • Add a 1 ¾” x 5 ¼” strip of Pool Party cardstock across the card front. Stamp the sentiment in Memento Black.
  • Tie a piece of White ¼” Ribbon and make a bow on the right hand side. Adhere this DSP/ribbon layer to the card base.
  • Die cut a circle from Basic White using the Spotlight on Nature Dies, adhere to the card front using Dimensionals.
  • Stamp the bird image from Free as a Bird in Memento Black on Basic White and color with Pool Party, Poppy Parade, and Darling Duckling Stampin’ Blends. I also used a little bit of light Crumb cake for the branch. Fussy cut.
  • Adhere the birds to the circle with a bit of glue in the center and Mini Dimensionals on the two branch ends.
  • Finish with Darling Duckling 2025–2027 In Color Flat Pearls for a cheerful touch.

Stampin’ Tip: If you don’t have the Free as a Bird stamp set, you can substitute any branch-and-bird image for a similar look – the key is in the color palette and layout.

🛍️ Shop the Supplies:


The DSP and dots are also on sale this month!! Make sure to grab all the In Color items during this sale – you can find ALL the products on the In Color Sale Special page ( or click the image below).

Don’t forget – you’ll earn Stampin’ Rewards on your purchase too!

📹 Want more inspiration? Be sure to follow me on YouTube or Facebook for tutorials, lives, and more!

👉 Looking for other ways to stamp with me?

If you are local – join my in person card class!

Looking for even more ways to enjoy stamping? Join my Stampin’ Up! Ink Pad Pals team!

  • Save 20%+ on your orders.
  • Get free access to my monthly card class tutorials.
  • Enjoy our monthly team meetings with stamping fun and collaboration.

Contact me to find out more or see the details on my website.

See you next week for another Throwback Thursday creation!

➡️ Subscribe to my newsletter at https://mailchi.mp/f1809c680508/subscribe-to-stampin-with-leahs-newsletter