Catching Butterflies – Sale-a-bration Gift Card Holder

Sale-a-bration is the BEST time of year since you can earn FREE stamp sets and Designer Series Paper ( DSP) with every purchase of $60CAD (subtotal). This season the selection of stamps and DSP are sooo cute!

Today I created using the FREE sale-a-bration item Catching Butterflies stamp set.

Here are the dimensions of the materials I used. See the video for exactly how to cut and assemble.

Pool Party Cardstock: 5-1/2″ X 11″, score the long side at 3-3/8″ from each end. (then see video for how to cut the barn doors)

Pool Party Stitched Rectangle : 3″ X 4-3/8″

Pool Party pocket: 4″ X 3″ (die cut with basic borders clouds)

Heart & Home DSP (woodgrain): 4″ X 5-1/4″

Heart & Home DSP (green leaves): (x2) 2-3/4″ X 3-1/8″

Basic White Stitched Rectangles: (X2) 2-1/4″ X 3-5/8″

Basic White scrap to stamp girl with net

The Butterfly layer and the girl were attached to the front flap using Dimensionals. The Pool party REctangle and the sentiment layer were attached with Tear and Tape afterwards so they could be lined up to create a border aroudn the girl and butterflies.

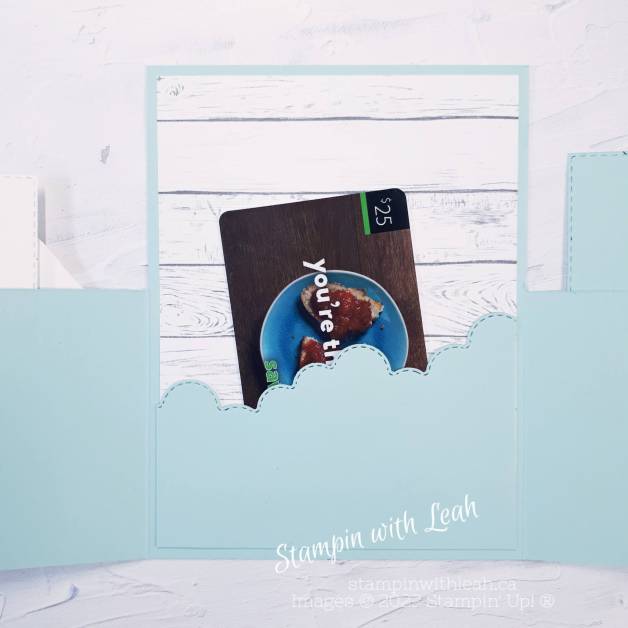
When I attached the cloud layer I used Tear and Tape around the edges only to create a pocket for a gift card.
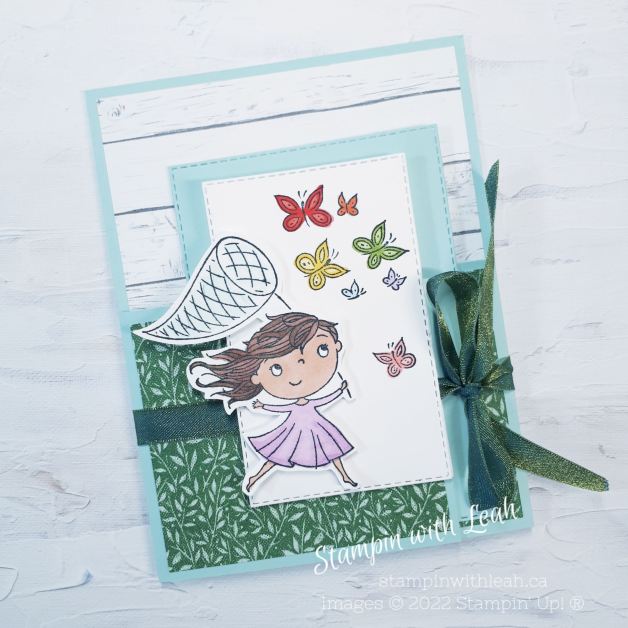
The finished card fits nicely in a regular Medium Basic White Envelope and perfectly hides the gift card inside.

To see all the details of these cards you can watch my video below.

Please leave a comment below and make sure to follow this blog for more great inspiration!


Paper Trimmer
$34.00
Paper Snips
$13.50

Right now there are so many perks to ordering. You get SAB rewards (free items for every $60 or $120 cdn you spend), AND for any order over $65cdn I am also emailing out an amazing 28 card Tutorial Bundle. Just use the host code below.

If you want to learn more about the Natural Tone Stampin’ Blends that I used to colour the hair and skin in this video contact me (leahdixon41@gmail.com) directly or add them to your starter kit when you join my team! You can even choose 2 FREE stamp sets from the Annual or Mini Catalogue as a bonus for joining during Sale-a-bration!

Click here to shop my online store.
Click here to access & view the current catalogs.
Click here to subscribe to those fun Paper Pumpkin kits of creativity!
Click here for more information about joining my Online Monthly Technique Club. Earn even more goodies by joining a club!
Click here to learn more about joining my Ink Pad Pals Team. Get the MOST rewards including a discount on future products!
Follow me on social media! I share regularly on PinterestYouTube, and Facebook!
Please subscribe to my newsletter, too! Click here and enter your email. When you include your birthday you will even be added to my birthday card mailing list 🙂


Christmas Season – Gift Card Holders

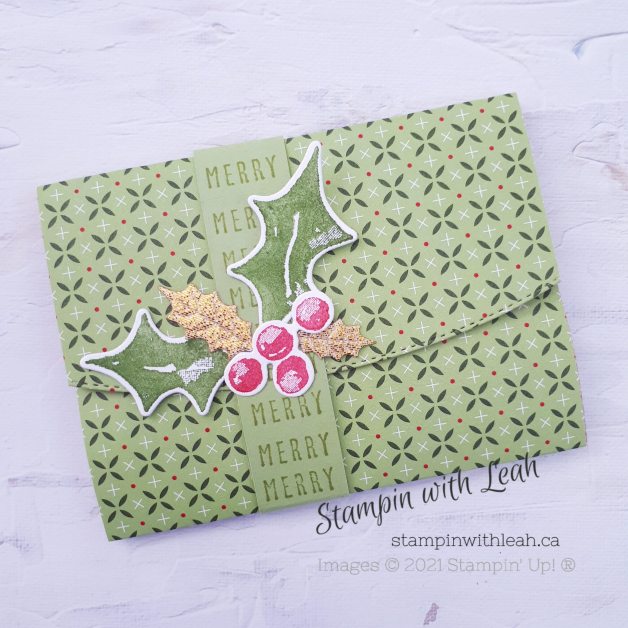
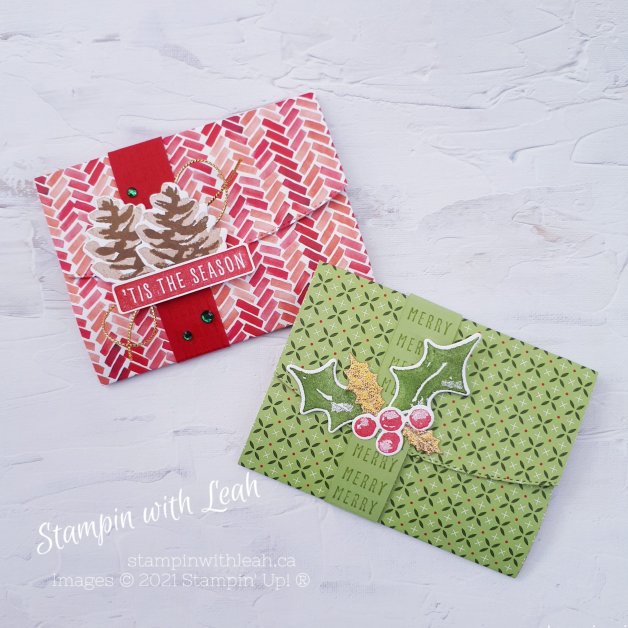
This week I am featuring different gift card holders. I love this one since it uses DSP and is so quick and easy to make.

This design can also be easily modified for any time of the year. I love these for Teacher thank you gifts and teen birthdays.

Each gift card is created using a 4″ X 11″ piece of DSP, scored at 3″, 6″, 9″. Then you round the small end to create a nice flap.

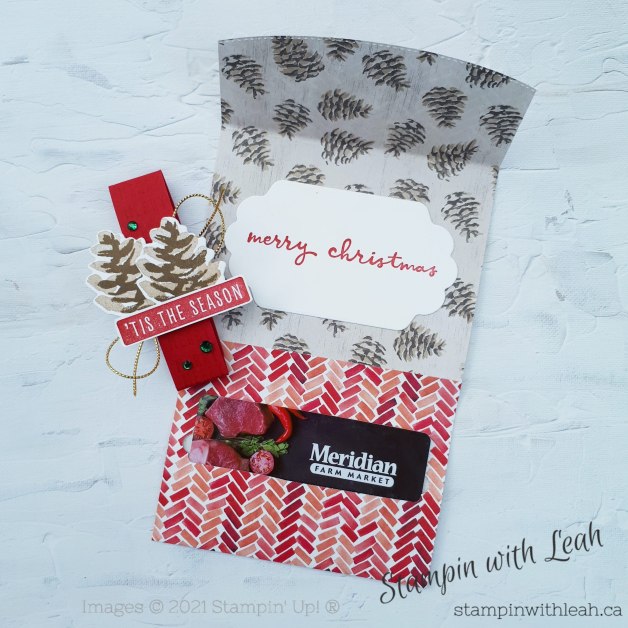
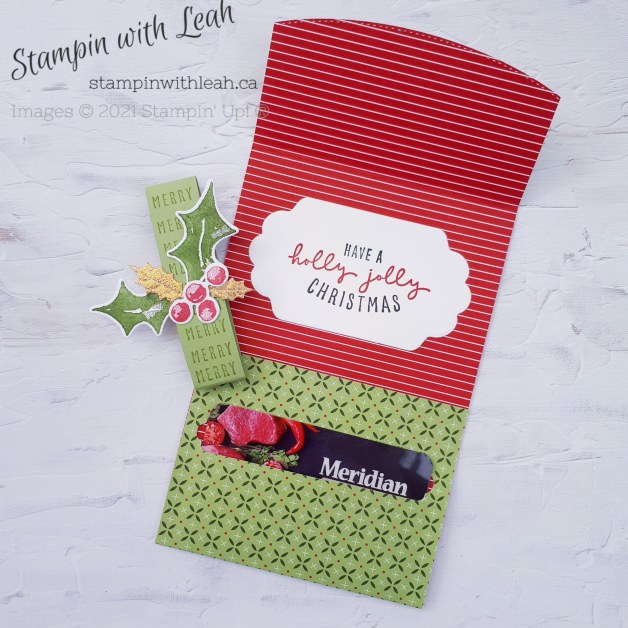
Add tear and tape to sides of the end piece that is 3″. Then cut out the card slot and glue the end shut.

Add a piece of white cardstock inside to write on.

Next, fold it all closed, wrap a strip of coordinating 3/4″ X 8-1/2″ cardstock around the closed DSP and tape it together. Finally decorate the cardstock strip.

To see exactly how I created these – checkout the video below.

Please leave a comment below and make sure to follow this blog for more great inspiration!

Product List
Painted Christmas 12" X 12" (30.5 X 30.5 Cm) Designer Series Paper
Real Red 8-1/2" X 11" Cardstock
Basic White 8 1/2" X 11" Cardstock
Pear Pizzazz 8-1/2" X 11" Cardstock
Christmas Season Bundle (English)
Christmas To Remember Cling Stamp Set (English)
Crumb Cake Classic Stampin' Pad
Soft Suede Classic Stampin' Pad
Real Red Classic Stampin' Pad
Holiday Rhinestone Basic Jewels
Mossy Meadow Classic Stampin' Pad
Gold Holly Leaves
Simply Elegant Trim
Stampin' Seal+
Basic Borders Dies
Mini Glue Dots
Stampin' Cut & Emboss Machine
Paper Trimmer

Some of this product will be retiring soon – grab our last chance items before they are gone!

I also have an ordering special going on – so make sure to use the host code to get some free handstamped cards!

Click here to shop my online store.
Click here to access & view the current catalogs.
Click here to subscribe to those fun Paper Pumpkin kits of creativity!
Click here for more information about joining my Online Monthly Technique Club. Earn even more goodies by joining a club!
Click here to learn more about joining my Ink Pad Pals Team. Get the MOST rewards including a discount on future products!
Follow me on social media! I share regularly on PinterestYouTube, and Facebook!
Please subscribe to my newsletter, too! Click here and enter your email. When you include your birthday you will even be added to my birthday card mailing list 🙂

West Coast Creators Blog Hop – October 2021

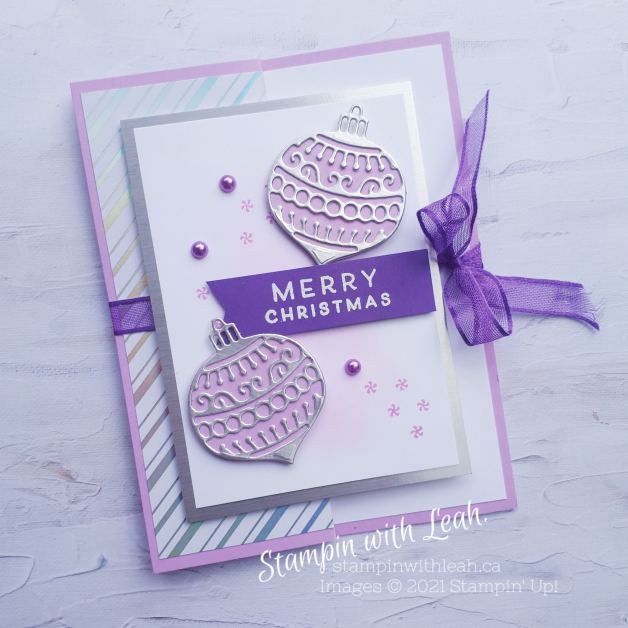
It’s the 14th of the month – time for another West Coast Creators Blog Hop!  This one features fun folds!!  Hop around see all the amazing cards created by our team members!  Leave a little love and then come back to see us again on the 14th next month!

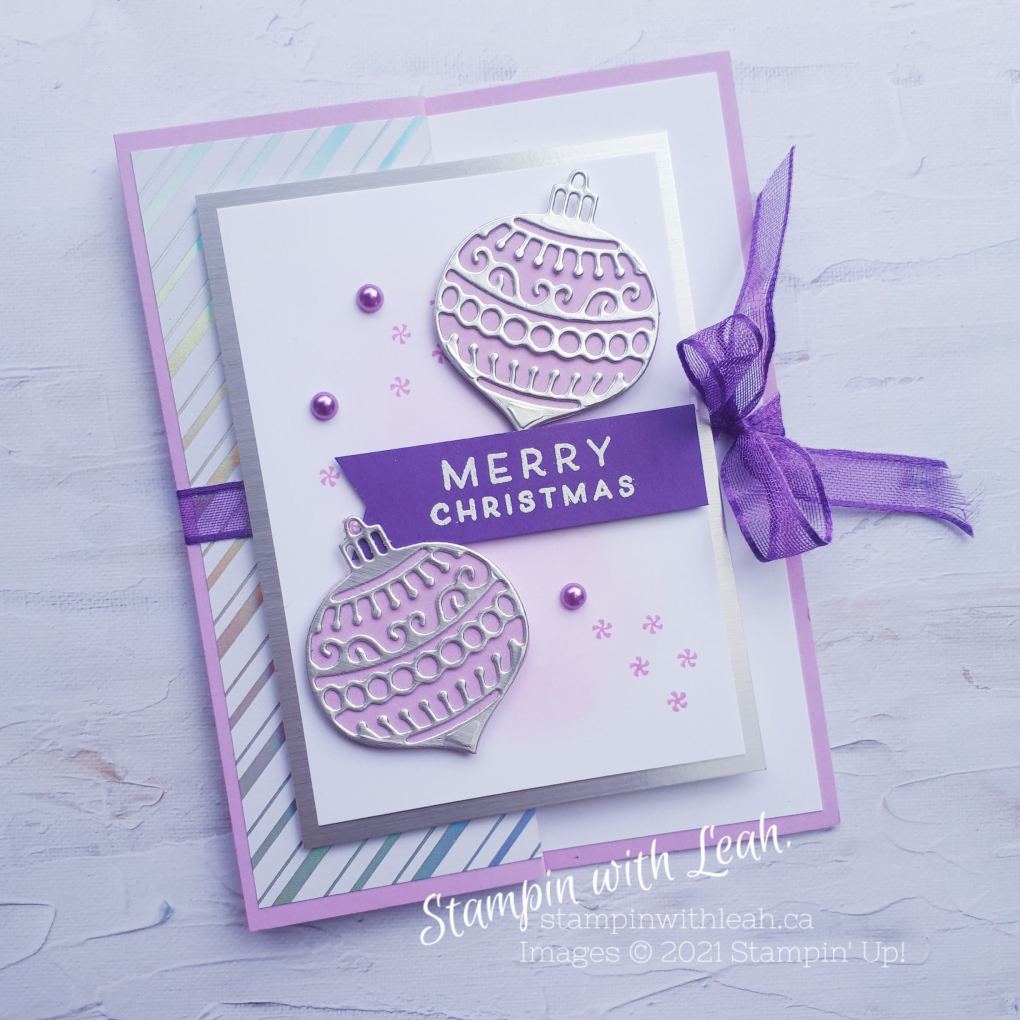
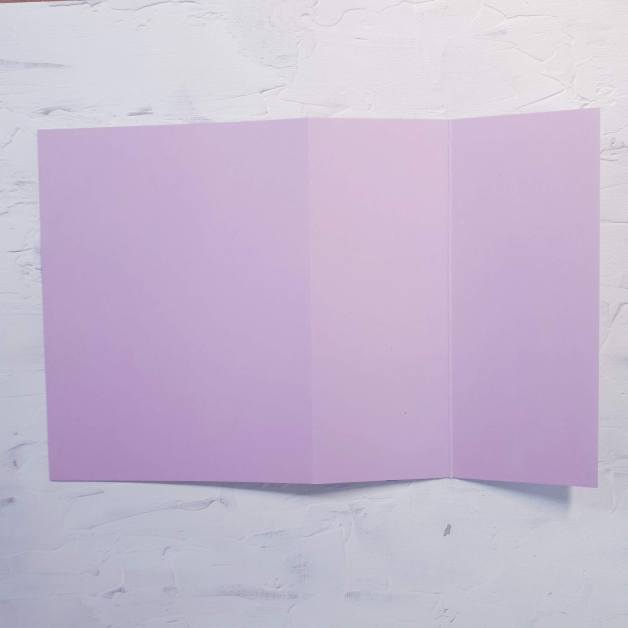
My card uses a fold whose name I don’t even know. Here are a few photos to help explain how I folded it though.

Start with a regular card, 8-1/2″ X 5-1/2″, scored at 4-1/4″. The flip it over and score again at 2-1/8″ so that it folds in the opposite direction.

Put a liner inside if you are going to have one and then close the card and hole punch through both (or all 3 layers) using the round bit on the Trio Punch.

It will look like this – punched all the way through.

Next you want to add a piece of DSP – cut at 2″ X 5-1/4″ – right along the center fold line.

Next attach the ribbon by running it through the holes on the closed card.

Then tie the ribbon around the front and back the card – creating a bow on the right hand side.

Next, create a piece to go on the front ( whatever design you want – I used the Frosted Gingerbread bundle to create mine in Fresh Freesia and Gorgeous Grape). The inside will look like this after you attach the front panel over top of the ribbon and DSP.

That is the finished card! Have fun making your own creations with this fold!

Live in Canada, don’t have a demonstrator? Contact me to get a catalogue or find out why right now is the best time to join our team. Here is a full list of supplies I used to create his card, you can add these directly to your Starter Kit. You can also click to order items or contact me directly if you would like to grab a few items.

Product List
Versamark Pad
$13.00
Simply Scored
$41.00

Click here to shop my online store.
Click here to access & view the current catalogs.
Click here to subscribe to those fun Paper Pumpkin kits of creativity!
Click here for more information about joining my Online Monthly Technique Club. Earn even more goodies by joining a club!
Click here to learn more about joining my Ink Pad Pals Team. Get the MOST rewards including a discount on future products!
Follow me on social media! I share regularly on PinterestYouTube, and Facebook!
Please subscribe to my newsletter, too! Click here and enter your email. When you include your birthday you will even be added to my birthday card mailing list 🙂