Festive Friday with Humble Home

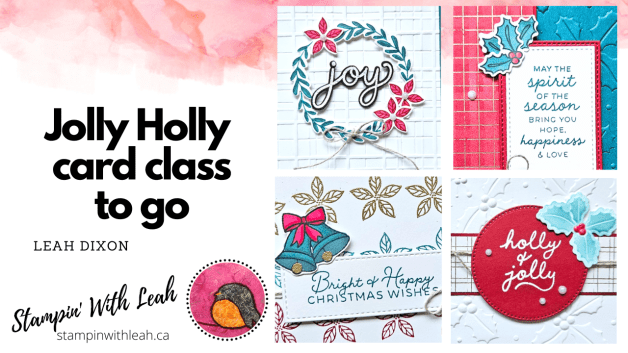
For this week’s Festive Friday project, I’m spotlighting the Humble Home stamp set from Stampin’ Up!—a true gem on the Last Chance list. While the coordinating punch has retired, this stamp set is still an adorable must-have for creating handmade Christmas cards that radiate warmth and nostalgia.

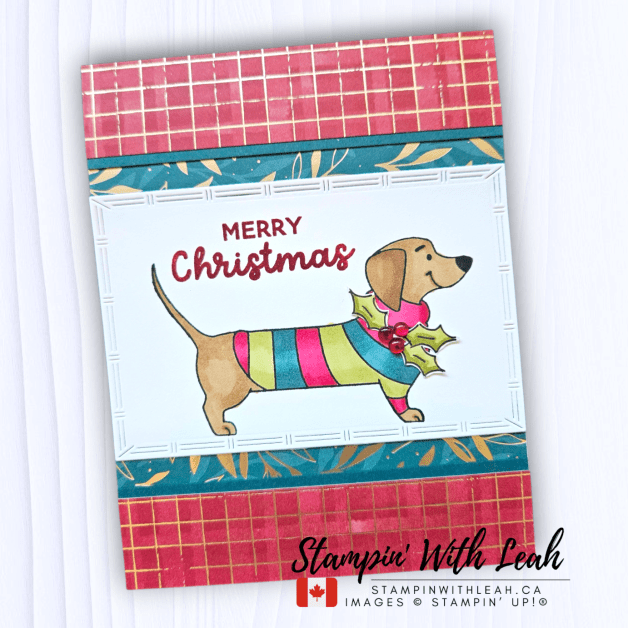
I paired the sweet gingerbread-style house image with Regal Distressed Patterns 12″ x 12″ Designer Series Paper, letting the deep red and gold grid pattern set the stage for a cozy, festive feel. The house is stamped in Early Espresso Ink and coloured in Pecan Pie directly on a circle from the Spotlight on Nature dies.

The sentiment “Merry Christmas” was stamped beneath the image in Cherry Cobbler Ink, while “From our house to yours” is stamped directly on the Crumb Cake card base in Early Espresso Ink for an extra heartfelt touch. A scattering of gold sequins adds just the right amount of holiday sparkle.

Cardmaking Tips:

  • When working with distressed patterned paper, let it peek through as part of your design—it adds texture without needing extra layers.
  • Gold sequins are a quick way to elevate a simple card without overpowering the stamped image.

This clean and classic design is perfect for mass-producing your Christmas cards—and since Humble Home is retiring soon, you’ll want to grab it before it’s gone!

🛒 Want to recreate this card?
Head to my online store to grab your supplies or click on the supplies listed below:

Product List

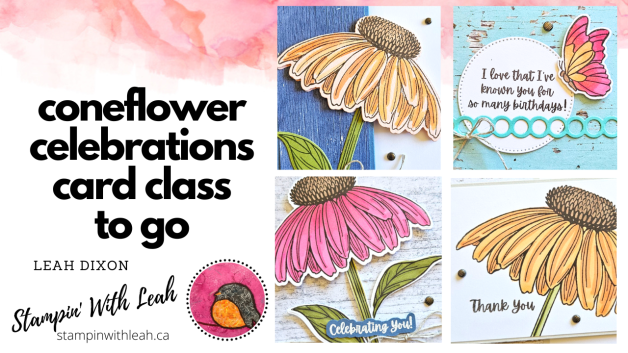
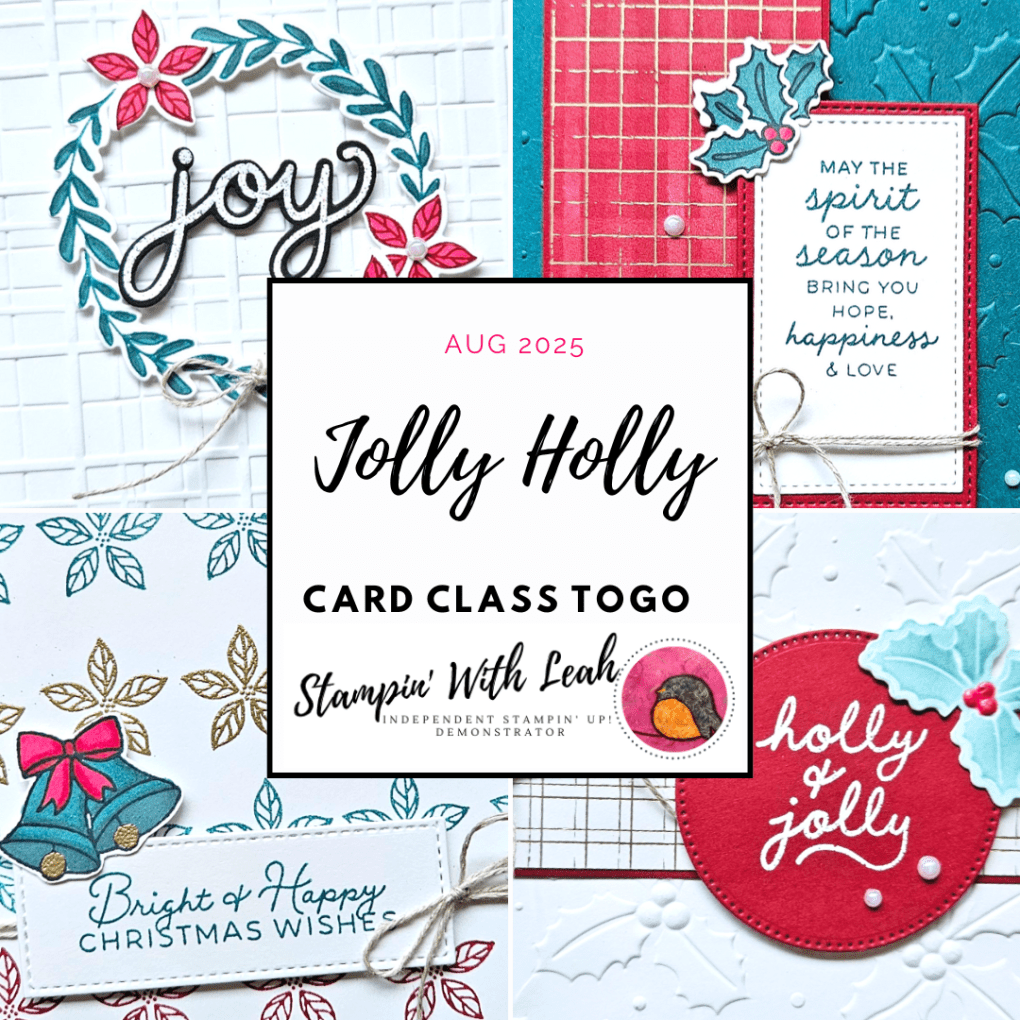
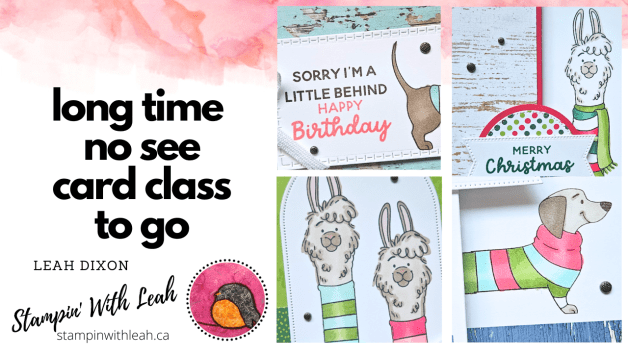
📦 Want to create more with me? Join my online Card Class to Go this week and receive all the pre-cut supplies and tutorials to make some beautiful coneflower cards!

You can also find me in person ( In Port Coquitlam, BC)

Other great stampin opportunities are coming soon – and these ones have passed – but you can access the replays:

GET YOUR KIT HERE!

Looking for even more ways to enjoy stamping? Join my Stampin’ Up! Ink Pad Pals team!

  • Save 20%+ on your orders.
  • Get free access to my monthly card class tutorials.
  • Enjoy our monthly team meetings with stamping fun and collaboration.

Contact me to find out more or see the details on my website.

❤️ Thanks for crafting with me!
Be sure to subscribe so you never miss a Festive Friday!

Click here to shop my online store.
Click here to access & view the current catalogs.
Click here to subscribe to those fun Paper Pumpkin kits of creativity!
Click here for more information about joining my Online Monthly Technique Club. Earn even more goodies by joining a club!
Click here to learn more about joining my Ink Pad Pals Team. Get the MOST rewards including a discount on future products!
Follow me on social media! I share regularly on PinterestYouTube, and Facebook!
Please subscribe to my newsletter, too! Click here and enter your email. When you include your birthday you will even be added to my birthday card mailing list 🙂


Throwback Thursday: Free as a Bird with Fresh In Colors

If you’ve been crafting with me for a while, you know Free as a Bird is one of my all-time favorite retired Stampin’ Up! stamp sets. This week, I dusted it off for Throwback Thursday and gave it a fresh twist with the 2025–2027 In Color Designer Series Paper, the 2025–2027 In Color Flat Pearls, and the crisp White ¼” Ribbon.

To bring it all together, I reached for the Spotlight on Nature Dies and created a pretty circular focal point for my sweet bluebirds. The color combo of Darling Duckling, Poppy Parade, and Pool Party comes straight from the Global Design Project #509 color challenge – and it’s perfect for a bright, happy friendship card.

Step-by-Step Instructions:

  • Cut a Basic White card base (4 ¼” x 11”, scored at 5 ½”).
  • Cut a Darling Duckling DSP layer to 4” x 5 ¼”.
  • Add a 1 ¾” x 5 ¼” strip of Pool Party cardstock across the card front. Stamp the sentiment in Memento Black.
  • Tie a piece of White ¼” Ribbon and make a bow on the right hand side. Adhere this DSP/ribbon layer to the card base.
  • Die cut a circle from Basic White using the Spotlight on Nature Dies, adhere to the card front using Dimensionals.
  • Stamp the bird image from Free as a Bird in Memento Black on Basic White and color with Pool Party, Poppy Parade, and Darling Duckling Stampin’ Blends. I also used a little bit of light Crumb cake for the branch. Fussy cut.
  • Adhere the birds to the circle with a bit of glue in the center and Mini Dimensionals on the two branch ends.
  • Finish with Darling Duckling 2025–2027 In Color Flat Pearls for a cheerful touch.

Stampin’ Tip: If you don’t have the Free as a Bird stamp set, you can substitute any branch-and-bird image for a similar look – the key is in the color palette and layout.

🛍️ Shop the Supplies:


The DSP and dots are also on sale this month!! Make sure to grab all the In Color items during this sale – you can find ALL the products on the In Color Sale Special page ( or click the image below).

Don’t forget – you’ll earn Stampin’ Rewards on your purchase too!

📹 Want more inspiration? Be sure to follow me on YouTube or Facebook for tutorials, lives, and more!

👉 Looking for other ways to stamp with me?

If you are local – join my in person card class!

Looking for even more ways to enjoy stamping? Join my Stampin’ Up! Ink Pad Pals team!

  • Save 20%+ on your orders.
  • Get free access to my monthly card class tutorials.
  • Enjoy our monthly team meetings with stamping fun and collaboration.

Contact me to find out more or see the details on my website.

See you next week for another Throwback Thursday creation!

➡️ Subscribe to my newsletter at https://mailchi.mp/f1809c680508/subscribe-to-stampin-with-leahs-newsletter


Festive Friday with Jolly Holly

This week’s Festive Friday card was inspired by my August Card Class to Go featuring the Jolly Holly Bundle. I decided to create an extra card using this gorgeous set and its coordinating hybrid embossing folder.

✂️ How I Made This Card:

  • I started with a Pretty Peacock card base and ran a layer through the Jolly Holly Hybrid Embossing Folder (witht he die inserted).
  • To make the holly leaves pop, I gently dragged my Craft White Ink Pad across the raised areas—this creates such beautiful contrast and texture.
  • I then adhered the embossed panel to the card base, but here’s the trick—Dimensionals went only behind the cut-out leaves. This gives them a little lift, making the whole design more dimensional and eye-catching. Make sure to grab any small edge leaves that may fall away and add them in place with Dimensionals as well. If needed, use a Mini Glue Dot or other flat adhesive to hold the corners down to the card base.
  • The sentiment is stamped in Pretty Peacock ink on a stitched rectangle (from the Jolly Holly bundle), accented with an embossed-and-die-cut holly cluster.
  • To create the holly bundle, I fully cut out a piece of holly from another hybrid embossed sheet of Basic White cardstock. Then I coloured the berries and coated them in clear embossing powder. Next I used a blending brush to add Pretty Peacock Ink to the leaves.
  • I finished off the card with a few Iridescent Foil Gems for a touch of holiday sparkle.

This design is simple yet elegant, perfect for making multiples as part of your Christmas card stash.

Tip: The drag-ink technique works best with pigment ink pads like Craft White, as they give you bold coverage and time to blend if desired.

🛒 Want to recreate this card?
Head to my online store to grab your supplies or click on the supplies listed below:


📦 Want to create more with the Jolly Holly Bundle? Join my Card Class to Go this month and receive all the pre-cut supplies and tutorials to make even more festive cards!

Looking for more ways to stamp with me? You can find me online and in person ( In Port Coquitlam, BC)

See the details and register here – there is still time to register from any where in the world! The event has happened – but I still have a kit available and you can access the replay videos.

GET YOUR KIT HERE!

Looking for even more ways to enjoy stamping? Join my Stampin’ Up! Ink Pad Pals team!

  • Save 20%+ on your orders.
  • Get free access to my monthly card class tutorials.
  • Enjoy our monthly team meetings with stamping fun and collaboration.

Contact me to find out more or see the details on my website.

❤️ Thanks for crafting with me!
Be sure to subscribe so you never miss a Festive Friday!

Click here to shop my online store.
Click here to access & view the current catalogs.
Click here to subscribe to those fun Paper Pumpkin kits of creativity!
Click here for more information about joining my Online Monthly Technique Club. Earn even more goodies by joining a club!
Click here to learn more about joining my Ink Pad Pals Team. Get the MOST rewards including a discount on future products!
Follow me on social media! I share regularly on PinterestYouTube, and Facebook!
Please subscribe to my newsletter, too! Click here and enter your email. When you include your birthday you will even be added to my birthday card mailing list 🙂


Throwback Thursday: Revisiting the Nests of Christmas Paper Pumpkin Kit

I love revisiting my Paper Pumpkin kits, especially when they coordinate so perfectly with current products! This week, I pulled out the Nests of Christmas Paper Pumpkin kit from October 2024 and created three brand-new alternative cards using the coordinating Nests of Winter 12×12 DSP and the stunning Gold Striped Mesh Ribbon.

  • Die cut a Basic White and a Shaded Spruce Everyday Arch that can layer together. Glue them together and then glue to a Pool Party layer ( either a piece from the Paper Pumpkin kit or a 4″ X 5-1/4″ layer of Nests of Winter DSP).
  • Tie a piece of Gold Striped Mesh Ribbon around this layer and attach to a Thick Basic White card base.
  • Stamp the sentiment using Shaded Spruce Ink on one of the extra labels from the kit ( or cut your own with Stylish Shapes dies). Attach to the card front using Dimensionals.
  • Fussy cut a bird on a branch and an extra branch from the Nests of Winter DSP and glue to the card front ( tuck the ends under the sentiment label).
  • Embellish with Iridescent Foil Gems.

🛍️ Shop the Supplies:


🧵 BONUS: I have TWO full Nests of Christmas Paper Pumpkin kits available — directly from me (not Stampin’ Up!). These are $35 CAD each (+ shipping if needed). If you’re in Canada, contact me directly to arrange local pickup or mailing.

✨ You can also catch my original unboxing + 2 alternatives on YouTube here:
https://www.youtube.com/watch?v=5EOk43pdpPY&list=PLfZU8O6t1_SEy0Vv9A1Xf0ykL-5hp7djD&index=8

In addition to this sweet winter card, I created 3 other alternatives. Each of these uses bits from the Paper Pumpkin kit added on to a card stock base rather than creating the cards as intended. Let’s take a look at each of the new cards!

Don’t forget – you’ll earn Stampin’ Rewards on your purchase too!

📹 Want more inspiration? Be sure to follow me on YouTube or Facebook for tutorials, lives, and more!

👉 Looking for other ways to stamp with me?

If you are local – join my in person card class!

Looking for even more ways to enjoy stamping? Join my Stampin’ Up! Ink Pad Pals team!

  • Save 20%+ on your orders.
  • Get free access to my monthly card class tutorials.
  • Enjoy our monthly team meetings with stamping fun and collaboration.

Contact me to find out more or see the details on my website.

See you next week for another Throwback Thursday creation!

➡️ Subscribe to my newsletter at https://mailchi.mp/f18https://www.stampinup.ca?09c680508/subscribe-to-stampin-with-leahs-newsletter


Jolly Holly Card Class to Go – August 2025

My latest Card Class to Go is now available—and it’s a merry one! I’m featuring the Jolly Holly Bundle, an adorable Online Exclusive stamp and die set from Stampin’ Up! Paired with the luxe Regal Distressed Patterns 12×12 Specialty Paper, this class is all about holiday sparkle and cheer.

❄️ Whether you missed the Live or just want to craft along at your own pace, the Replay is now available on YouTube:

💖 Why You’ll Love These Cards:

✔️ Classic Christmas icons with a playful twist
✔️ Textured backgrounds using the Regal Distressed paper for wow-factor
✔️ Easy-to-follow layouts that look polished but come together quickly
✔️ Great for mass-producing holiday cards
✔️ Designs that pair beautifully with your existing holiday supplies

Whether you’re a beginner or experienced stamper, you’ll find this class both inspiring and achievable!

Here are the 4 unique cards:

This last card was inspired by the Global Design Project (GDP508) Case the Designer Challenge – so fun!

📦 How to Get the Card Kit
Receive the full card kit (supplies for 4 cards) FREE with your $60+ order (before tax/shipping) in my online store between August 6–12, 2025.
👉 Shop here

📥 Prefer just the tutorial?
Grab the PDF right here in my online shop:
👉 https://payhip.com/b/wDz9l

Here are the supplies you’ll want to have at home:


Want to stamp with me some more?

Join my August Card Class to learn new techniques and create beautiful projects. Spots are limited, so reserve yours today!

See the details and register here – you can still get the kit and watch the replay!
  • Save 20%+ on your orders (including the virtual album and the suite sale items!!)
  • Get free access to my monthly card class tutorials.
  • Enjoy our monthly team meetings with stamping fun and collaboration.

Click here to shop my online store.
Click here to access & view the current catalogs.
Click here to subscribe to those fun Paper Pumpkin kits of creativity!
Click here for more information about joining my Online Monthly Technique Club. Earn even more goodies by joining a club!
Click here to learn more about joining my Ink Pad Pals Team. Get the MOST rewards including a discount on future products!
Follow me on social media! I share regularly on PinterestYouTube, and Facebook!
Please subscribe to my newsletter, too! Click here and enter your email. When you include your birthday you will even be added to my birthday card mailing list 🙂


Christmas in July… on August 1st? Why not!

This week’s Global Design Project Challenge #GDP507 is all about celebrating the holidays early. I decided to go modern and bold with my Festive Friday creation—featuring a black background, shining gold embossing, and the stunning Most Wonderful stamp set.

✂️ How I Made This Card:

  • Card Base: Thick Basic White
  • Background Panel: Basic Black cardstock stamped with Most Wonderful stamp set – all stamps mounted together
  • Heat Embossing: Versamark ink + Gold Embossing Powder
  • Sentiment: Memento Black on Thick Basic White using the Stylish Shapes dies
  • Ribbon: Gold Mesh Ribbon
  • Embellishments: Loose sequins adhered with liquid glue
  • Adhesive: Stampin’ Dimensionals and Multipurpose Liquid Glue

✨ Try this technique with your own stamp sets—mounting them all at once makes a bold, custom background that’s perfect for embossing!

🛒 Want to recreate this card?
Head to my online store to grab your supplies or click on the supplies listed below:


Looking for more ways to stamp with me? You can find me online and in person ( In Port Coquitlam, BC)

See the details and register here – there is still time to register from any where in the world! The event has happened – but I still have a kit available and you can access the replay videos.

GET YOUR KIT HERE!

Looking for even more ways to enjoy stamping? Join my Stampin’ Up! Ink Pad Pals team!

  • Save 20%+ on your orders.
  • Get free access to my monthly card class tutorials.
  • Enjoy our monthly team meetings with stamping fun and collaboration.

Contact me to find out more or see the details on my website.

❤️ Thanks for crafting with me!
Be sure to subscribe so you never miss a Festive Friday!

Click here to shop my online store.
Click here to access & view the current catalogs.
Click here to subscribe to those fun Paper Pumpkin kits of creativity!
Click here for more information about joining my Online Monthly Technique Club. Earn even more goodies by joining a club!
Click here to learn more about joining my Ink Pad Pals Team. Get the MOST rewards including a discount on future products!
Follow me on social media! I share regularly on PinterestYouTube, and Facebook!
Please subscribe to my newsletter, too! Click here and enter your email. When you include your birthday you will even be added to my birthday card mailing list 🙂


Festive Friday: Bright & Happy with Jolly Holly

Happy Festive Friday! Today’s holiday card was created using the brand new Jolly Holly Bundle (an Online Exclusive!) and the GDP506 sketch for layout inspiration. With custom-stamped floral accents, bold texture, and a rich traditional palette, this is a fun, cheerful addition to your Christmas card stash.

And don’t forget — Stampin’ Up!’s FREE Shipping ends TONIGHT (July 25 at 11:59pm MT). Stock up on Online Exclusives like Jolly Holly while you can!

💡 Leah’s Crafting Tips:

🖼 Create your own patterned paper!
The centre strip isn’t from DSP — I hand-stamped and coloured the florals and greenery from the Jolly Holly stamp set using Stampin’ Blends. It’s a beautiful way to customize your colour palette or match any project theme!

✂️ Modify your dies:
The sentiment label was created using the Textured Notes Dies, but I trimmed it with a double cut technique to make it narrower — perfect for this long sentiment while keeping those stitched details.

Here is a full Product List for today’s card:


🛍️ LAST DAY: Free Shipping on Orders $100+ CAD!

Today is your final chance to enjoy FREE SHIPPING on qualifying orders at Stampin’ Up!
✔️ No code needed
✔️ Automatically applied at checkout
✔️ Ends July 25 at 11:59 PM (MT)

👉 Shop Online Exclusives like Jolly Holly now

    Looking for more ways to stamp with me? You can find me online and in person ( In Port Coquitlam, BC)

    See the details and register here – there is still time to register from any where in the world! The event has happened – but I still have a kit available and you can access the replay videos.

    GET YOUR KIT HERE!

    Looking for even more ways to enjoy stamping? Join my Stampin’ Up! Ink Pad Pals team!

    • Save 20%+ on your orders.
    • Get free access to my monthly card class tutorials.
    • Enjoy our monthly team meetings with stamping fun and collaboration.

    Contact me to find out more or see the details on my website.

    ❤️ Thanks for crafting with me!
    Be sure to subscribe so you never miss a Festive Friday!

    Click here to shop my online store.
    Click here to access & view the current catalogs.
    Click here to subscribe to those fun Paper Pumpkin kits of creativity!
    Click here for more information about joining my Online Monthly Technique Club. Earn even more goodies by joining a club!
    Click here to learn more about joining my Ink Pad Pals Team. Get the MOST rewards including a discount on future products!
    Follow me on social media! I share regularly on PinterestYouTube, and Facebook!
    Please subscribe to my newsletter, too! Click here and enter your email. When you include your birthday you will even be added to my birthday card mailing list 🙂


    Festive Friday: Dressed-Up Dachshund for the Holidays

    It’s another Festive Friday, and I’m sharing a card that’s sure to make you smile! This week’s card features the Long Time No See stamp set — a super cute Online Exclusive — paired with the beautifully rich Regal Distressed Patterns 12” x 12” Designer Series Paper.

    The star of this card? A fashionable little dachshund decked out for Christmas in a cozy, hand-coloured sweater!

    Card Details:

    🐾 Stamp Set: Long Time No See (Online Exclusive)
    🎄 DSP: Regal Distressed Patterns
    🖍 Colours Used:

    • Dog: Pecan Pie
    • Sweater: Cherry Cobbler, Pretty Peacock, Old Olive
    • Sentiment: Cherry Cobbler

    🎨 Extra Touches:

    • Holly at the collar was hand drawn, coloured, and fussy cut
    • Accented with Cherry Cobbler & Pearl Adhesive-Backed Berries
    • Framed with a Texture Notes rectangle die

    🎨 Leah’s Pro Tip:

    When placing the dachshund on your block, tilt his tail back slightly. This creates space for the sentiment between his tail and head — keeping your layout clean and balanced!

    This card is a wonderful reminder that you can get creative even with small touches — like drawing and cutting your own holly for that festive flair. And don’t forget, the Long Time No See set is an Online Exclusive, so you’ll only find it in the online shop — not in any printed catalogues.

    👉 Check out all Online Exclusives here

    Do you love this little guy? Then make sure to check out last week’s Long Time No See card class to go. You can still get the PDF in my online shop.

    Here is a full Product List for today’s card:


    ✨ Don’t forget:

    • Orders $25+ CAD are now eligible for Stampin’ Rewards when you opt in to the new loyalty program!

    Looking for more ways to stamp with me? You can find me online and in person ( In Port Coquitlam, BC)

    See the details and register here – there is still time to register from any where in the world! The event has happened – but I still have a kit available and you can access the replay videos.

    GET YOUR KIT HERE!

    Looking for even more ways to enjoy stamping? Join my Stampin’ Up! Ink Pad Pals team!

    • Save 20%+ on your orders.
    • Get free access to my monthly card class tutorials.
    • Enjoy our monthly team meetings with stamping fun and collaboration.

    Contact me to find out more or see the details on my website.

    ❤️ Thanks for crafting with me!
    Be sure to subscribe so you never miss a Festive Friday!

    Click here to shop my online store.
    Click here to access & view the current catalogs.
    Click here to subscribe to those fun Paper Pumpkin kits of creativity!
    Click here for more information about joining my Online Monthly Technique Club. Earn even more goodies by joining a club!
    Click here to learn more about joining my Ink Pad Pals Team. Get the MOST rewards including a discount on future products!
    Follow me on social media! I share regularly on PinterestYouTube, and Facebook!
    Please subscribe to my newsletter, too! Click here and enter your email. When you include your birthday you will even be added to my birthday card mailing list 🙂


    Festive Friday: Llama Fun Fold Card Featuring Long Time No See

    Welcome back to another Festive Friday! This week I’m continuing my Christmas card series with a fun and festive creation using the Long Time No See stamp set — the same set I featured in this week’s Card Class To Go.

    This card is all about holiday cheer, bright colours, and a playful layout! It features a bold Granny Apple Green card base with a fun fold layout, making it extra interactive and perfect for sending a bit of joy this holiday season.

    🎨 Design Details:

    • Stamp Set: Long Time No See
    • Card Base: Granny Apple Green
    • Designer Series Paper: Take a Bow DSP (retiring – Last Chance!)
    • Colouring: Stampin’ Blends in Crumb Cake, Real Red, Granny Apple Green, and Shaded Spruce
    • Embellishments: Peppermint Dots add a sweet, dimensional touch
    • Sentiment: “Merry Merry Merry Christmas” – a playful stacked greeting to match the llama’s long scarf!

    I love how this card combines whimsy with traditional Christmas colours. The Take a Bow DSP adds a fun polka-dot backdrop, and this fold is sure to stand out on the mantel.

    ✂️ Tips & Tricks:

    • Mix and match Stampin’ Blends for a soft, blended fur effect on the llama.
    • Stack your sentiments with dimensionals for added depth.
    • Use a white gel pen to add highlights to your lights or scarf for a pop of brightness.

    📦 Don’t Forget!
    The Take a Bow DSP is on the Last Chance List, so grab it before it’s gone! And if you loved this stamp set, check out this week’s Card Class To Go featuring more fun llama-themed designs!

    Join me July 9–15 for a special Long Time No See Card Class To Go, where we’ll make four fun projects using this set — just like this card and more!
    👉 Click here for full class details and to get your kit and PDF tutorial now!

    🛍️ Want to recreate this card?
    You can shop all the supplies here in my Canadian online store:
    👉 https://www.stampinup.ca/?demoid=2189587

    🛒 Browse all Online Exclusives here
    🛒 Don’t wait—Take a Bow DSP is a Last Chance items and will sell out fast!

    Product List:


    ✨ Don’t forget:

    • Orders $25+ CAD are now eligible for Stampin’ Rewards when you opt in to the new loyalty program!

    Looking for more ways to stamp with me? You can find me online and in person ( In Port Coquitlam, BC)

    See the details and register here – there is still time to register from any where in the world! The event has happened – but I still have a kit available and you can access the replay videos.

    GET YOUR KIT HERE!

    Looking for even more ways to enjoy stamping? Join my Stampin’ Up! Ink Pad Pals team!

    • Save 20%+ on your orders.
    • Get free access to my monthly card class tutorials.
    • Enjoy our monthly team meetings with stamping fun and collaboration.

    Contact me to find out more or see the details on my website.

    ❤️ Thanks for crafting with me!
    Be sure to subscribe so you never miss a Festive Friday!

    Click here to shop my online store.
    Click here to access & view the current catalogs.
    Click here to subscribe to those fun Paper Pumpkin kits of creativity!
    Click here for more information about joining my Online Monthly Technique Club. Earn even more goodies by joining a club!
    Click here to learn more about joining my Ink Pad Pals Team. Get the MOST rewards including a discount on future products!
    Follow me on social media! I share regularly on PinterestYouTube, and Facebook!
    Please subscribe to my newsletter, too! Click here and enter your email. When you include your birthday you will even be added to my birthday card mailing list 🙂


    🎉 New Card Class To Go – Featuring Long Time No See!

    Get ready to smile! This month’s Card Class To Go features the absolutely adorable Long Time No See stamp set. You’ll create 4 unique and cheerful cards—including fun folds and versatile greetings that make these cards great for all occasions!

    🌟 How to Get the Class Kit:
    Place a $60+ order (before shipping/tax) in my online shop and you’ll receive:

    • ✂️ A pre-cut 4-card kit
    • 📘 A full PDF tutorial
    • 📦 Shipped to you, ready to assemble!

    📍 Live outside Canada? You can still grab the PDF only from my website right here.

    💌 What’s in the Class?

    Here’s a quick look at the 4 cards you’ll create in this class:

    “Long Time No See” Fun Fold Card
    This clever accordion-style card features the full stretch of the dachshund from head to tail—perfect for a laugh and a joyful “hello” across the miles.
    🟢 Colour Combo: Granny Apple Green, Pool Party, Strawberry Splash and Misty Moonlight
    🪵 Paired with Country Woods DSP for texture and warmth.

    Llama Holiday Cheer Card
    Send festive greetings with this llama decked out in a candy-cane striped scarf. A simple Z-fold layout and holiday palette make this card a standout!
    🔴 Colours: Real Red, Granny Apple Green, Shaded Spruce
    🎄 Sentiment: “Merry Christmas” with a polka dot pop.

    Birthday Llama Duo Card
    Celebrate with double the fun! Two llamas in cozy sweaters wish someone a very happy birthday. A stitched arch die and playful background complete the look.
    🎉 Technique: Embossed sentiment, layered ribbon detail
    🟢 Colour Combo: Granny Apple Green, Pool Party, Strawberry Slush and Flirty Flamingo

    A Little Daschund Behind for those belated birthday wishes
    Send birthday wishes to loved ones with this sweet little card.
    🎉 Technique: Partial stamping, layered ribbon detail
    🟢 Colour Combo: Crumb Cake, Pool Party, Early Espresso and Flirty Flamingo

    Here’s how to get your kit:
    Place a $60+ order (before tax & shipping) in my online store between July 9–15, 2025, and I’ll send you all four card kits (1 of each design) as a thank-you gift. See below for a full list of supplies used to create these cards.

    🌎 International Customers
    Get the tutorial instantly! 👉 Purchase the PDF here

    👉 Watch the Long Time No See Card Class replay here:

    Here’s a list of the products you’ll need at home to create the cards using the kit I send you:


    Want to make even more of these cards? Here is a list of the cardstock, DSP and embellishment pieces you will receive in your kit:


    Check Out July’s Online Exclusives!

    The Long Time No See stamp set is just one of many fabulous new July Online Exclusives! You’ll also find:

    • Fresh holiday kits
    • Gorgeous DSP and embellishments
    • And limited-time bundles – only available while supplies last!

    ✨ See it all here:
    👉 https://www.stampinup.ca/categories/whats-new/new-arrivals?demoid=2189587

    💖 Why You’ll Love This Class:

    • 🎁 Great for All Occasions: With sentiments for birthdays, holidays, and “just because” notes, this is a class you’ll turn to again and again.
    • 🐾 Playful and Whimsical Designs: Whether you love llamas or long dogs, these quirky characters are full of personality and charm.
    • 🎨 Easy to Colour: Simple outlines make it a joy to blend and shade with Stampin’ Blends—perfect for beginners or seasoned crafters.
    • 🧩 Fun-Fold Techniques: Includes interactive layouts that are simple to create but have a big wow-factor.
    • 🧰 No Fussy Cutting Required: Your class kit includes all the tricky bits pre-cut for you!

    Want to stamp with me some more?

    Join my July Card Class to learn new techniques and create beautiful projects. Spots are limited, so reserve yours today!

    • Save 20%+ on your orders (including the virtual album and the suite sale items!!)
    • Get free access to my monthly card class tutorials.
    • Enjoy our monthly team meetings with stamping fun and collaboration.

    Click here to shop my online store.
    Click here to access & view the current catalogs.
    Click here to subscribe to those fun Paper Pumpkin kits of creativity!
    Click here for more information about joining my Online Monthly Technique Club. Earn even more goodies by joining a club!
    Click here to learn more about joining my Ink Pad Pals Team. Get the MOST rewards including a discount on future products!
    Follow me on social media! I share regularly on PinterestYouTube, and Facebook!
    Please subscribe to my newsletter, too! Click here and enter your email. When you include your birthday you will even be added to my birthday card mailing list 🙂