Welcome to another Festive Friday! This week’s card is a cheerful and bold Christmas design featuring some incredible Last Chance products. If you’ve had your eye on the More Wishes Stamp Set or the Take a Bow 6″x6″ Designer Series Paper, now is the time to grab them before they’re gone for good!
Card Details:
For this festive design, I combined bright, classic Christmas colors with fun typography and fussy-cut details:
The holly leaves were fussy cut from the DSP, and I added dimension with Cherry Cobbler Pearl Berries to give the card a little extra holiday sparkle!
The sentiment features “merry” from the More Wishes Stamp Set, stamped in Real Red Ink on white die-cut panels.
The bold “CHRISTMAS” is heat embossed in White Embossing Powder on Real Red cardstock, creating a striking contrast.
The beautiful Take a Bow 6″x6″ DSP serves as the background, adding a festive flair with its starry green pattern.
Why You’ll Love This Card:
✔ Simple yet striking layout that makes a big impact
✔ A perfect way to use Last Chance products before they retire
✔ Great for mass-producing Christmas cards with a handmade touch
Don’t Miss Out!
Both the More Wishes Stamp Set and Take a Bow DSP are retiring soon—grab them before they sell out! Shop now and add these must-have items to your holiday crafting stash.
I hope this card inspires you to get a head start on your Christmas cardmaking. Let me know what you think in the comments! Would you recreate this design?
Click here to shop my online store. Click here to access & view the current catalogs. Click here to subscribe to Thanks for hopping by! Make sure to pin this post for future reference and share it with your crafty friends.those fun Paper Pumpkin kits of creativity! Click here for more information about joining my Online Monthly Technique Club. Earn even more goodies by joining a club! Click here to learn more about joining my Ink Pad Pals Team. Get the MOST rewards including a discount on future products! Follow me on social media! I share regularly on Pinterest, YouTube, and Facebook! Please subscribe to my newsletter, too!Click here and enter your email. When you include your birthday you will even be added to my birthday card mailing list 🙂
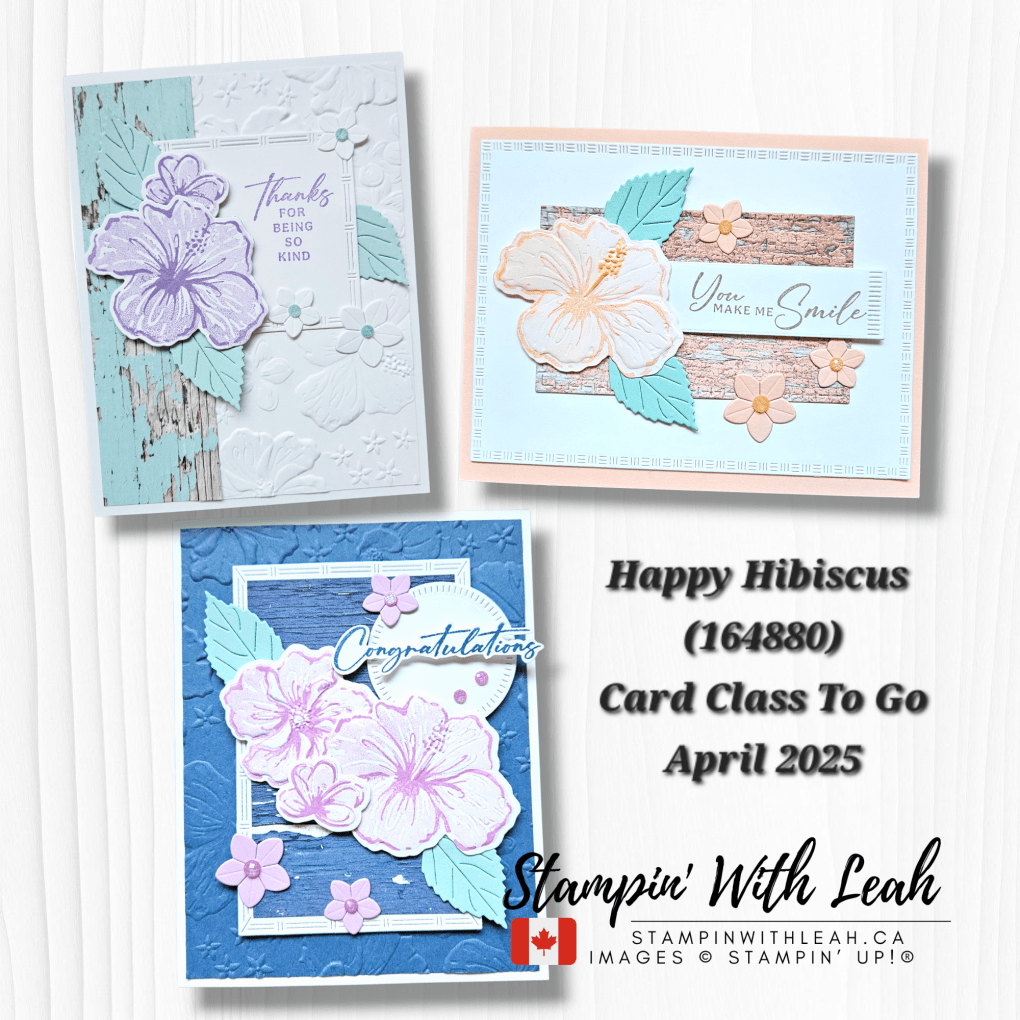
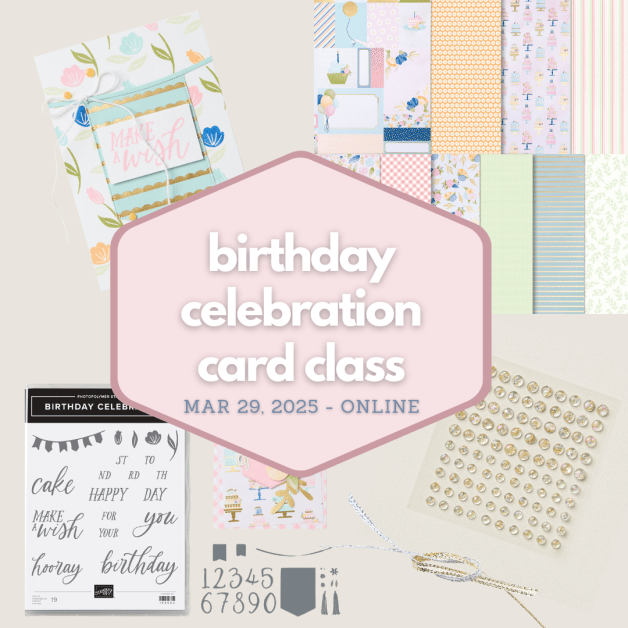
Spring is in the air, and I have a gorgeous floral-themed Card Class To Go for you this month! These three stunning cards showcase a mix of soft pastels and bold blues, layered textures, and intricate die cuts—perfect for celebrating special moments.
How to Get This Class for FREE
When you place an order ($65 minimum before tax and shipping) by Tuesday, April 8th, you’ll receive the Make & Take packets for these three cards for FREE! Your order must be in by the deadline to qualify, and I’ll ship your kit on April 12th, 2025.
Bonus Gift: Orders over $75 will also receive a free embellishment with their kit!
(Please note: Per Stampin’ Up! policy, I cannot send stamped images, but you can substitute supplies you already own!)
This card combines subtle white embossing with a distressed Country Woods DSP woodgrain panel for a rustic yet elegant look. The Highland Heather hibiscus flowers pop against the textured background, and the soft Pool Party leaves add a fresh, spring-like feel. Perfect for sending a heartfelt thank-you!
This card features a stunning Misty Moonlight embossed background paired with a Country Woods Misty Moonlight woodgrain panel for extra texture. The hibiscus flowers are stamped and die-cut in Fresh Freesia, accented with delicate floral embellishments. A crisp white circle and script sentiment add a touch of elegance!
A light and airy design with a beautiful Petal Pink Country Woods DSP textured background, framed in soft pastels. The large hibiscus flower takes center stage, accented by delicate die-cut leaves and small floral details. A sentiment banner finishes the card beautifully!
Watch the Replay
Want to see how these cards come together? Watch the full video here:
Place Your Order & Get Your Kit!
Don’t miss out on this stunning card class! Click below to shop now and secure your FREE Make & Take kit! Here are all the supplies you’ll want on hand to recreate the cards at home with your kit:
Looking for more crafting fun? Join myApril Card Class to learn new techniques and create beautiful projects. Spots are limited, so reserve yours today!
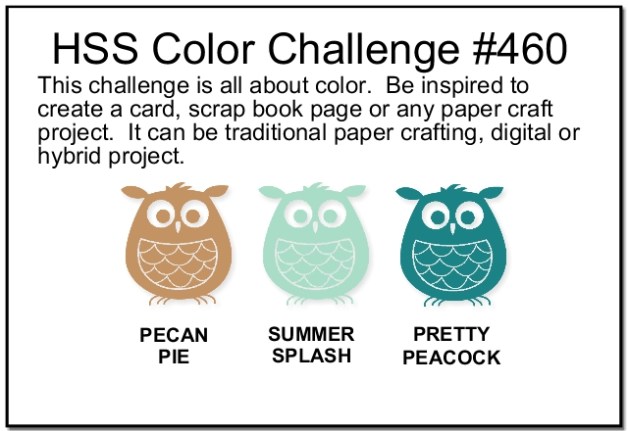
This week, I participated in the Hand Stamped Sentiments #460 Colour Challenge, featuring Pecan Pie, Summer Splash, and Pretty Peacock. These rich, bold hues inspired me to create this elegant “Everyday Details” card using the Textured Notes dies to add some special textures to the layers.
Here’s the card I created:
Project Details:
I started with a Pretty Peacock card base and layered it with a tone-on-tone stamped and die cut background for added texture. The detailed nest was stamped in Memento Black, then coloured with Pecan Pie Stampin’ Blends, paired beautifully with Summer Splash eggs and Pretty Peacock leaves. The Textured Notes dies added depth, and by double-cutting, I turned the original rectangle shape into a square for added versatility. A Basic White layer embossed with the Soft Waves embossing folder creates even more dimension, while the finishing touches—rhinestones and a white and silver bow—add a bit of shimmer and elegance.
This card is perfect for special occasions – like the arrival of a new baby. Be sure to check out the Hand Stamped Sentiments blog for more colour challenge inspiration and to share your own creation!
Looking for more crafting fun? Join myApril Card Class to learn new techniques and create beautiful projects. Spots are limited, so reserve yours today!
Happy Festive Friday, crafters! This week, I’m highlighting some incredible Last Chance Items—the Iconic Imagery Stamp Set and Dies, paired beautifully with the brand-new Textured Notes Dies. Plus, these Last Chance Items are on sale for a steal of a deal, so don’t miss out! 🎄✨
How It Came Together:
This card came to life with layers of Textured Notes dies in Pretty Peacock, Lost Lagoon, and Pool Party, creating an ombré look that’s both modern and festive. The Iconic Imagery Stamp Set adds extra charm with its snowflake images, stamped in Pretty Peacock Ink on Pool Party cardstock before being die cut for dimensional details.
The sentiment, “Celebrate the Season,” is heat-embossed in white on Lost Lagoon for a bold, frosty focal point. To tie everything together, I added Pretty Peacock sequins for a touch of holiday sparkle!
Why You’ll Love This Card:
✔ Easy to recreate with bold, geometric details ✔ Perfect for creating modern and elegant holiday cards ✔ Features a sophisticated ombré color palette
🔗 Shop Last Chance Deals and Online Exclusives in MY SHOP or click on the items below:
💬 Would you try this color palette for your holiday cards? Let me know in the comments!
Click here to shop my online store. Click here to access & view the current catalogs. Click here to subscribe to Thanks for hopping by! Make sure to pin this post for future reference and share it with your crafty friends.those fun Paper Pumpkin kits of creativity! Click here for more information about joining my Online Monthly Technique Club. Earn even more goodies by joining a club! Click here to learn more about joining my Ink Pad Pals Team. Get the MOST rewards including a discount on future products! Follow me on social media! I share regularly on Pinterest, YouTube, and Facebook! Please subscribe to my newsletter, too!Click here and enter your email. When you include your birthday you will even be added to my birthday card mailing list 🙂
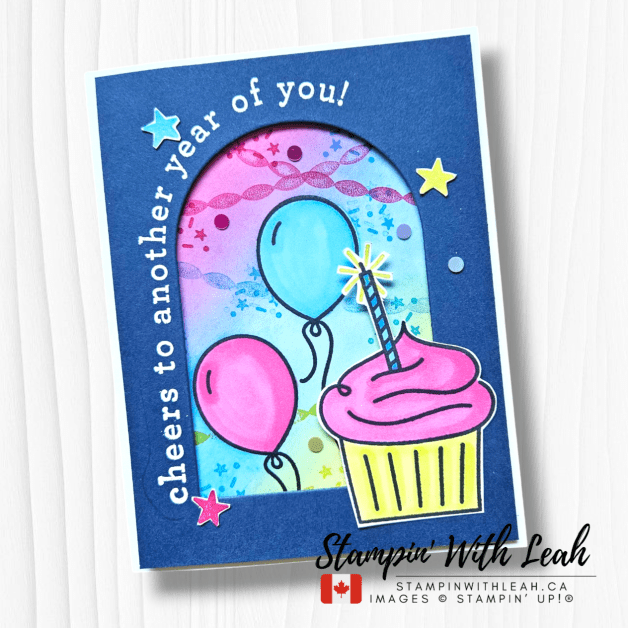
I’m so excited to share this vibrant birthday card I created during my recent Facebook Live. It features the Arched Wishes Stamp Set and Everyday Arch Dies, both of which are Online Exclusives. This design was inspired by Loni Spendlove’s gorgeous card, which you can see here.
What makes this card truly special is the masked balloon technique I used to create the colorful blended background. By combining stamped images with a soft ink-blended effect, I added depth and a festive vibe perfect for any celebration.
Card Details: 🎈 Masked balloons and a rainbow blended background 🧁 Bright, cheerful cupcake stamped and fussy cut 🌟 Added embellishments for extra sparkle and fun
Watch the Tutorial! 🎥
Want to see how this card came together? Watch the replay of my Facebook Live on YouTube.
📌 Love this design? Be sure to check out my blog for more inspiration and get my class tutorials! → StampinWithLeah.ca
If you’d like to recreate this design or try your own twist, shop the products used:
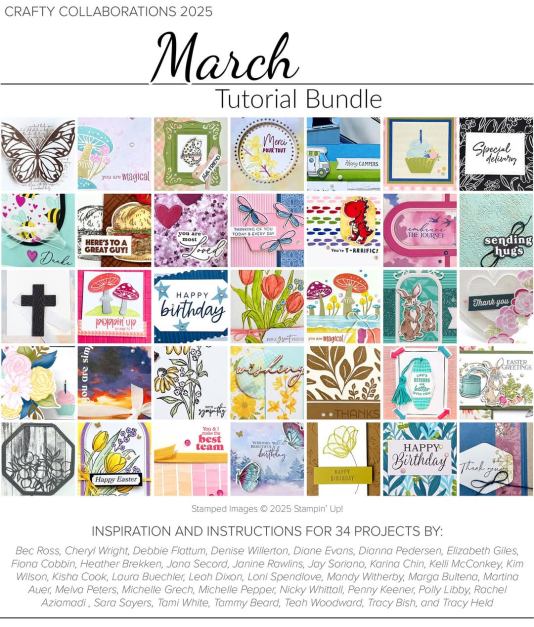
Some of the supplies used on this card are part of the new collection of Online Exclusive products for March 2025, and I have a special PDF guide showcasing all the latest must-have crafting goodies! Grab it here:
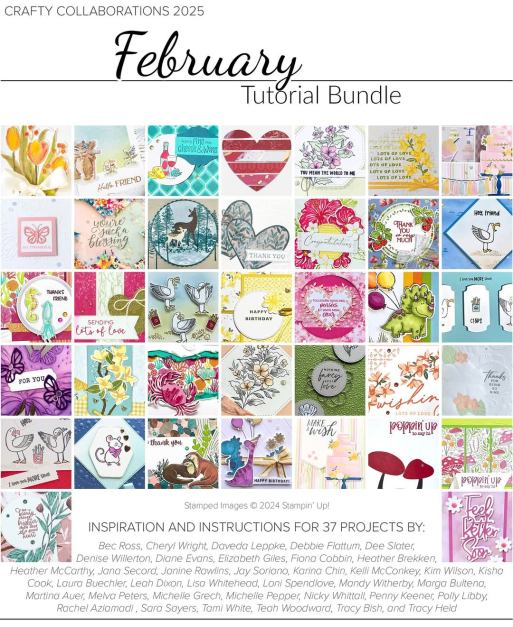
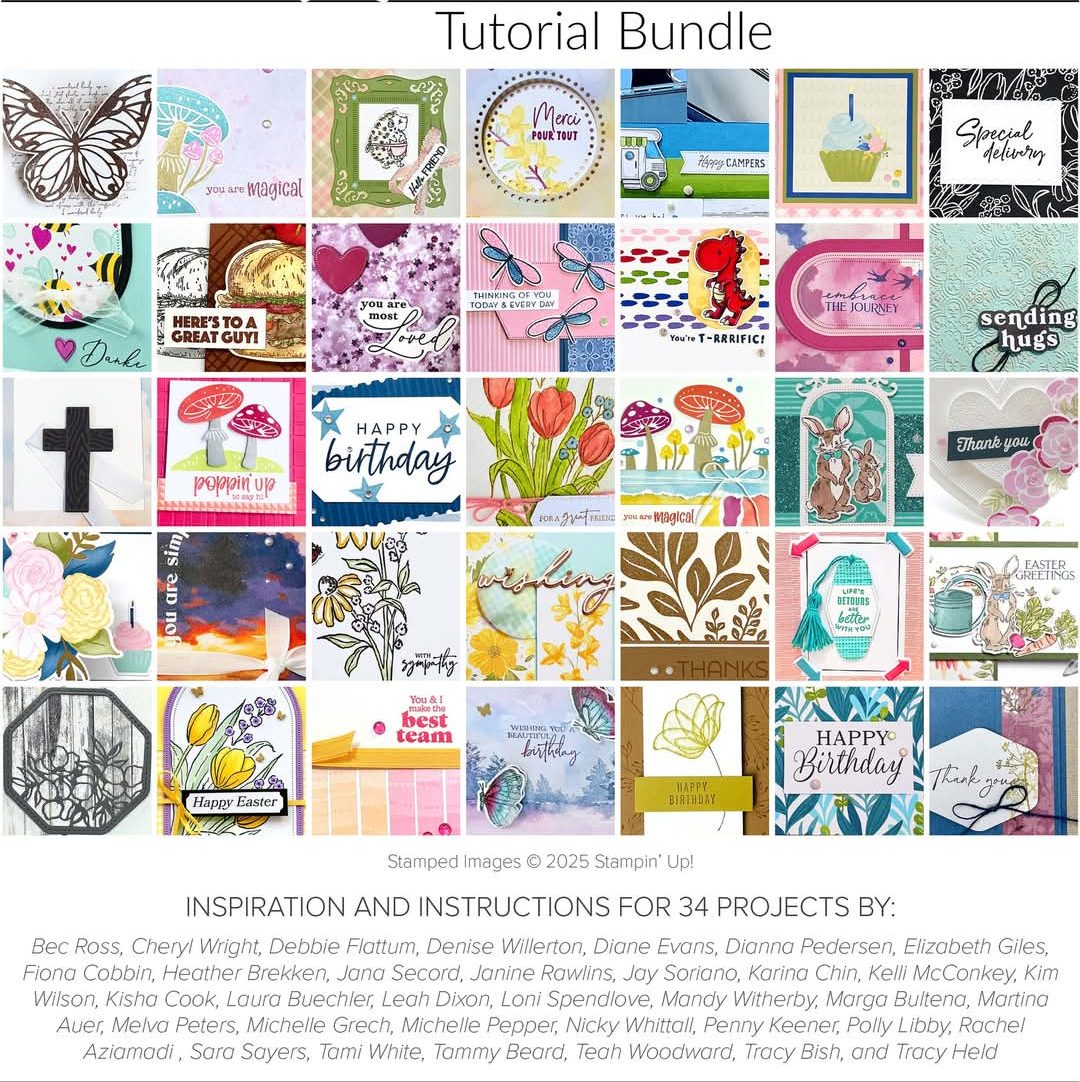
When you place a $65+ order, you’ll receive the 34 project March Crafty Collaborations Tutorial PDF as an extra gift from me! This is an amazing resource full of creative inspiration from many talented demonstrators. Want to stay updated on all my events and classes? Subscribe to my newsletter!
Join Me for More Stamping Fun
Looking for more ways to craft? Here’s how you can connect with me:
In-Person Events: If you’re local to Port Coquitlam, join me for Coffee and Cards or book your own card class.
Online Events: Birthday Celebrations Card Class (you can still register – although packages may arrive late)
Ink Pad Pals Team: Join my team for exclusive perks, discounts, and a supportive crafting community.
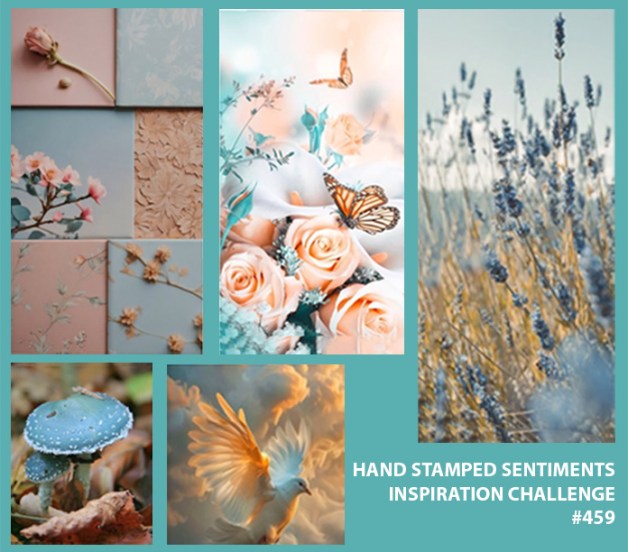
It’s time for a new Hand Stamped Sentiments Inspiration Challenge(#HSS459), and this one is full of dreamy pastels, elegant florals, and soft natural textures! The colour palette of Lost Lagoon, Petal Pink, and Peach Pie creates the perfect delicate, nature-inspired design.
For this challenge, I created a Bandstand Fold Card, a fun interactive design I learned from Dawn Griffith. This fold adds an elegant touch, making it perfect for showcasing beautiful layers of Designer Series Paper.
Here’s the Inspiration Image for This Week’s Challenge:
Here’s the card I created:
Project Details:
The soft floral design from Perennial Lavender DSP combined with the stunning Thoughtful Designs Specialty DSP creates a layered, ethereal effect, mirroring the inspiration challenge perfectly. The Labelled With Love Bundle adds the perfect focal point with a sentiment framed by delicate stamped florals and soft pastel butterflies.
Want to create this card? I’m including a full list of supplies below as well as a printable instruction sheet with full measurements and step-by-step details so you can recreate this Bandstand Fold yourself!
Now it’s your turn! Create a project inspired by the #HSS459 mood board and share it with us. We can’t wait to see how this beautiful color palette and nature-inspired theme spark your creativity!
📌 Pin this project for later! 📩 Subscribe for more card tutorials and inspiration!
Special Offers and Upcoming Events
When you use my host code (6HQ62V46) this month, I’ll send you a link to an exclusive 34 Project Tutorial Bundle as a thank-you!
Looking for more crafting fun? Join myApril Card Class to learn new techniques and create beautiful projects. Spots are limited, so reserve yours today!
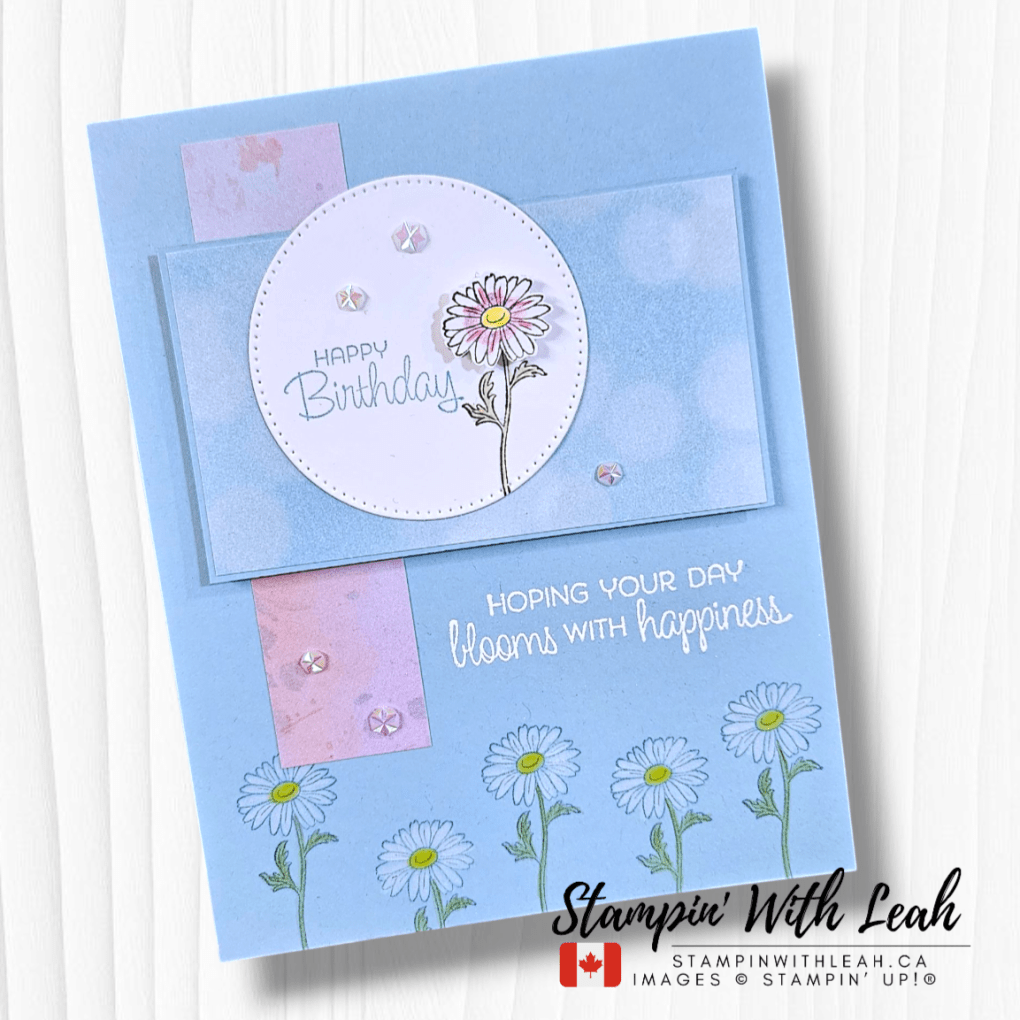
Hello, crafty friends! 🌸 Welcome to this month’s Coast to Coast Creators Blog Hop, where we’re diving into a beautiful colour challenge that has us feeling all the soft, dreamy vibes of spring! This month, I created a delicate floral card using the Year of Flowers stamp set paired with the Beautiful Bokeh DSP—and I am in love with the results! 💙💜💖
This challenge pushed me outside my comfort zone in the best way, and I hope it inspires you to create something fresh and fun! Let’s take a closer look at my project.
🌿 Card Details & Supplies Used
For this card, I wanted to highlight the stunning colours in this challenge while keeping the design soft and elegant. I chose:
✅ Stamp Set: Year of Flowers ✅ Paper: Beautiful Bokeh DSP, Basic White Cardstock ✅ Colours: Balmy Blue Ink, Watercolour Pencils (White, Melon Mambo, Old Olive and Daffodil Delight) ✅ Embellishments: Iridescent Faceted Gems and Basics Wow! Embossing Powder
Here’s how I put it all together:
1️⃣ Background: I layered two soft Beautiful Bokeh DSP panel onto my card base. The blurred effect of this paper adds so much depth without extra work—so dreamy! ✨At the bottom of the card I stamped the daisy in Balmy Blue Ink and lightly coloured with Watercolour Pencils.
2️⃣ Focal Image: I stamped the daisy from Year of Flowers in Memento Black ink and coloured it with Watercolour Pencils for a soft effect.
3️⃣ Sentiment: The sentiment “Happy Birthday” (also from Year of Flowers) is stamped in Balmy Blue Ink. The larger sentiment is stamped in Versamark and heat embossed with white embossing powder.
4️⃣ Finishing Touches: A few Iridescent Faceted Gems complete the look!
🎨 Playing with Colour Challenges
Colour challenges are a great way to step out of your creative routine and explore new palettes! This one had me mixing soft pastels in a way I hadn’t tried before, and I love how they blend together so seamlessly.
What do you think of this colour combo? Would you try it?
💙 Hop Along for More Inspiration!
The Coast to Coast Creators team has created even more stunning projects with this colour challenge! Be sure to hop along and check out all the inspiration. Click below to visit each creator’s post!
And if you love this card, be sure to save it on Pinterest for later! 💕
Want to recreate this card? You can shop all the supplies I used in my online store!
Here is a list of supplies needed to create these card.
Be sure to subscribe to my newsletter for more crafting tips, project ideas, and updates on upcoming events or check out everything at linktr.ee/stampinwithleah.
Live in Canada, don’t have a demonstrator? Contact me to get a catalogue or find out why right now is a great time to join my team.
A perk to ordering with me in the month of March is that with any order over $65cdn, you will receive an amazing 30+ project Tutorial Bundle from me as a thank you. Just use the host code below. As a member of my team you get free access to this Tutorial Bundle.
You can see all the benefits of joining my team (the Ink Pad Pals) by clicking the image below.
Click here to shop my online store. Click here to access & view the current catalogs. Click here to subscribe to Thanks for hopping by! Make sure to pin this post for future reference and share it with your crafty friends.those fun Paper Pumpkin kits of creativity! Click here for more information about joining my Online Monthly Technique Club. Earn even more goodies by joining a club! Click here to learn more about joining my Ink Pad Pals Team. Get the MOST rewards including a discount on future products! Follow me on social media! I share regularly on Pinterest, YouTube, and Facebook! Please subscribe to my newsletter, too!Click here and enter your email. When you include your birthday you will even be added to my birthday card mailing list 🙂
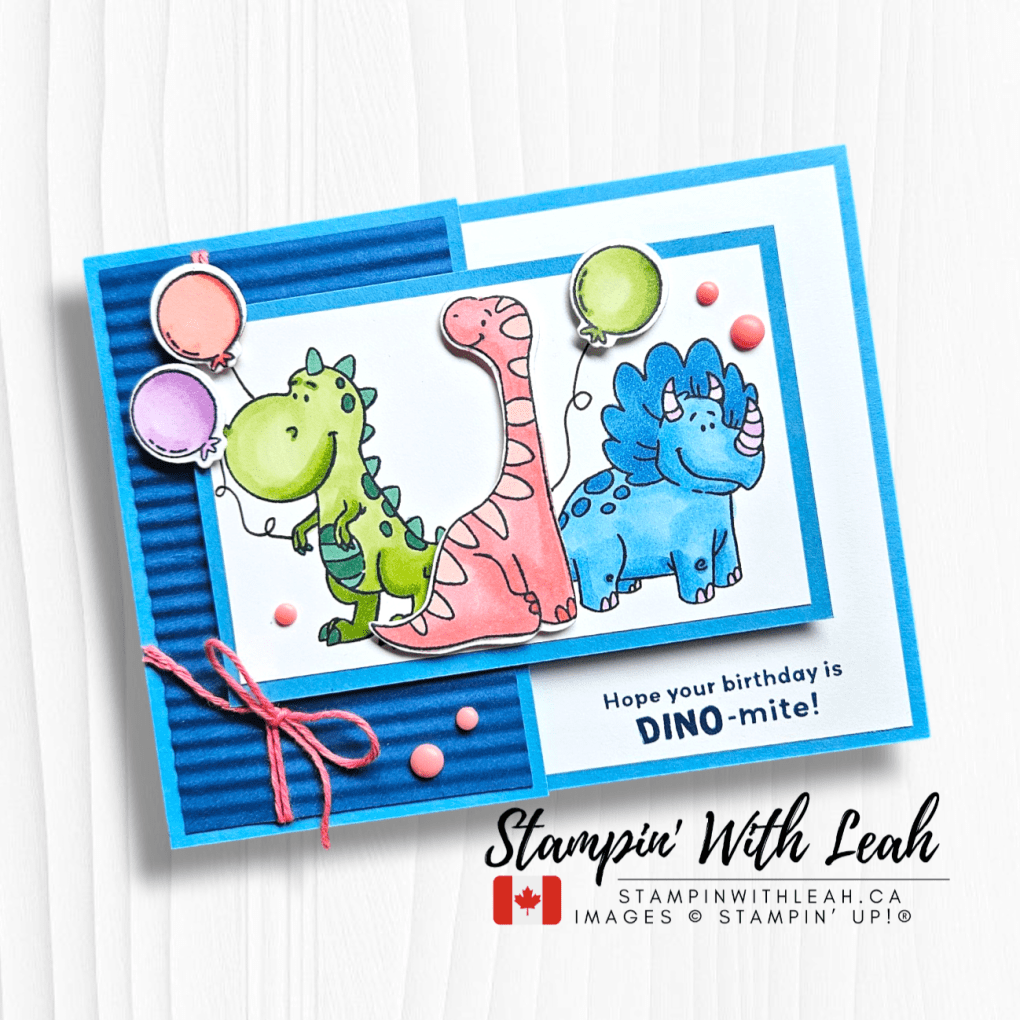
Who’s ready for a DINO-mite birthday card? 🦕💖 This bright and cheerful card features the Darling Dinos Bundle and some brand-new Online Exclusives from Stampin’ Up! such as the Mini Corrugated 3D Embossing Folder and the Pack Your Bags Three Pack Twine. Plus, I used a unique popped up panel layout to make it extra special! Keep reading for all the details and a video for step-by-step instructions!
Card Details & Supplies
Here’s a closer look at the products I used to bring this card to life:
✅ Darling Dinos Bundle – The cutest dino stamps and coordinating dies! ✅ Mini Corrugated 3D Embossing Folder – Adds amazing texture to the background. ✅ Pack Your Bags Twine – A perfect finishing touch. ✅ Rainbow Adhesive Back Dots – Because every card needs a little embellishing! ✅ Stampin’ Blends in Granny Apple Green/Shaded Spruce, Azure Afternoon/Fresh Freesia, and Pretty in Pink/Calypso Coral for smooth blending!
Fun Popped Up Panel Layout: A Unique Twist!
This isn’t your typical card—here’s how I created the popped up panel effect:
📏 Card Base: Start with a 4-1/4” x 11” piece of cardstock, scored at 5-1/2”. ✂️ Modify the Front Panel: Cut the front panel in half at 2-3/4” and turn it sideways to create the pop-up effect! 🌟 Decorate & Assemble: Layer your stamped & die-cut dinos, add textured details with the Mini Corrugated 3D Embossing Folder, and finish with twine and embellishments!
💡 Pro Tip: This layout is a great way to add dimension and interest while still fitting in a standard envelope!
Watch the Tutorial! 🎥
Want to see exactly how I made this card? Watch my Facebook Live replay where I walk you through all the steps!
📌 Love this design? Be sure to check out my blog for more inspiration and get my class tutorials! → StampinWithLeah.ca
Supplies You’ll Need:
If you’d like to recreate this card exactly as shown, here are the supplies used:
Some of the supplies used on this card are part of the new collection of Online Exclusive products for March 2025, and I have a special PDF guide showcasing all the latest must-have crafting goodies! Grab it here:
When you place a $65+ order, you’ll receive the 30+-project March Crafty Collaborations Tutorial PDF as an extra gift from me! This is an amazing resource full of creative inspiration from many talented demonstrators. Want to stay updated on all my events and classes? Subscribe to my newsletter!
Join Me for More Stamping Fun
Looking for more ways to craft? Here’s how you can connect with me:
In-Person Events: If you’re local to Port Coquitlam, join me for Coffee and Cards or book your own card class.
Online Events: Birthday Celebrations Card Class (you can still register – although packages may arrive late)
Ink Pad Pals Team: Join my team for exclusive perks, discounts, and a supportive crafting community.
Are you ready to add beautiful texture to your handmade cards? My latest Card Class to Go features the Kiss of Texture stamp set, an incredible Online Exclusive that makes it easy to create layered, textured designs with just ink and stamps—no extra tools required!
How It Works: When you place an order of $60 or more (before tax & shipping) in my online store using host code – 6HQ62V46, you’ll receive the Kiss of Texture Card Class to Go Kit and PDF instructions absolutely FREE! This kit includes pre-cut cardstock, embossed layers, ribbon bits, and embellishments to create six stunning cards (two each of three designs). You will need your own stamps, ink and adhesives at home.
✨ Bonus Gift! Place an order of $75+, and you’ll also receive a pack of Antique Pearls embellishments as my thank-you gift!
📅 Order Deadline: March 11th, 2025 📦 Kits ship by: March 15th, 2025
In the video I mentioned a Door Prize Draw , you can enter now until Friday (March 7th, 2025) in the evening (PT)! Good Luck!
Card Designs in This Class:
🌸 Floral Elegance Card – A lovely mix of Bubble Bath and Pebbled Path, this design highlights how texture stamps can add depth to floral elements.
🌸 Textured Circles Card – A playful combination of Bubble Bath, Pretty in Pink soft layered circles on a Pebbled Path card base and a touch of Pretty in Pink ribbon.
💙 Soft & Subtle Texture Card – Featuring a pastel rainbow of Flirty Flamingo, Lemon Lolly, Balmy Blue, and Fresh Freesia textured with Pebbled Path, this card showcases the “kissing” technique beautifully for a soft, layered look.
Note: Pebbled Path is an In Color that will retire this year! These colors often sell out fast, so don’t wait to grab yours!
Supplies You’ll Need:
If you’d like to recreate these cards exactly as shown, here are the key supplies used:
Although you will receive the pieces of cardstock, embossed pieces, embellishments and die cut pieces that you need to create the 6 cards- but you may want to order some of the items below to create even more cards at home:
Exciting news! Stampin’ Up! has just released a new collection of Online Exclusive products for March 2025, and I have a special PDF guide showcasing all the latest must-have crafting goodies! Grab it here:
Don’t live in Canada? You can still get the tutorial for this class from my Crafting Class Tutorials To Go section of my blog. You’ll find this tutorial and many others there for purchase.
Bonus Gift! 🎁
When you place a $65+ order, you’ll also receive the 30+-project March Crafty Collaborations Tutorial PDF as an extra gift! This is an amazing resource full of creative inspiration from many talented demonstrators. Want to stay updated on all my events and classes? Subscribe to my newsletter!
Join Me for More Stamping Fun
Looking for more ways to craft? Here’s how you can connect with me:
In-Person Events: If you’re local to Port Coquitlam, join me for Coffee and Cards or book your own card class.
Online Events: Birthday Celebrations Card Class (today is the last day to register!!)
Ink Pad Pals Team: Join my team for exclusive perks, discounts, and a supportive crafting community.
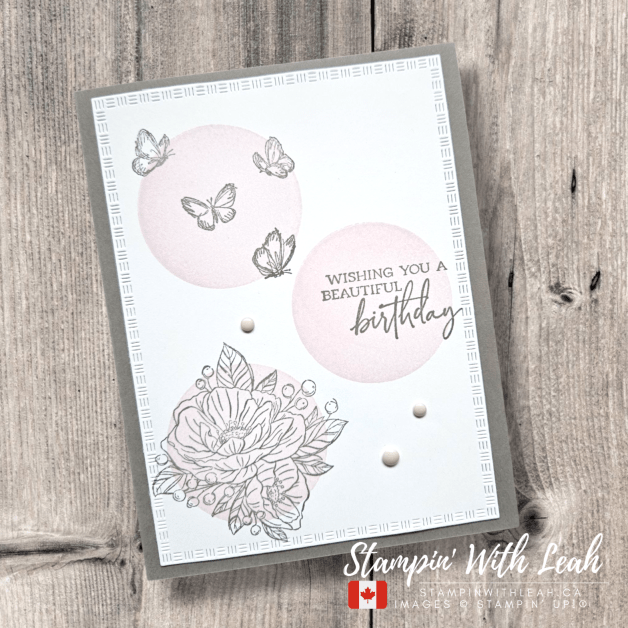
Losing a beloved pet is never easy. Whether it’s a loyal dog who’s been by your side for years or a sweet cat who loved curling up in your lap, pets truly are family. When a friend or loved one experiences that kind of loss, a handmade card can be a thoughtful way to show you care.
This week’s Throwback Thursday project is a heartfelt pet sympathy card featuring a mix of brand-new and retired products. I love pulling out old favorites and giving them new life alongside fresh supplies! Let’s take a closer look at how I created these soft and comforting designs.
A Blend of New and Retired Favorites
For these cards, I started with a Thick Basic White card base with a Petal Pink layer—such a warm and soothing colour. The background features the not-yet-releasedTextured Note Dies, adding a subtle frame that elevates the whole design. The gorgeous rainbow arch? That’s the Everyday Arches Dies (an Online Exclusive!), layered in Flirty Flamingo, Gold Foil, and Basic White to create a warm yet elegant look.
I tucked in some fluffy clouds using the Adventurous Sky Dies, stamped a small but meaningful sentiment from the Keeping Tabs Stamp Set, and added a sprinkle of Petal Pink Foiled Gems for just a touch of shine.
But here’s where the throwback element comes in—I reached for my retired cat and dog punches to create the sweet silhouettes at the base of the card. While these punches are no longer available, they were the perfect finishing touch, and if you have them in your stash, this is a great way to use them!
A Handmade Card That Brings Comfort
There’s something truly special about a handmade card during difficult times. While it can’t take away the loss, it lets someone know they’re not alone. Whether you use the same supplies or swap in similar ones from your craft collection, I hope this design inspires you to create and share a little kindness.
Want to make your own? Many of the products I used are available now in my online store (with the exception of the upcoming Textured Note Dies and the retired dog and cat punches—stay tuned for those!). You can shop the Everyday Arches Dies, Adventurous Sky Dies, Keeping Tabs Stamp Set, and more to create your own version of this heartfelt card.
I’d love to hear—do you enjoy using a mix of old and new in your crafting? Let me know in the comments! And if you decide to make a pet sympathy card, tag me on social media so I can see your beautiful creations. 💕
Sale-A-Bration is Still On!
Did you know that Sale-A-Bration is happening now? You can earn free Stampin’ Up! products for every $75 CAD you spend until February 28th! It’s the perfect time to stock up on crafting essentials while getting amazing freebies. Don’t miss out on these exclusive rewards!
Special Offers and Upcoming Events
When you use my host code (NSTY47WP) this month, I’ll send you a link to an exclusive 37 Project Tutorial Bundle as a thank-you!
Upcoming Card Classes
Looking for more crafting fun? Join my March Card Class or April Card Class to learn new techniques and create beautiful projects. Spots are limited, so reserve yours today!
Looking for more ways to enjoy stamping? Join my Stampin’ Up! Ink Pad Pals team!
Save 20%+ on your orders.
Get free access to my monthly card class tutorials.
Enjoy our monthly team meetings with stamping fun and collaboration.
During Sale-a-bration there are even more perks to joining.
Option 1 – Join our crafting community as a new demonstrator and you can get $165 CAD worth of products PLUS a choice of two Stampin’ Write Marker Assortments AND the Handmade Designs Cling Stamp Set, an exclusive stamp set designed to work with the markers. That’s a $294 CAD value all for just $135 CAD!
Option 2 – Join Stampin’ Up! during Sale-A-Bration and get $165 CAD worth of product PLUS an additional $41 CAD worth of product of your choice when you join for $135 CAD. That’s a $206 CAD value!
Contact me to find out more or see the details on my website.
Live in Canada and don’t have a demonstrator? Contact me to get a catalog and find out why now is the perfect time to join my team!
Leave a comment below and don’t forget to subscribe to this blog for more crafty inspiration!
Happy crafting, and I can’t wait to see your creations! 💕
Click here to shop my online store. Click here to access & view the current catalogs. Click here to subscribe to those fun Paper Pumpkin kits of creativity! Click here for more information about joining my Online Monthly Technique Club. Earn even more goodies by joining a club! Click here to learn more about joining my Ink Pad Pals Team. Get the MOST rewards including a discount on future products! Follow me on social media! I share regularly on Pinterest, YouTube, and Facebook! Please subscribe to my newsletter, too!Click here and enter your email. When you include your birthday you will even be added to my birthday card mailing list 🙂


")


")
 Designer Series Paper")


")


 Sheer Ribbon")


")


")


 Specialty Designer Series Paper")
 Designer Series Paper")
")


 Designer Series Paper")
")


")


")


 Bordered Ribbon")


")