Christmas Crafting with Stitched Season DSP | Case the Catalog Challenge

I am officially in full Christmas crafting mode! 🎄 With autumn Christmas fairs on the horizon, I’ve been pulling out my Christmas Designer Series Paper and looking for ways to create cards that are festive, eye-catching—and don’t take forever to make.

This card was created for this week’s Stampin’ Through the Catalog Challenge, and I had so much fun putting it together.

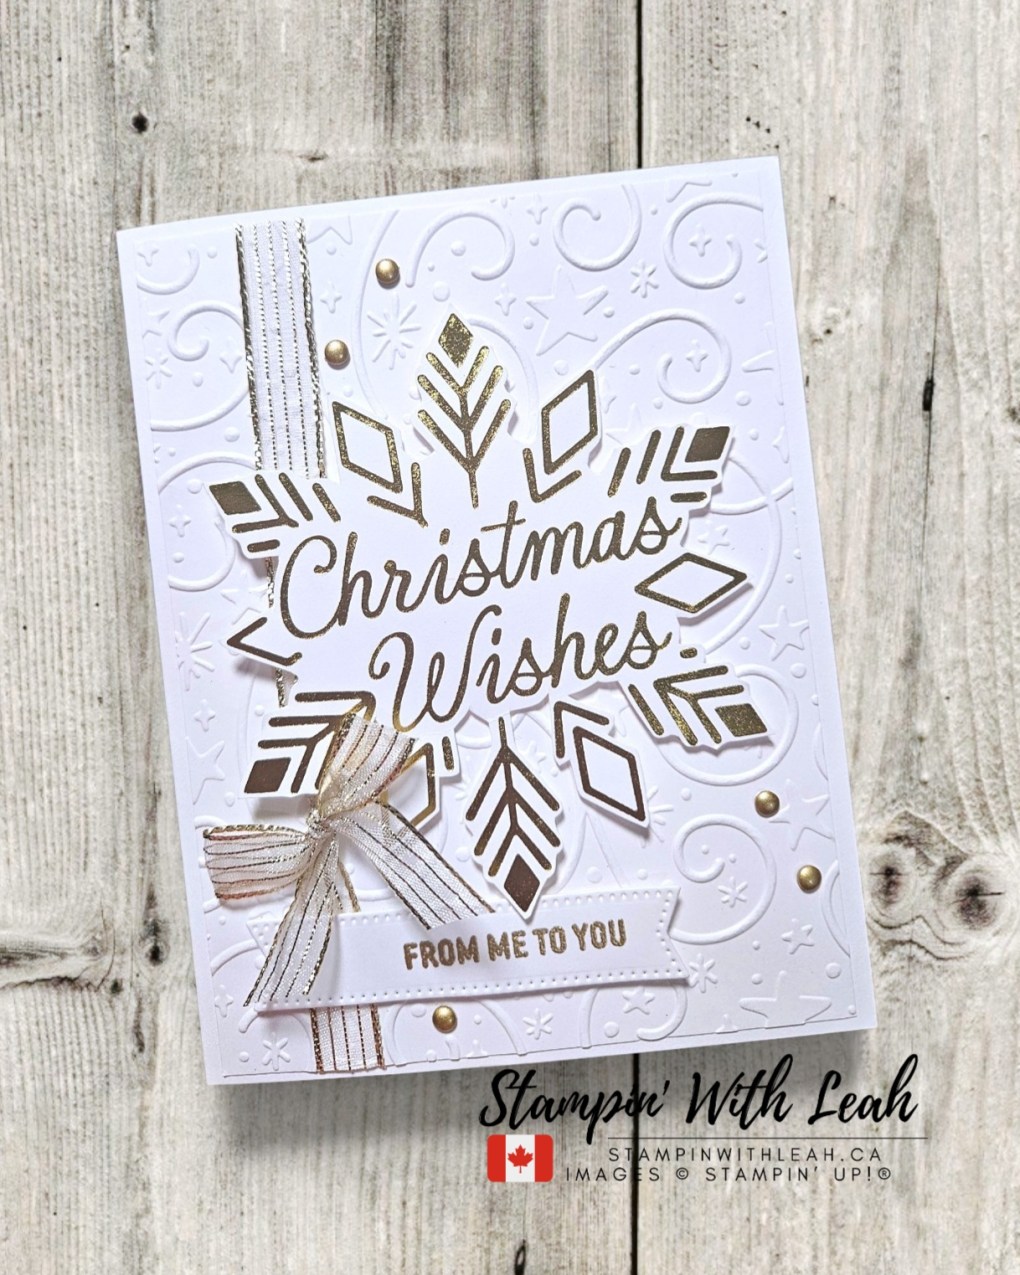
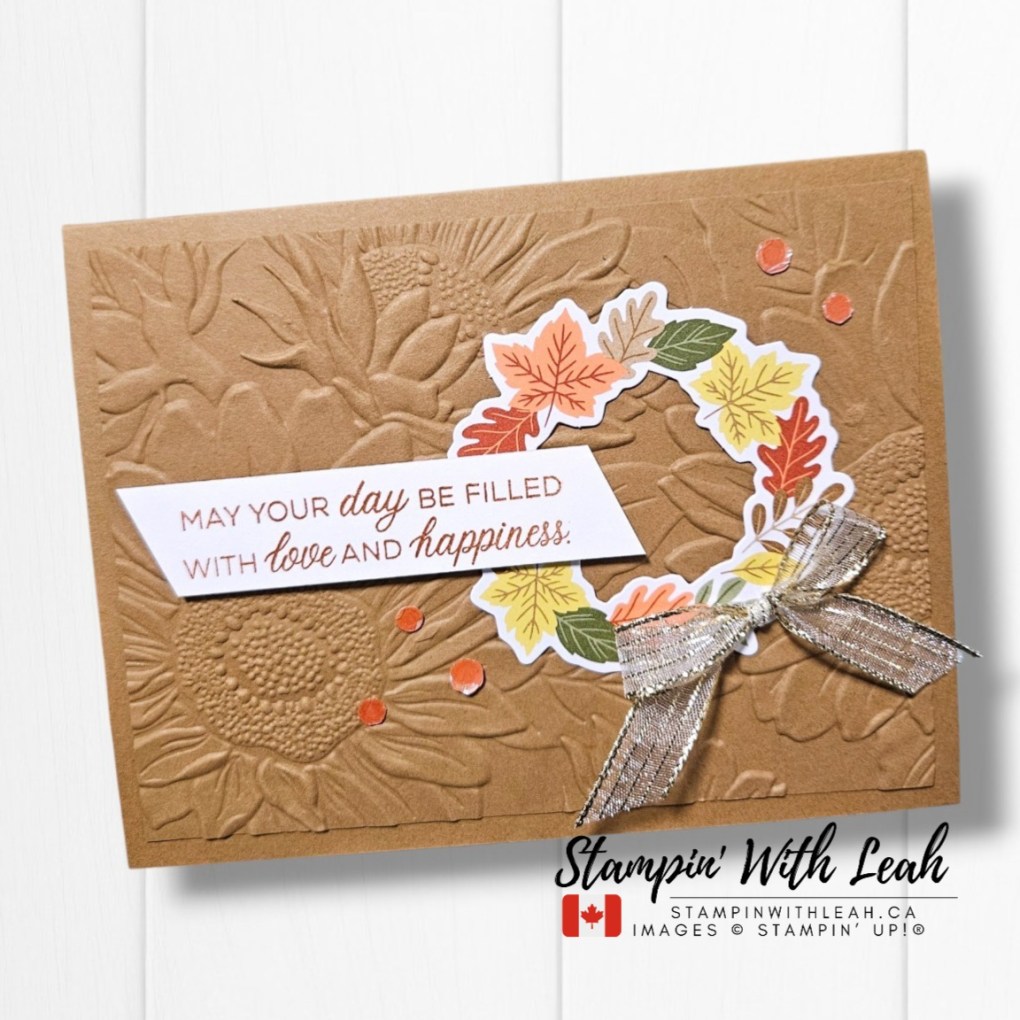
For this design, I used A Stitched Season Designer Series Paper for almost all of the colour and pattern. I cut four rectangles (1-1/2″ X 2-1/4″ each) for the background and then used the third-smallest Everyday Arches Die to cut the little bird from a different DSP piece as the focal piece.

No stamping or colouring involved. Just a bit of die cutting, layering and embellishing!

The card base got some extra texture from the Textured Tree Rings 3D Embossing Folder, which adds just the right amount of interest without competing with all those pretty patterns.

And then there’s that Happy Christmas sentiment! ❤️

I used the new Magical Christmas Hot Foil Die with red hot foil and the reverse plate. I LOVE how bold and shiny it is—and how quickly hot foiling can take a card from simple to special.

The Magical Christmas Hot Foil Die is part of the upcoming September–December collection. Customers will be able to order it beginning in September, but if you’re someone who just can’t wait to get your hands on the new products, you can join my Stampin’ Up! team today and take advantage of the demonstrator preorder.

That means you can choose all the preorder products you want and start creating before the new catalogue even goes live. If you’ve ever thought about joining my team, this is a pretty fun time to do it!

I’m really enjoying being in full Christmas mode already. There is something very satisfying about getting a head start on those Christmas fair projects—and this card is a perfect example of why I love Designer Series Paper so much.

🛒 Want to recreate this card?
Head to my online store or contact me today to grab your supplies.

Stampin’ Up! Supplies Used:

(*PLUS – the Magical Christmas Hot Foil Die, Red hot foil and the Reverse plate – available Sept 2026 or now when you sign up to join my team)


📦 Want to create more with me? I’m currently in the middle of a reno so not offering in person classes, however I have some upcoming online classes and all my past classes are available here:

Looking for even more ways to enjoy stamping? Join my Stampin’ Up! Ink Pad Pals team! We have a new Starter Kit! You get an fabulous Welcome Box and a $165 coupon for just $135.

  • Save 15%+ on your orders.
  • Get free access to my monthly card class tutorials.
  • Enjoy our monthly team meetings with stamping fun and collaboration.

Contact me to find out more or see the details on my website.

❤️ Thanks for crafting with me!
Be sure to subscribe so you never miss a Festive Friday!

Click here to shop my online store.
Click here to access & view the current catalogs.
Click here to subscribe to those fun Paper Pumpkin kits of creativity!
Click here for more information about joining my Online Monthly Technique Club. Earn even more goodies by joining a club!
Click here to learn more about joining my Ink Pad Pals Team. Get the MOST rewards including a discount on future products!
Follow me on social media! I share regularly on PinterestYouTube, and Facebook!
Please subscribe to my newsletter, too! Click here and enter your email. When you include your birthday you will even be added to my birthday card mailing list 🙂


Festive Friday: A Little Woodland Christmas Magic

It’s Festive Friday, and I have another Christmas card to share with you! 🎄

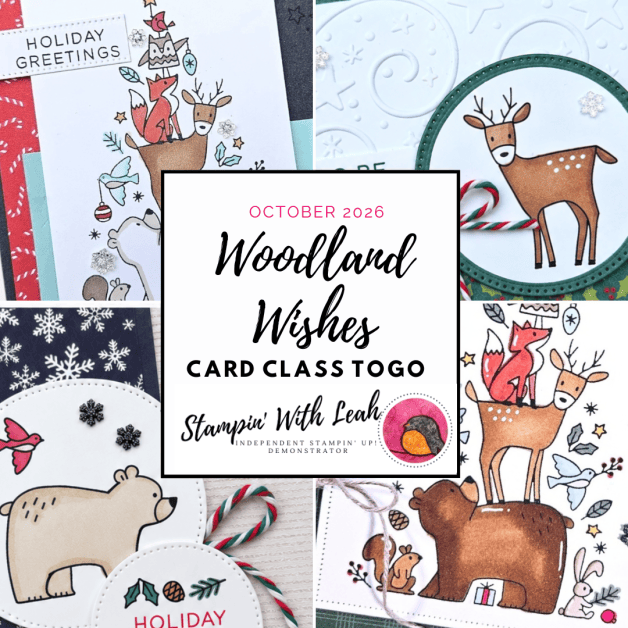
I’m having so much fun getting a head start on my Christmas cards, and this one features the adorable Woodland Wishes stamp set.

There’s something about these little woodland images that makes me smile. The sweet little deer and bird make such a fun focal point, and I love how the soft, natural colours give this card a cozy woodland feel.

A pop of Real Red from the sentiment and those fun Adhesive-Backed Christmas Berries adds just enough Christmas colour, while the little bit of Linen Thread gives it a rustic finishing touch.

This one feels like Christmas in the woods to me—and I think it would be a fun design to make multiples of for your Christmas card stash!

🛒 Want to recreate this card?
Head to my online store or contact me today to grab your supplies.

Stampin’ Up! Supplies Used:

(*PLUS – the Adhesive-backed Christmas Berries – available Sept 2026 or now when you sign up to join my team)


A couple of important reminders!

Today is the LAST DAY of Double Stampin’ Rewards!

For today only, qualifying orders (minimum $25 CDN) earn 20% in Stampin’ Rewards instead of the usual 10%. If you’ve had something on your wish list, today is the day!

And don’t forget about the 15% Designer Series Paper & Cardstock Sale on select papers, happening through August 31. Perfect timing if you’re starting to build your stash for fall and Christmas crafting!

📦 Want to create more with me? I’m currently in the middle of a reno so not offering in person classes, however I have some upcoming online classes and all my past classes are availble here:

Looking for even more ways to enjoy stamping? Join my Stampin’ Up! Ink Pad Pals team! We have a new Starter Kit! You get an fabulous Welcome Box and a $165 coupon for just $135.

  • Save 15%+ on your orders.
  • Get free access to my monthly card class tutorials.
  • Enjoy our monthly team meetings with stamping fun and collaboration.

Contact me to find out more or see the details on my website.

❤️ Thanks for crafting with me!
Be sure to subscribe so you never miss a Festive Friday!

Click here to shop my online store.
Click here to access & view the current catalogs.
Click here to subscribe to those fun Paper Pumpkin kits of creativity!
Click here for more information about joining my Online Monthly Technique Club. Earn even more goodies by joining a club!
Click here to learn more about joining my Ink Pad Pals Team. Get the MOST rewards including a discount on future products!
Follow me on social media! I share regularly on PinterestYouTube, and Facebook!
Please subscribe to my newsletter, too! Click here and enter your email. When you include your birthday you will even be added to my birthday card mailing list 🙂


Throwback Thursday: A Christmas Card with Half Full

I’m using some of my free time over summer break to get a little ahead for Christmas Craft Fairs this fall, so apparently it’s time to start making Christmas cards! 🎄

For this Throwback Thursday, I pulled out an old favourite: the Half Full stamp set by Stampin’ Up!

I love revisiting older stamp sets and giving them a fresh look with newer colours and products.

For this card, I went with a mostly white colour palette for a soft, snowy Christmas feel. The embossed background adds lots of texture while keeping the overall design clean and elegant.

The wine glasses are coloured with Golden Glow, while the holly leaves feature Peaceful Pine and a pop of Real Red for the berries.

And then there are those gorgeous Adhesive-Backed Snowflakes! These are a pre-order product that I was able to play with early as a Stampin’ Up! demonstrator. They’ll be available to customers in September, so I thought this card would make a fun little sneak peek.

I love how those tiny snowflakes add just a touch of sparkle without taking away from the focal point.

Of course, a card made with the Half Full stamp set needs a little humour!

There’s another fun sentiment waiting inside this card — because sometimes the inside deserves just as much attention as the front. 😉

I’m hoping to build up a good collection of cards for my Christmas Craft Fairs over the next few months. Getting started during summer break means I can enjoy the process instead of scrambling to make everything at the last minute!

And while I’m definitely not ready to give up summer yet… I have to admit, Christmas crafting is pretty fun. 🎄

Are you a Christmas crafter who starts early, or do you wait until the Christmas spirit hits?

Looking for even more ways to enjoy stamping? Join my Stampin’ Up! Ink Pad Pals team! We have a new starter kit offer. See all the details by clicking the image below.

  • Save 15%+ on your orders.
  • Get free access to my monthly card class tutorials.
  • Enjoy our monthly team meetings with stamping fun and collaboration.

Contact me to find out more or see the details on my website.

➡️ Subscribe to my newsletter at https://mailchi.mp/f1809c680508/subscribe-to-stampin-with-leahs-newsletter


GDP561 Colour Challenge: A Soft and Pretty Christmas Card

I’m playing along with this week’s Global Design Project colour challenge #GDP561, and I have to say… these colours are just gorgeous together!

This week’s colour combination is Hydrangea Hue, Soft Sea Foam and Peaceful Pine, and I thought they would make a beautiful, slightly unexpected Christmas colour palette.

I’m trying to get a head start on my Christmas cards, so I reached for the simple and lovely Hope Love & Joy Bundle to create this sweet Christmas card.

I started with a Hydrangea Hue card base, stamped with Hydrangea Hue snowflakes for a subtle background. I then added a torn strip of Soft Sea Foam cardstock across the middle, with a Basic White strip layered over top.

For the sentiment, I stamped the J and Y in Peaceful Pine, while the “O” is actually a Hydrangea Hue snowflake! I love finding little ways to make a simple card more interesting.

A bit of Peaceful Pine ribbon and the gorgeous Adhesive-Backed Snowflakes finished it off perfectly.

And speaking of those snowflakes… they are currently available through the Stampin’ Up! demonstrator preorder! If you’d love early access to new products and all sorts of fabulous preorder goodies, I’d love to have you join my team, Ink Pad Pals – see below for more details.

I hope this Global Design Project colour challenge inspires you to create your own project for #GDP561. Grab your crafting supplies and join the fun!

✂️Supplies Used:


Looking for even more inspiration and more ways to enjoy stamping? Join my Stampin’ Up! Ink Pad Pals team!
The join process has changed a bit (sign up for $135 and get a $170 coupon) and you now get a fantastic Welcome Box too. The perks once you’ve joined remain the same.

  • Save 20%+ on your orders.
  • Get free access to my monthly card class tutorials.
  • Enjoy our monthly team meetings with stamping fun and collaboration.

Contact me to find out more or see the details on my website.


August 2026 Paper Pumpkin – Kindred Greetings Unboxing & Alternative Card

There’s something special about a handmade card with a simple, heartfelt message, and the Kindred Greetings Paper Pumpkin kit is all about sending those thoughtful cards when they’re needed most.

If you missed my Paper Pumpkin live, the replay is now available! In the video, I walk through the three beautiful card designs included in the kit and share some tips for putting them together.

Watch the Kindred Greetings Paper Pumpkin Replay, I’ll walk you through assembling all three of the kit’s original card designs while sharing tips and tricks along the way. Whether you have the kit sitting on your craft table waiting to be opened or you’re simply looking for some card-making inspiration, I hope you’ll enjoy crafting along with me!

🎥 Watch the replay here:

For my alternate design, I stepped away from the original card layouts and paired the Kindred Greetings stamp set with the Botanical Expressions Dies.

I used the Botanical Expressions Dies to create the beautiful leafy background, keeping the overall card soft and monochromatic. I also added a little 2nd generation stamping speckle to the stamped foliage and some delicate butterfly embellishments for a touch of whimsy.

I love how changing the layout and adding a few supplies from my craft room can give a Paper Pumpkin kit a completely different look!

The card base was scored at 2″, 3-1/8″, 5-3/8″ and 6-1/2″ (which is not what I said in the video – sorry!)

One of my favourite things about Paper Pumpkin is discovering just how far you can stretch the supplies. You can follow the instructions exactly as designed, or use the exclusive stamps and pieces to create something completely your own.

Get More From Your Paper Pumpkin Kit

If you’re a Paper Pumpkin subscriber with me, you also receive an exclusive PDF tutorial featuring the Paper Pumpkin stamp set. It’s my way of giving you even more ideas for using those exclusive stamps long after you’ve finished the kit projects.

If you’re in Canada and would like to subscribe to Paper Pumpkin with me, I’d love to have you join my Paper Pumpkin community! This tutorial includes additional card ideas you can recreate long after the kit is finished. We usually send out the PDF after the 25th.

📦 Subscribe to Paper Pumpkin here:
Paper Pumpkin Subscription

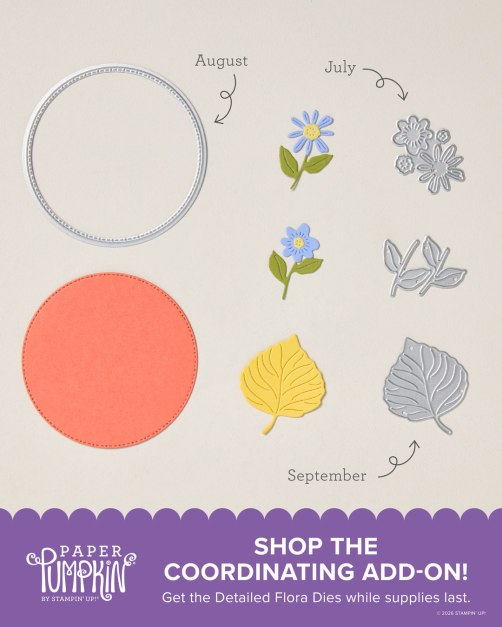
Detailed Flora Dies Add-On (Item 168664| $18.00)
Don’t forget the coordinating add-on dies! The Detailed Flora Dies work perfectly with this month’s Kindred Greetings Kit, plus the past July and upcoming September kits.

📌 Refill Kits:
Around the 24th of each month, Stampin’ Up! often releases refill kits (while supplies last). Grab yours here: https://www.stampinup.ca/categories/subscriptions/paper-pumpkin/refills-past-kits-add-ons?demoid=2189587

👉 Watch the replay, subscribe today, and get ready for all the beautiful crafting Paper Pumpkin brings each month!


Coming in September:

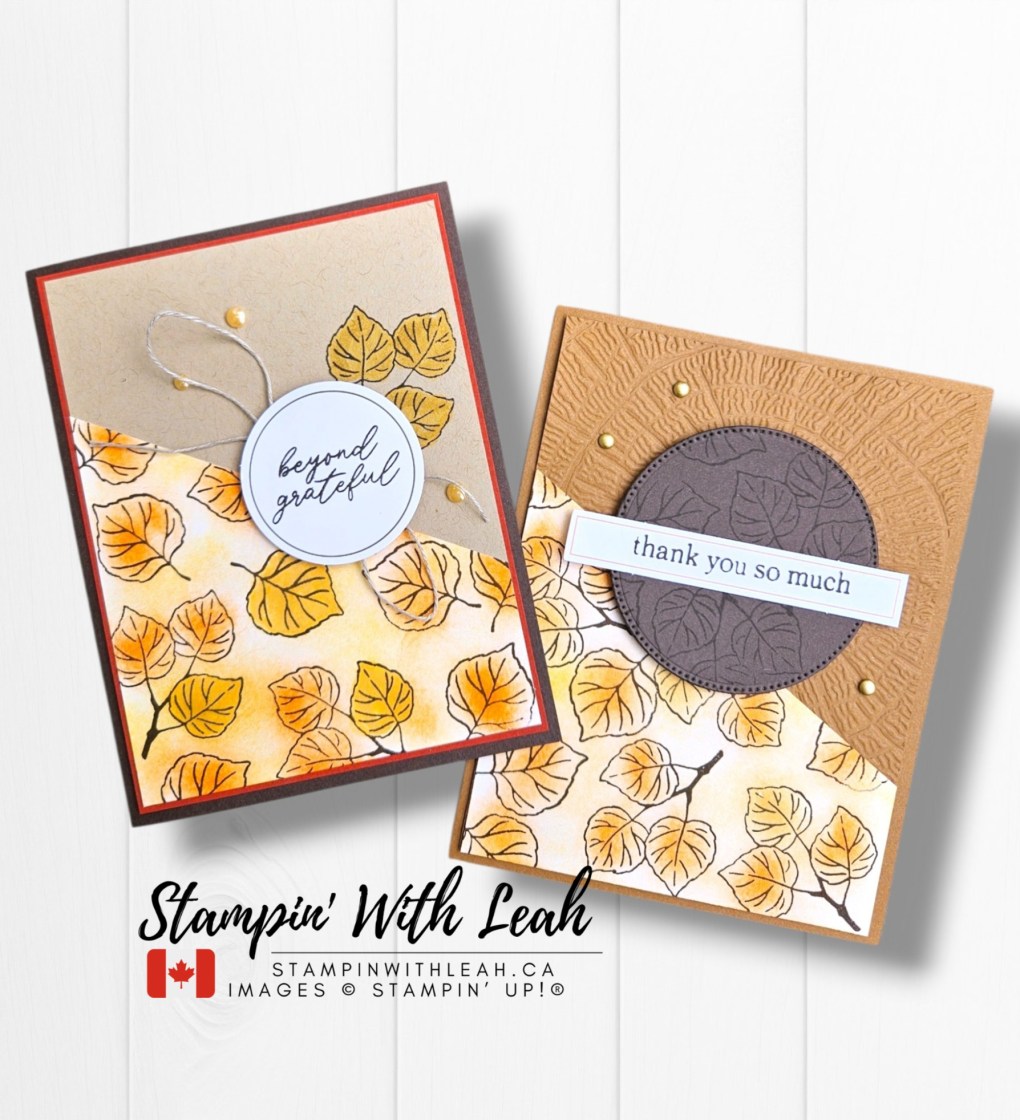
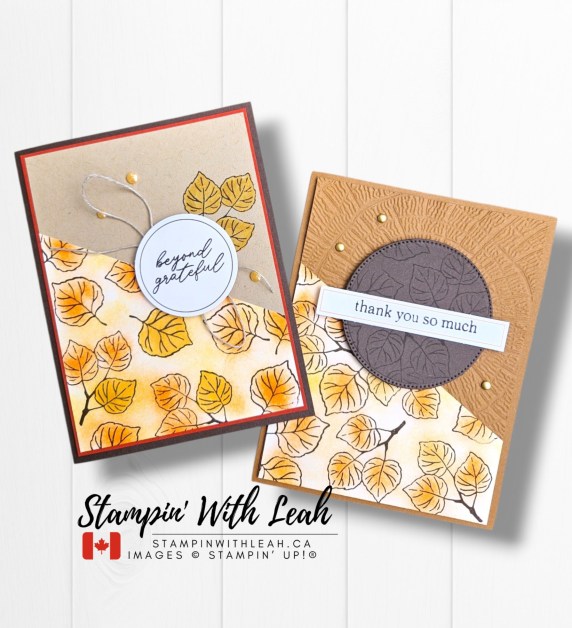
SEPTEMBER: Aspens of Gratitude
Subscribe August 11–September 10
Share your gratitude with cards featuring beautifully hand-painted woodland designs.
• Makes 10 cards: 5 each of 2 designs with 10 coordinating envelopes
• Precut paper pieces
• Self-adhesive gem embellishments
• Coordinating colours: Basic Black, Cajun Craze, Daffodil Delight, Early Espresso
(Stampin’ Spot), Golden Glow, Gray Granite, Mossy Meadow, Pumpkin Pie

Customize your cards with two stamp options for each label!

💌 Ready to craft with Paper Pumpkin?

Paper Pumpkin is a wonderful way to receive a little creative inspiration in your mailbox each month—with coordinated supplies, exclusive stamps, and projects ready to create. Paper Pumpkin subscriptions are flexible — you can pause or cancel anytime — making it an easy and fun way to keep creativity flowing all year long.
👉 Subscribe here : https://www.stampinup.ca/products/paper-pumpkin-subscription/?demoid=2189587
You won’t want to miss these beautifully coordinated kits!

Looking for some more fun stamping experiences in person or online? Check out my calendar of events or contact me to book your own card class.

NO CLASSES CURRENTLY DUE TO RENOVATIONS

You can also sign up for my newsletter (link below) so you don’t miss out on any of my events. ***I WILL have info about an online stamp camp coming soon!***

Thanks so much for crafting along with me, and be sure to leave a comment if you try one of these designs!

Click here to shop my online store.
Click here to access & view the current catalogs.
Click here to subscribe to those fun Paper Pumpkin kits of creativity!
Click here for more information about joining my Online Monthly Technique Club. Earn even more goodies by joining a club!
Click here to learn more about joining my Ink Pad Pals Team. Get the MOST rewards including a discount on future products!
Follow me on social media! I share regularly on PinterestYouTube, and Facebook!
Please subscribe to my newsletter, too! Click here and enter your email. When you include your birthday you will even be added to my birthday card mailing list 🙂


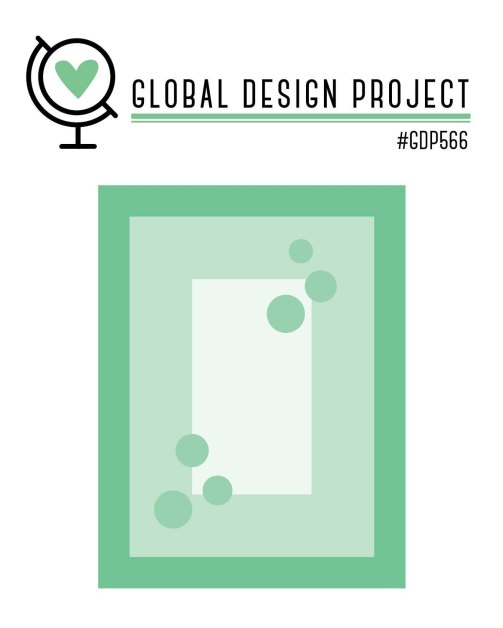
Global Design Project #560 | Balloon Celebration Card

I love a good sketch, so this week’s Global Design Project #560 CASE the Designer Challenge was right up my alley!

For this challenge, we were given a beautiful card by Charlet Mallett to CASE. Rather than copying all of the details, I grabbed the sketch and used the layout as my starting point—my favourite way to design a card!

I wanted my version to feel bright, happy and summery, so I pulled out the Balloon Festoon and Exciting Times stamp sets along with the colourful Beautiful Ordinary Life Designer Series Paper.

The striped Designer Series Paper was the perfect choice for this card. I love how the vertical stripes create a fun background while still leaving plenty of room for the balloons and greeting to stand out.

For the focal point, I stamped and layered three colourful balloons and added the balloon strings underneath. The large circle behind the balloons helps bring all of the elements together and gives the balloons a place to “float.”

I also added a little texture with the coordinating ribbon tied across the card and finished it with a few colourful embellishments. The “Let’s celebrate” greeting was the perfect sentiment for this cheerful design.

One of my favourite things about CASE challenges is seeing how a card can evolve when you take the layout from someone else’s design and then make it your own. The original card may be the inspiration, but the colours, products and little details can completely change the finished project.

This would make such a fun birthday card, celebration card or party card—and the bright colours make it perfect for summer celebrations!

I hope you’ll check out the original card by Charlet and see how the Global Design Project Design Team interpreted the challenge. Then grab the sketch, put your own spin on it and join the challenge #GDP560!

✂️Supplies Used:


Want to stamp with me?

Make sure to sign up for my newletter (link below) to learn about upcoming classes. I am in the middle of moving right now – so no classes this summer. I can’t wait to host you all in my new studio once the move is complete.


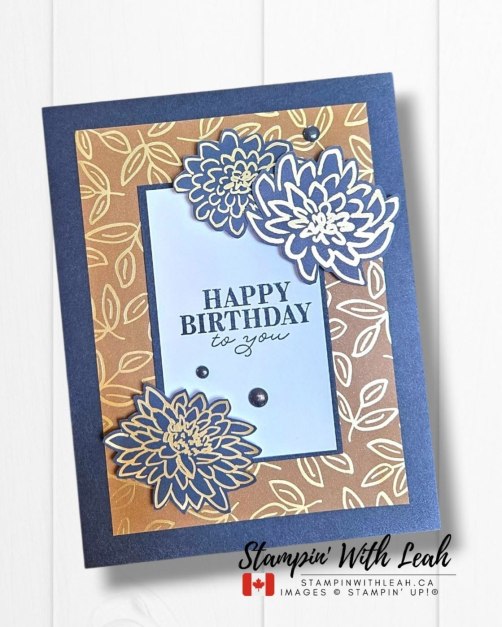
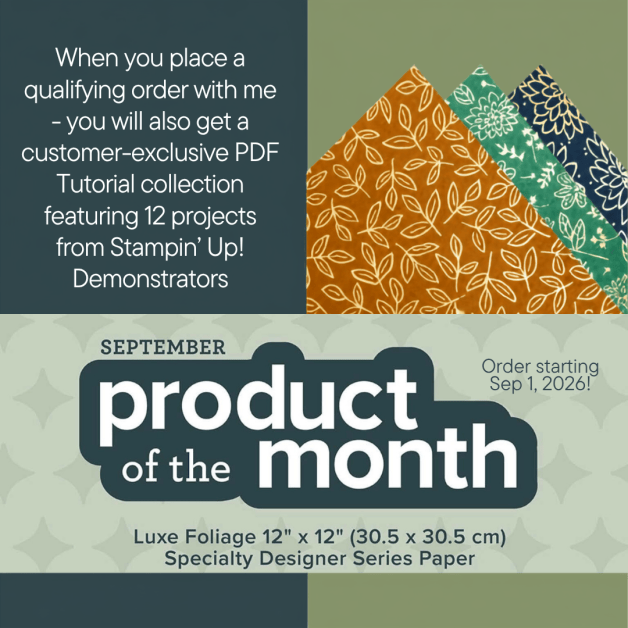
August 2026 Product of the Month – Glow of Harvest 12X12 Specialty DSP

Each month, Stampin’ Up! features an exclusive Product of the Month, giving you the opportunity to purchase a featured product at a special price with a qualifying order. I love this promotion because it’s a great way to add something special to your craft room while saving money!

For August, the featured product is the gorgeous Glow of Harvest 12″ x 12″ Specialty Designer Series Paper (Item #168598) and this month’s Product of the Month promotion begins on August 4th! . With a $100 CAD order (before tax and shipping), you can add this beautiful paper pack to your order for just $7 CAD! It’s a great time to stock up on your favourites and earn this month’s special offer!

This stunning paper collection celebrates the beauty of autumn with warm, rich colours and an elegant pearlized finish that adds a subtle shimmer to every project.

Each package includes:

  • 12 sheets (2 each of 6 single-sided designs)
  • Pearlized finish for extra shine
  • Acid and lignin free (photo-safe)
  • Coordinating colours: Cajun Craze, Crumb Cake, Early Espresso, Golden Glow and Pecan Pie.

The smaller patterns make beautiful card backgrounds, while the larger designs are perfect for fussy cutting to create eye-catching focal points on your cards, scrapbook layouts and other paper crafting projects.

My Bonus Gift for You

When you order the Glow of Harvest Specialty Designer Series Paper as part of Stampin’ Up!’s August Product of the Month promotion through me, I’ll send you my exclusive PDF Tutorial featuring projects created with this beautiful paper.

It’s my way of helping you get even more inspiration from your new supplies! Instead of wondering what to make first, you’ll have step-by-step project ideas ready to inspire your creativity.

This tutorial includes:

  • 12 inspiring projects
  • A variety of card styles
  • Creative layouts and ideas
  • Inspiration to help you get the most from this beautiful die

It’s available exclusively to my customers as my thank you for supporting my business.

Inspiration from the Stampin’ Up! Design Team

Need a little creative inspiration? The talented Stampin’ Up! Design Team has created some beautiful projects featuring the Glow of Harvest Specialty Designer Series Paper, showcasing just how versatile this collection really is.

From elegant cards to sweet 3D projects, these samples highlight the gorgeous pearlized finish, warm autumn colour palette, and a variety of ways to use both the larger focal designs and the smaller all-over patterns.

Take a look at these beautiful projects below!

I hope these ideas inspire you to create something beautiful with your own Glow of Harvest Designer Series Paper. Whether you CASE one of these designs or put your own creative spin on them, this paper makes it easy to create stunning projects.


How to Get Yours

It’s easy!

  • Place a $100 CAD (before tax and shipping) order during August.
  • Add the Glow of Harvest Specialty Designer Series Paper to your cart for just $7 CAD.
  • Complete your order through my online store.
  • I’ll send you my exclusive PDF tutorial so you can start creating beautiful projects with your new paper.

Don’t Miss Out!

This special offer is available only during August and while supplies last, so if this paper has caught your eye, be sure to grab it before it’s gone.

I can’t wait to see what you create with this gorgeous fall collection!

Click here to shop my online store.
Click here to access & view the current catalogs.
Click here to subscribe to those fun Paper Pumpkin kits of creativity!
Click here for more information about joining my Online Monthly Technique Club. Earn even more goodies by joining a club!
Click here to learn more about joining my Ink Pad Pals Team. Get the MOST rewards including a discount on future products!
Follow me on social media! I share regularly on PinterestYouTube, and Facebook!
Please subscribe to my newsletter, too! Click here and enter your email. When you include your birthday you will even be added to my birthday card mailing list 🙂


Global Design Project #558 | Woodland Wishes Christmas Card

This week, I’m excited to share my card for the Global Design Project #558 Sketch Challenge! I always enjoy sketch challenges because they provide a great starting point while still leaving plenty of room for creativity.

For my card, I stayed true to the sketch by creating four square panels and filling each one with an adorable woodland scene using the Woodland Wishes stamp set. Each little critter brings its own personality to the card—from the curious hedgehog and graceful deer to the sweet fox and friendly bear.

To add interest without overwhelming the design, I embossed the Basic White card base with the festive Swirls of Magic embossing folder. The subtle texture creates the perfect whimsical backdrop while allowing the stamped images to remain the focal point.

I coloured all of the images with Stampin’ Blends and layered each panel onto Old Olive cardstock to help define the layout from the sketch. A bold Real Red sentiment banner stretches across the centre, tying all four panels together while adding the perfect pop of Christmas colour. I finished the card with a few rhinestones for just a touch of sparkle.

One of my favourite things about sketch challenges is seeing how everyone interprets the same design differently. It’s amazing how a simple sketch can inspire so many unique creations!

I hope you’ll visit the Global Design Project to see all of the Design Team inspiration and then join us by creating your own version of this week’s sketch. I can’t wait to see what you make!

✂️Supplies Used:

Basic White 8 1/2" X 11" Thick Cardstock [ 159229 ]Basic White 8 1/2″ X 11″ Thick Cardstock [159229]Basic White 8 1/2" X 11" Cardstock [ 166780 ]Basic White 8 1/2″ X 11″ Cardstock [166780]Old Olive 8-1/2" X 11" Cardstock [ 100702 ]Old Olive 8-1/2″ X 11″ Cardstock [100702]Real Red 8-1/2" X 11" Cardstock [ 102482 ]Real Red 8-1/2″ X 11″ Cardstock [102482]Woodland Wishes Photopolymer Stamp Set (English) [ 168243 ]Woodland Wishes Photopolymer Stamp Set (English) [168243]
Basic Black Hybrid Stampin' Pad [ 166648 ]Basic Black Hybrid Stampin’ Pad [166648]Versamark Pad [ 102283 ]Versamark Pad [102283]Basics Wow! Embossing Powder [ 165679 ]Basics Wow! Embossing Powder [165679]Heat Tool (Us And Canada) [ 129053 ]Heat Tool (Us And Canada) [129053]Embossing Additions Tool Kit [ 159971 ]Embossing Additions Tool Kit [159971]
Golden Glow Stampin’ Blends Combo Pack [ 167682 ]Golden Glow Stampin’ Blends Combo Pack [167682]Crumb Cake Stampin' Blends Combo Pack [ 154882 ]Crumb Cake Stampin’ Blends Combo Pack [154882]Pecan Pie Stampin’ Blends Combo Pack [ 161674 ]Pecan Pie Stampin’ Blends Combo Pack [161674]Calypso Coral Stampin' Blends Combo Pack [ 154881 ]Calypso Coral Stampin’ Blends Combo Pack [154881]Old Olive Stampin' Blends Combo Pack [ 154892 ]Old Olive Stampin’ Blends Combo Pack [154892]
Real Red Stampin' Blends Combo Pack [ 154899 ]Real Red Stampin’ Blends Combo Pack [154899]Darling Duckling Stampin’ Blends Combo Pack [ 165288 ]Darling Duckling Stampin’ Blends Combo Pack [165288]Rhinestone Basic Jewels [ 144220 ]Rhinestone Basic Jewels [144220]Swirls Of Magic Embossing Folder [ 168179 ]Swirls Of Magic Embossing Folder [168179]Multipurpose Liquid Glue [ 110755 ]Multipurpose Liquid Glue [110755]
Stampin' Dimensionals [ 104430 ]Stampin’ Dimensionals [104430]Stampin' Cut & Emboss Machine [ 149653 ]Stampin’ Cut & Emboss Machine [149653]Paper Trimmer [ 152392 ]Paper Trimmer [152392]Basic White Medium Envelopes [ 159236 ]Basic White Medium Envelopes [159236]

Want to stamp with me?

Make sure to sign up for my newletter (link below) to learn about upcoming classes. I am in the middle of moving right now – so no classes this summer. I can’t wait to host you all in my new studio once the move is complete.


July 2026 Paper Pumpkin – Hooray for Birthdays Unboxing & Alternative Card

Birthday cards are one of those things you can never have too many of, and this month’s Paper Pumpkin kit delivers in the best way! If you missed my live class, don’t worry—the replay is now available so you can craft along whenever it’s convenient for you.

The July 2026 Hooray for Birthdays Paper Pumpkin kit is packed with everything you need to create nine interactive stand-up easel birthday cards (three each of three unique designs), complete with coordinating envelopes, holographic foil accents, printed stickers, precut die-cut pieces, and an exclusive stamp set.

One of my favourite things about Paper Pumpkin is that every month offers something a little different, and these easel cards are such a fun surprise for the recipient. They display beautifully and make birthdays feel even more special.

In this replay, I’ll walk you through assembling all three of the kit’s original card designs while sharing tips and tricks along the way.

🎥 Watch the replay here:

Of course, I couldn’t resist creating an alternate design! Although – I did modify it a bit after the video by adding a banner ( see in the phot below).

One of my favourite parts of Paper Pumpkin is stretching the supplies beyond the instructions. Using the exclusive stamps and elements from the kit, I created a bonus birthday card with a completely different layout to show just how versatile these monthly kits can be.

Bonus tutorial when you subscribe with me

Aside from following my blog to get inspiration – when you subscribe to Paper Pumpkin with me, you’ll also receive a FREE PDF tutorial with exclusive alternate card ideas focused on the Paper Pumpkin stamp set. This tutorial includes additional card ideas you can recreate long after the kit is finished. We usually send out the PDF after the 25th.

📦 Subscribe to Paper Pumpkin here:
Paper Pumpkin Subscription

Detailed Flora Dies Add-On (Item 168664| $18.00)
Don’t forget the coordinating add-on dies! The Detailed Flora Dies work perfectly with this month’s Hooray for Birthdays Kit, plus the upcoming August and September kits.

📌 Refill Kits:
Around the 24th of each month, Stampin’ Up! often releases refill kits (while supplies last). Grab yours here: https://www.stampinup.ca/categories/subscriptions/paper-pumpkin/refills-past-kits-add-ons?demoid=2189587

👉 Watch the replay, subscribe today, and get ready for all the beautiful crafting Paper Pumpkin brings each month!


Coming in August

AUGUST: Kindred Greetings
Subscribe July 11–August 10
Send timeless, understated cards with heartfelt messages of comfort and appreciation.
• Makes 9 cards: 3 each of 3 designs with 9 coordinating envelopes
• Precut paper pieces and intricate precut card fronts
• Gray and white twine
• Coordinating colours: Basic Gray, Calypso Coral, Gray Granite (Stampin’ Spot),
Lost Lagoon, Petal Pink, Pool Party

Card bases and envelopes have a textured, linen-like feel.

💌 Ready to craft with Paper Pumpkin?

Paper Pumpkin subscriptions are flexible — you can pause or cancel anytime — making it an easy and fun way to keep creativity flowing all year long.
👉 Subscribe here : https://www.stampinup.ca/products/paper-pumpkin-subscription/?demoid=2189587
You won’t want to miss these beautifully coordinated kits!

Looking for some more fun stamping experiences in person or online? Check out my calendar of events or contact me to book your own card class.

NO CLASSES CURRENTLY DUE TO RENOVATIONS

You can also sign up for my newsletter (link below) so you don’t miss out on any of my events. ***I WILL have info about an online stamp camp coming soon!***

Thanks so much for crafting along with me, and be sure to leave a comment if you try one of these designs!

Click here to shop my online store.
Click here to access & view the current catalogs.
Click here to subscribe to those fun Paper Pumpkin kits of creativity!
Click here for more information about joining my Online Monthly Technique Club. Earn even more goodies by joining a club!
Click here to learn more about joining my Ink Pad Pals Team. Get the MOST rewards including a discount on future products!
Follow me on social media! I share regularly on PinterestYouTube, and Facebook!
Please subscribe to my newsletter, too! Click here and enter your email. When you include your birthday you will even be added to my birthday card mailing list 🙂


Interactive Gift Card Holder with Lovely Arrangements | Stampin’ Up!

This week’s challenge at Global Design Project is all about COLOUR—and it’s such a fresh and cheerful combo!

When I saw this colour palette, I immediately thought flowers! The beautiful blooms from the Lovely Arrangements stamp set were the perfect choice. I stamped the flowers in Smoky Slate and coloured the flowers in Flirty Flamingo, paired them with stamped off Coastal Cabana leaves, and added touches of Lemon Lolly in the flower centres to tie all three challenge colours together.

For the focal point, I layered the flowers over a vellum circle cut using one of the dies from the Spotlight on Nature Dies. I love how the detailed edge frames the floral arrangement while adding just the right amount of texture. The soft patterned panel (cut from the Beautiful Ordinary Life 12X12 DSP) along the left side of the card provides a subtle backdrop without competing with the flowers, and a few Shimmering Dots add the perfect finishing touch.

The real surprise is inside!

This card opens to reveal a pop-out gift card holder, making it a beautiful way to give a gift card while still including space to write a personal message. I always love creating cards that are both pretty and practical, and this fold is sure to bring a smile when it’s opened. You can find all the dimensions and a how to video below.


The inspiration for this fun fold came from creativemomentsbyg.com . Once you know the fold, the possibilities are endless!

Card Details

I suggest using one colour of cardstock to create these 4 pieces. This will be the basic pop out card structure.

  • 5-1/2″ X 4-1/4″ mat
  • 8-1/2″ X 4-1/4″, scored at 4-1/4″ card
  • 6-1/4″ x 3-7/8″, scored at 3/4″ pop out piece
  • 4-3/4″ X 1-1/4″, scored at 1/4″ on each side, strip across the back of the card

Then you can use DSP and cardstock to decorate as desired. Here’s what I used to decorate this card:

  • 1-3/4″ x 5-1/2″ piece of Beautiful Ordinary Life 12X12 DSP on the card front
  • 4″ x 1″ piece of Beautiful Ordinary Life 12X12 DSP on the card back
  • 4″ x4″ piece of Beautiful Ordinary Life 12X12 DSP on the inside
  • 3″ X 3-5/8″ piece of Beautiful Ordinary Life 12X12 DSP as the gift card/cash mat
  • 3″X3″ piece of vellum to cut a Spotlight on nature circle die
  • Scraps to stamp and die cut the flowers and leaves.
  • optional – 3″ X 3″ Basic White square for inside the card and scraps for more flowers and leaves.

Watch here to see how these pieces go together to create a very special gift/cash holder for someone in your life:

Here’s a full list of my supplies.


I hope this project inspires you to try this week’s colour combination or to create your own interactive card. Be sure to stop by the Global Design Project and check out all the amazing inspiration from the Design Team, then join us by sharing your own creation!

Want to stamp with me?

Make sure to sign up for my newletter (link below) to learn about upcoming classes. I am STILL in the middle of renovating right now – so no classes this summer. I can’t wait to host you all in my new studio once the move is complete.