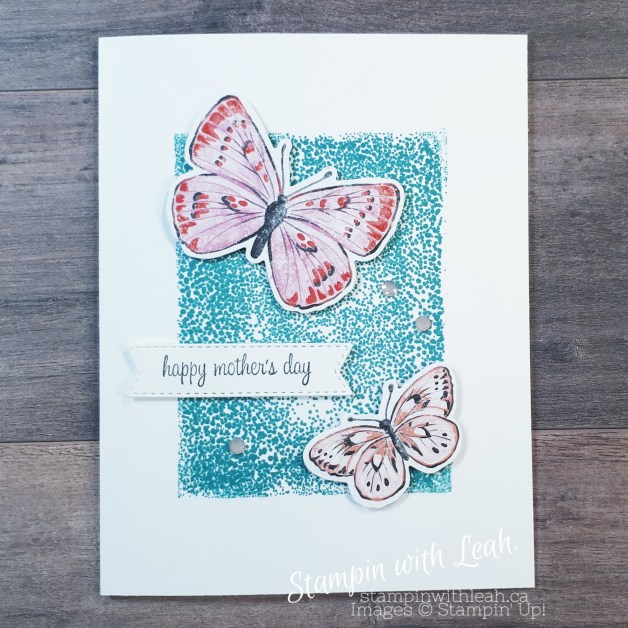
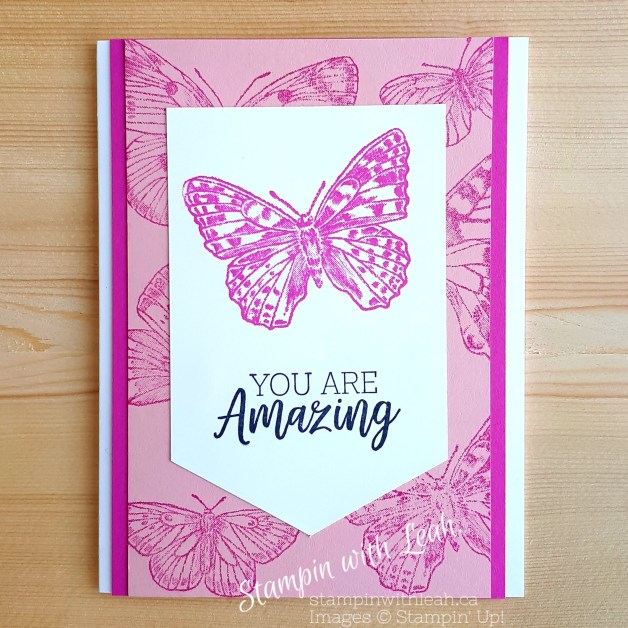
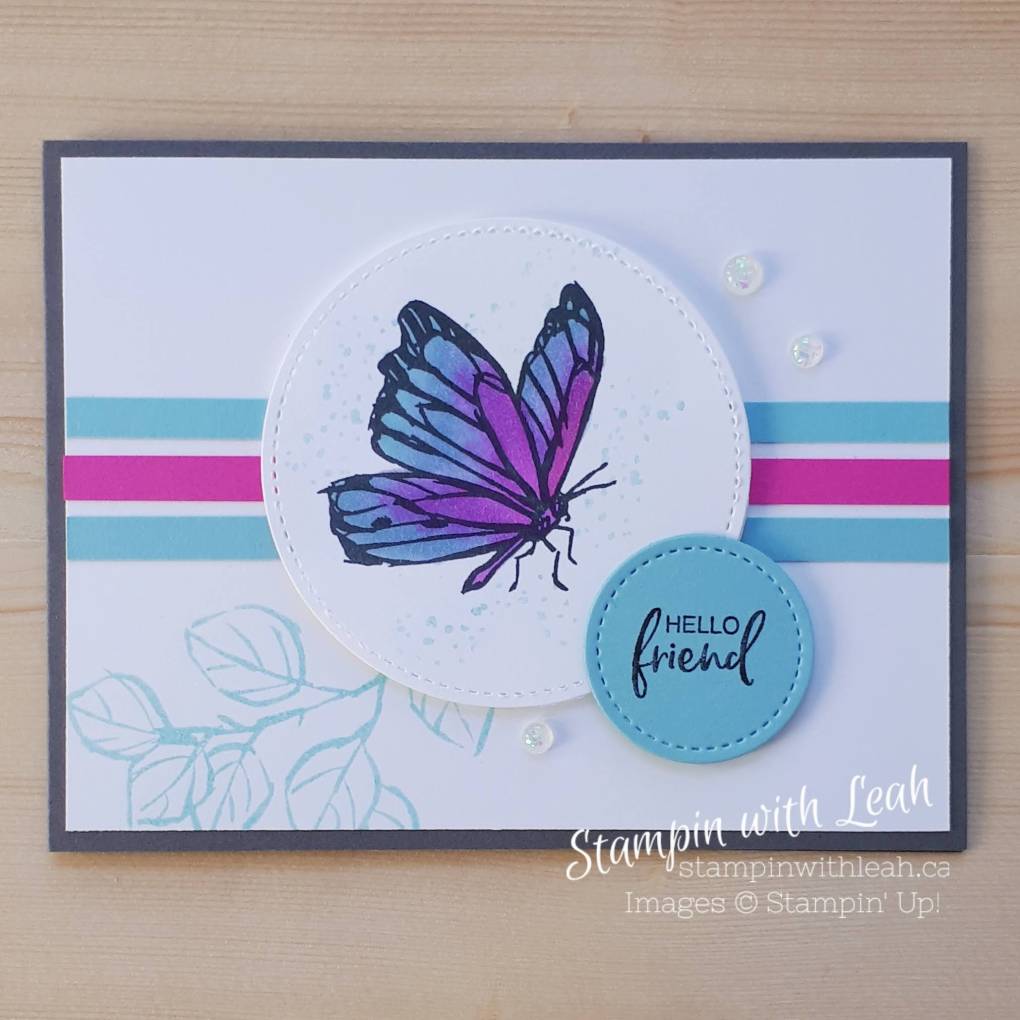
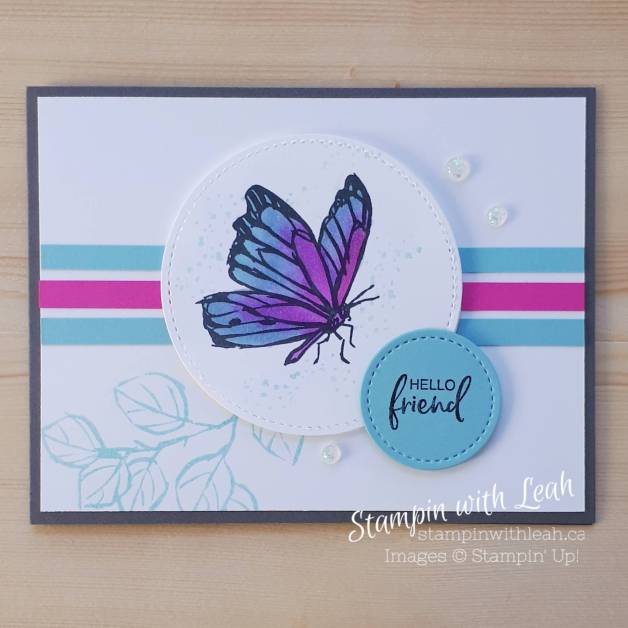
I LOVE finding new ways to create interesting backgrounds. This one was so simple. I just pressed a whole ink pad against my E block and then pressed the block onto my card base. Voila! Instant background. If you want to see this in action – check out the video below.
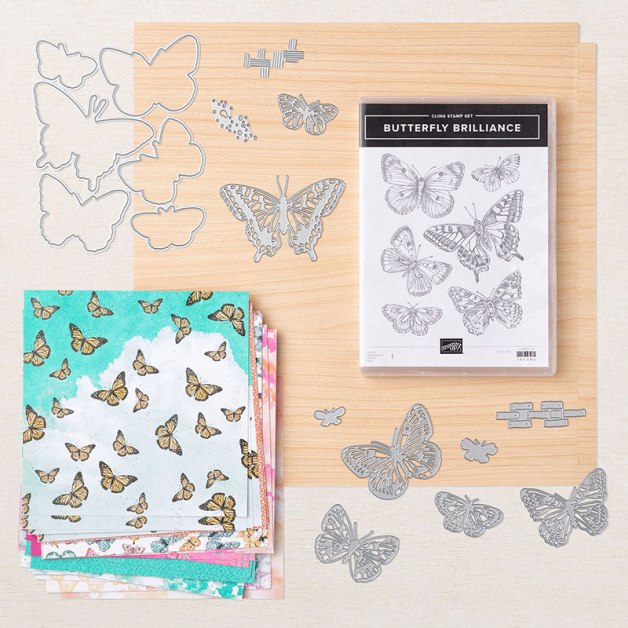
The rest of the card is a simple sentiment, some die cut butterflies from the AMAZING limited time only Butterfly Bijou 6X6 DSP and done! You can see a full list of supplies below.
Click here to shop my online store. Click here to access & view the current catalogs. Click here to subscribe to those fun Paper Pumpkin kits of creativity! Click here for more information about joining my Online Monthly Technique Club. Earn even more goodies by joining a club! Click here to learn more about joining my Ink Pad Pals Team. Get the MOST rewards including a discount on future products! Follow me on social media! I share regularly on Pinterest, YouTube, and Facebook! Please subscribe to my newsletter, too!Click here and enter your email. When you include your birthday you will even be added to my birthday card mailing list 🙂
I LOVE this Kangaroo & Company stamp set and die bundle – the kangas are so sweet! However, today’s card shows how you can use the other element sin the set to make fun creations as well. I am going to be mailing out some random hello cards to friends, family and customers soon – so here is one of the cards I’ll be sending.
To start I stamped the cute envelope on the Thick Basic White background using Smoky Slate ink. Then I used Blending brushes to apply Magenta Madness ink (on the left) and Balmy Blue ink (on the left) to a Basic White shape cut using the largest die in the Stitched So Sweetly set. As I applied the ink I covered 2/3 of the shape with each colour – creating the Misty Moonlight – ish colour in the center. I then used the matching inks to stamps the hearts. I used the matching inks to colour the hearts on the envelopes and to ink JUST the hello on the Hello Baby stamp. I wrapped twine around the scallop shape and tied a bow on the right. Then I put everything together with Dimensionals. A fairly quick card with a soft but stunning look.
To order the product need to make this card ( and many more) you can click the links below or go straight to my shop.
Click here to shop my online store. Click here to access & view the current catalogs. Click here to subscribe to those fun Paper Pumpkin kits of creativity! Click here for more information about joining my Online Monthly Technique Club. Earn even more goodies by joining a club! Click here to learn more about joining my Ink Pad Pals Team. Get the MOST rewards including a discount on future products! Follow me on social media! I share regularly on Pinterest, YouTube, and Facebook! Please subscribe to my newsletter, too!Click here and enter your email. When you include your birthday you will even be added to my birthday card mailing list 🙂
This card was created using a sketch from Freshly Made Sketches (FMS474) I love this whale and all of the cute puns!
Right now when you grab the Whale Done Suite (or any product over $60) you can earn Sale-a-bration rewards. I am also doing a prize draw for anyone who places an order with me during Sale-a-bration. Use the host code: 3X34UTCY to place an order before the end of Feb 28 for a chance to win a Punch Party stamp set.
The product used to make this card also makes a great starting place for a starter kit order.
Joining my Team and getting the Starter Kit is definitely the best deal in the Stampin’ Up! catalogue. For the next two days you can also get 5 Bonus packs of DSP.
To see all the details about the Sale-a-bration offerings and/or to see the Whale Done card being created chck out my video.
Click here to shop my online store. Click here to access & view the current catalogs. Click here to subscribe to those fun Paper Pumpkin kits of creativity! Click here for more information about joining my Online Monthly Technique Club. Earn even more goodies by joining a club! Click here to learn more about joining my Ink Pad Pals Team. Get the MOST rewards including a discount on future products! Follow me on social media! I share regularly on Pinterest, YouTube, and Facebook! Please subscribe to my newsletter, too!Click here and enter your email. When you include your birthday you will even be added to my birthday card mailing list 🙂
Today’s cards are all created using the not yet released Butterfly Brilliance Collection by Stampin’ Up!
Customers will be able to order this collection as of March 2nd (the stamp set and dies will be available in the new Annual Catalogue on May 3rd however; the DSP and Specialty paper are only available while supplies last from March 2 – April 30)
The first card I created was designed with a beginner stamper in mind. I used only 2 inks, 3 cardstocks and some glue. And yet the result is stunning.
To step it up a notch, I used essentially the same stamping, however, I stamped the butterfly twice and fussy cut it out. I embellished with twine and rhinestones and attached most pieces with my favourite adhesive – Dimensionals!!
Aside from the Butterfly Brilliance Collection, here are the supplies used to make this card. You can order the Butterfly Collection March 2nd, or add it to your starter kit today (**until Feb 28th you’ll even get 5 free DSP packs in addition to all the other perks of the kit**).
For my 3rd version of this card I took it up a few notches for the avid stamper. I used the Stampin’ Cut and Emboss Machine to add detail to the Specialty Paper, cut a label out of DSP, and to cut the intricate butterfly. Of course, I topped it all off with a dash of Wink of Stella.
If you want to see the whole process in action you can view my video below ( please subscribe to my You Tube channel if you enjoy these videos – then you’ll never miss one!)
I am hosting a Butterfly Brilliance Stamp Camp with some other talented Canadian Demonstrators. You can see all the details of the camp here: https://stampinup.net/crm/events/91361
Basically if you purchase the Collection from me on March 2 – 6th using the host code: NP2DWBBP , you will automatically be registered for the Stamp Camp. We will be making 8 beautiful cards and there will be 4 Mystery Stamping activities as well.
Click here to shop my online store. Click here to access & view the current catalogs. Click here to subscribe to those fun Paper Pumpkin kits of creativity! Click here for more information about joining my Online Monthly Technique Club. Earn even more goodies by joining a club! Click here to learn more about joining my Ink Pad Pals Team. Get the MOST rewards including a discount on future products! Follow me on social media! I share regularly on Pinterest, YouTube, and Facebook! Please subscribe to my newsletter, too!Click here and enter your email. When you include your birthday you will even be added to my birthday card mailing list 🙂
This is my first time joining a Craft Collaborations Blog Hop! This one features the hilarious Hey Birthday Chick Bundle!! Hop around and see all the amazing cards created by some amazingly talented crafters!
Here is my fun birthday card. The dies make using this set so simple – and I even remembered to use adhesive sheets on the back of the Basic White cardstock before I cut out the Happy Birthday sentiment.
To create the colourful background, I used strips of paper adhered to a Window Sheet and then die cut the whole layer with a circle. A great way to use up paper scraps!
The Hey Birthday Chick stamp set can be found in the Stampin’ Up! Jan- June Mini Catalogue, however the rest of the products featured in this blog hop are out of catalogue offerings. Here are all the details:
Don’t forget you can also earn Sale-a-bration items right now for every purchase over $60 (before taxes & shipping). Click the SAB catalogue image on the sidebar to see all the offerings.
Live in Canada, don’t have a demonstrator? Contact me to get a catalogue or find out why right now is the best time to join our team.
Click here to shop my online store. Click here to access & view the current catalogs. Click here to subscribe to those fun Paper Pumpkin kits of creativity! Click here for more information about joining my Online Monthly Technique Club. Earn even more goodies by joining a club! Click here to learn more about joining my Ink Pad Pals Team. Get the MOST rewards including a discount on future prodcts! Follow me on social media! I share regularly on Pinterest, YouTube, and Facebook! Please subscribe to my newsletter, too!Click here and enter your email. When you include your birthday you will even be added to my birthday card mailing list 🙂
Valentine’s is approaching and it is always fun to package up the goodies we give in sweet wrapping. Today I am highlighting Stampin’ Up!’s no adhesive Love you Always Treat Boxes (154285 – $12.25cdn for 10 food safe boxes). You can decorate these boxes for any occasion really – this one I gave it a bit of a Valentine feel, but kept the sentiment neutral so it can be used any time of the year.
The size of these boxes is great too. I fit two cookies in this one. A twine combo pack and some chocolate would also fit nicely.
The base of this box is extra sturdy and fits together without adhesives at all. It is easy to assemble – but not exactly obvious how to do it. So the first part of my video below goes over how to assemble the Love You Always Treat Box.
Contact me today to place an order or learn more about Stampin’ Up! and our quality products.
Click here to shop my online store. Click here to access & view the current catalogs. Click here to subscribe to those fun Paper Pumpkin kits of creativity! Click here for more information about joining my Online Monthly Technique Club. Earn even more goodies by joining a club! Click here to learn more about joining my Ink Pad Pals Team. Get the MOST rewards including a discount on future products! Follow me on social media! I share regularly on Pinterest, YouTube, and Facebook! Please subscribe to my newsletter, too!Click here and enter your email. When you include your birthday you will even be added to my birthday card mailing list 🙂
This week’s sketch challenge at Freshly Made Sketches (FMS469) was exactly what I needed to use up some paper scraps on my desk. I grabbed 3 different 4″ X 1/2″ strips, added some details by stamping and embossing them and voila, perfect background.
I love this little donkey – he is so fun and cute! It is also so nice that I got this stamp set for free – and you can too! Right now Sale-a-bration is happening, which means for every $60 or $120 you spend you can earn a free SAB item.
If you have a big wish list and would like to become a discount shopper, I recommend purchasing some of what’s on your wish list in the Sale-a-Bration Starter Kit. That’s how you’ll be able to get your hands on 200 sheets of this pretty monochromatic 6×6 patterned paper, too. (That paper is the free gift that is in the Sale-a-Bration Starter Kit available through the end of February. Click here for more details about Sale-a-Bration.)
Click here to shop my online store. Click here to access & view the current catalogs. Click here to subscribe to those fun Paper Pumpkin kits of creativity! Click here for more information about joining my Online Monthly Technique Club. Earn even more goodies by joining a club! Click here to learn more about joining my Ink Pad Pals Team. Get the MOST rewards including a discount on future products! Follow me on social media! I share regularly on Pinterest, YouTube, and Facebook! Please subscribe to my newsletter, too!Click here and enter your email. When you include your birthday you will even be added to my birthday card mailing list 🙂
I love how easy it is to create with this stamp set. The images are beautiful and simple to colour.
On this card I used Stampin’ Blends to add colour to the butterfly wings. It is also simple to use the two step stampin’ images to colour the butterfly. You can check out my video to see all the details of this card.
This stamp set is part of the amazing Sale-a-bration FREE offerings. Check out the whole Sale-a-bration catalogue by clicking the image below. Or contact me directly to get a paper copy of the catalogue.
I am so lucky to be a part of a fabulous team – The West Coast Creators. The group is full of creative inspiration and challenges, support, and good friends. For this month’s hop I was playing around with the new Pretty Perennials stamp set and dies from the Stampin’ Up! Jan – June Mini Catalogue. I was also inspired by the TGIF Sketch Challenge #298. I love these flowers and how the die accents make them pop. The font for the sentiments was the real eye-catching part of this set for me – it just makes me HAPPY!
To create this card I stamped the flowers in 2nd Generation Flirty Flamingo, Calypso Coral and Crushed Curry. Then I die cut the flowers and added accents in the same colours using the coordinating dies. The sentiment was stamped in Bermuda Bay and then fussy cut. The background is Smoky Slate, embossed with the Pine Planks Embossing Folder. The circle in the back is cut using the largest Stitched Shapes circle out of Fine Art Floral 12 X 12 DSP. I embellished the flower centers using Opal Rounds. I think these are my new FAVOURITE embellishment!
Right now is also Sale-a-bration, which means that every $60 or $120 purchase earns you free Sale-a-bration items! Contact me for details or click here to check out the catalogues for yourself.
Want everything in the catalogue? Then join my team to get a 20% discount on all your purchases. This is truly the best deal in the catalogue!
I am so happy with how this card turned out! You never know what you are going to get when you start splashing a smooshing inks. This card was inspired by The Spot Creative Challenge #145.
I started by splattering ink using my water painters and ink refills onto a piece of watercolour paper. Then I splattered some Wink of Stella. When I create backgrounds like this I tend to work with multiple papers so that I can use up all of the water colour that I create. It is also nice to have ready to go water coloured backgrounds for other projects. Next I stamped the Happy Birthday from the FREE Sale-a-bration stamp set Approaching Perfection in Bermuda Bay and a row of candles from the same set in Poppy Parade, Calypso Coral, Crushed Curry and Pacific Point. I punched those out using the Label Me Lovely Punch and mounted the whole image on a 2-1/4″ black circle. After that, I embossed a strip of 1-1/4″ X 3-1/2″ Bermuda Bay cardstock with the Tasteful Textile 3D Embossing Folder and snipped the ends with the Tailored Tag Punch. I tied a double strand of white twine and made a bow. The black and white DSP I used is from the True Love 12X12 DSP pack in the new Jan – June Mini Catalogue. The rest is pretty straight forward gluing, adhering with Dimensionals and embellishing with a dash of sequins. You’ll find a full list of supplies below.
Any purchase from our Annual or Mini Catalogue of $60 or $120 qualifies you to earn the FREE stamp set used in this card ( or a wide variety of other Sale-a-bration items). Check out the catalogue by clicking here.
If you are finding your wishlist is huge – why not join my team and get a 20% discount on all your purchases. You can find more information about the benefits of joining my Team here or click the image to join now.