Throwback Thursday: A Sweet Baby Card with Brides & Babies

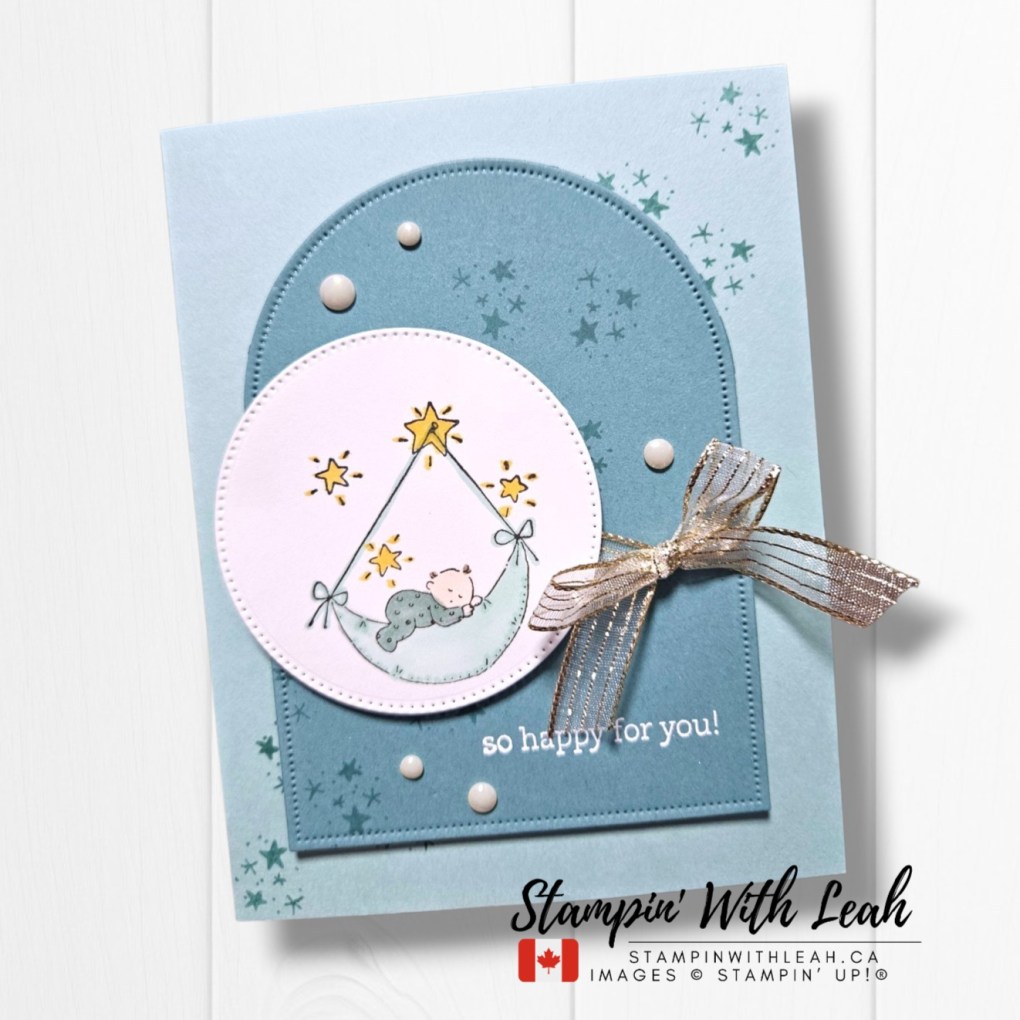
There’s something extra fun about pulling out a REALLY old stamp set and giving it a fresh new look!

For this week’s Throwback Thursday, I reached way back into my Stampin’ Up! collection for the Brides & Babies stamp set. And when I say throwback, I mean it — this one has been in my collection for a very long time! But seriously, how sweet is that little baby tucked into the moon? Some images are just too adorable to let go.
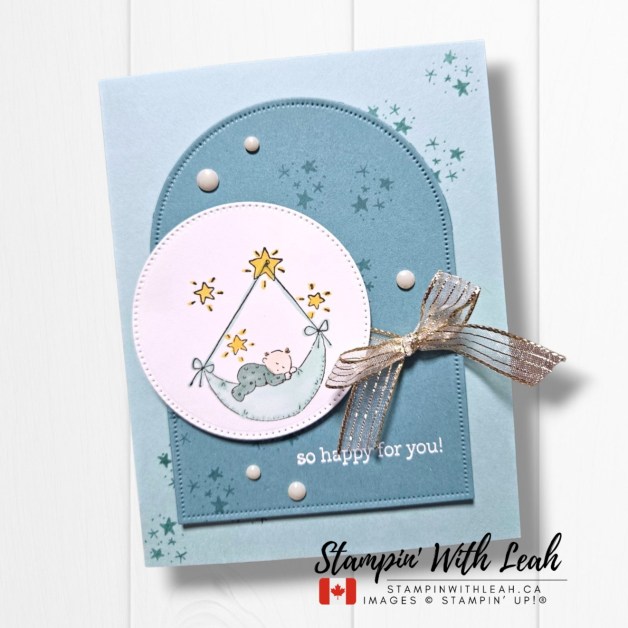
I paired this old favourite with some newer goodies to give it an updated feel. An Everyday Arch creates the large background layer and gives the card a fun focal point without taking away from that sweet stamped image.

I kept the colour palette soft and dreamy, with Pool Party and Lost Lagoon and just a touch of Golden Glow Shimmer Brush for the stars. The little scattered stars in the background help carry the theme across the card without making it feel too busy.

And then, of course, I needed a little something special! The Gold Striped 3/8″ Mesh Ribbon adds just the right amount of shimmer, while a few Antique Pearls finish everything off beautifully.

I love how mixing older stamps with current products can make something that has been sitting on the shelf for years feel completely new again. It’s also a great reminder that you don’t always need the newest stamp set to create something you love — sometimes an old favourite is exactly what you need!

Do you have a REALLY old Stampin’ Up! stamp set that you still can’t bring yourself to part with? I’d love to know which one!

Looking for even more ways to enjoy stamping? Join my Stampin’ Up! Ink Pad Pals team! We have a new starter kit offer. See all the details by clicking the image below.
  • Save 15%+ on your orders.
  • Get free access to my monthly card class tutorials.
  • Enjoy our monthly team meetings with stamping fun and collaboration.

Contact me to find out more or see the details on my website.

➡️ Subscribe to my newsletter at https://mailchi.mp/f1809c680508/subscribe-to-stampin-with-leahs-newsletter


Throwback Thursday: Mixing Old & New

I love a good Throwback Thursday project — especially when I can bring a few retired favourites back out and pair them with something current!

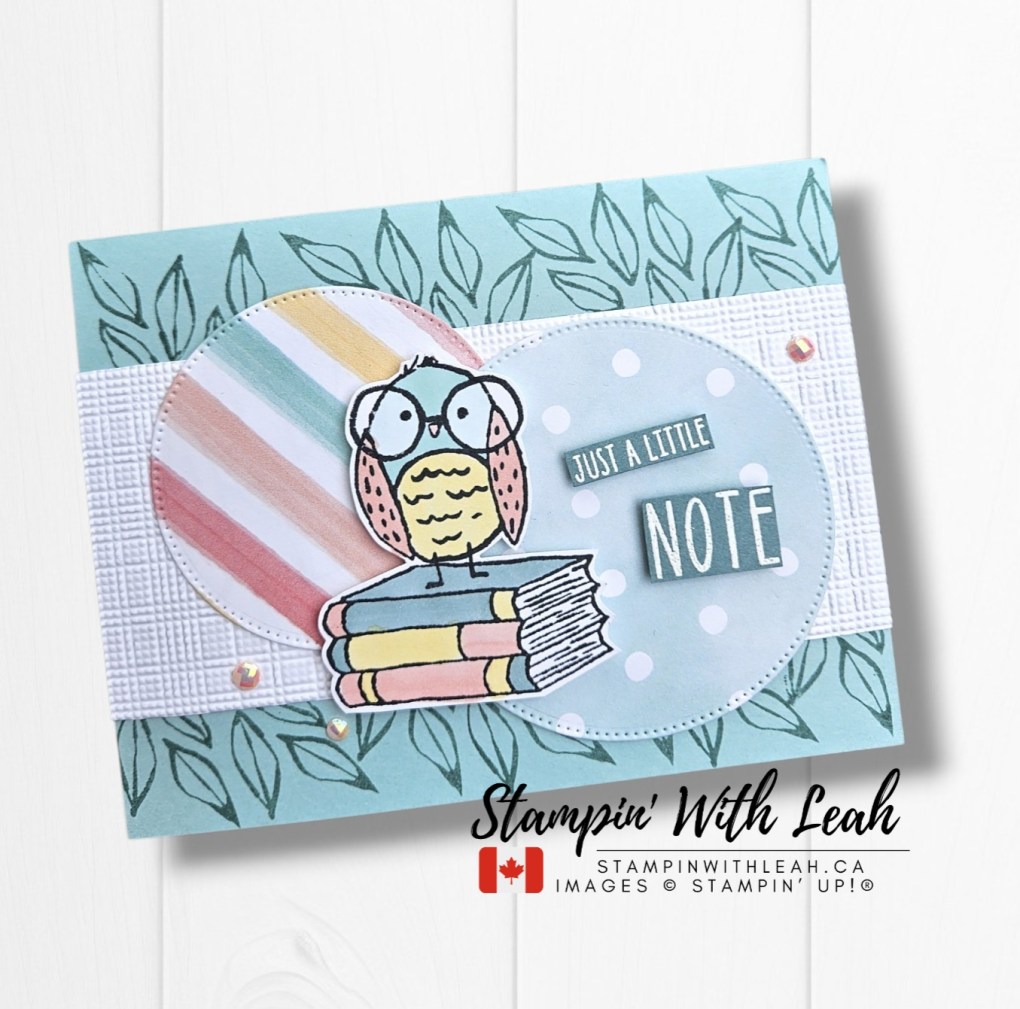
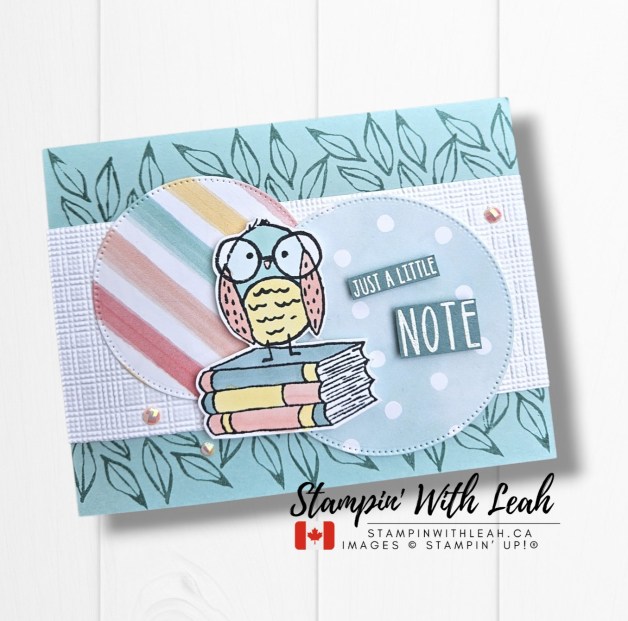
This card was created with a few special colleagues in mind as we get ready to head back to school. I am so grateful to have such an amazing team to work with every day, and I thought a sweet little note card would be a fun way to let them know how much I appreciate them.

For this card, I pulled out the retired Bird’s Eye View stamp set and stamped one of the birds perched on a stack of books. I added a little pair of glasses for some extra personality, then coloured the image in Calypso Coral, Lemon Lolly, Pool Party and Lost Lagoon.

Those colours coordinate beautifully with the striped and polka dot circles I die cut from the current Beautiful Ordinary Life Designer Series Paper using the Stylish Shapes dies.

I also added a strip of cardstock (2-1/2″ x 5-1/2″) embossed with the Softly Woven 3D Embossing Folder for a little texture. The heat embossed sentiment is from the retired Wild Bunch stamp set, and I finished things off with a few retired Pearlized Faceted Circles.

I really like how easily these older products work with something new. You don’t need an entire collection of brand-new supplies to create something fresh — sometimes it’s just a matter of looking at what you already have in a different way.

And that might be my favourite part of Throwback Thursday!

Old favourites + new products = lots of creative possibilities.

And this week, a little creativity is also a reminder of how thankful I am for the wonderful people I get to work alongside every day. Here’s to a great school year ahead!

Looking for even more ways to enjoy stamping? Join my Stampin’ Up! Ink Pad Pals team! We have a new starter kit offer. See all the details by clicking the image below.

  • Save 15%+ on your orders.
  • Get free access to my monthly card class tutorials.
  • Enjoy our monthly team meetings with stamping fun and collaboration.

Contact me to find out more or see the details on my website.

➡️ Subscribe to my newsletter at https://mailchi.mp/f1809c680508/subscribe-to-stampin-with-leahs-newsletter


Throwback Thursday: A Christmas Card with Half Full

I’m using some of my free time over summer break to get a little ahead for Christmas Craft Fairs this fall, so apparently it’s time to start making Christmas cards! 🎄

For this Throwback Thursday, I pulled out an old favourite: the Half Full stamp set by Stampin’ Up!

I love revisiting older stamp sets and giving them a fresh look with newer colours and products.

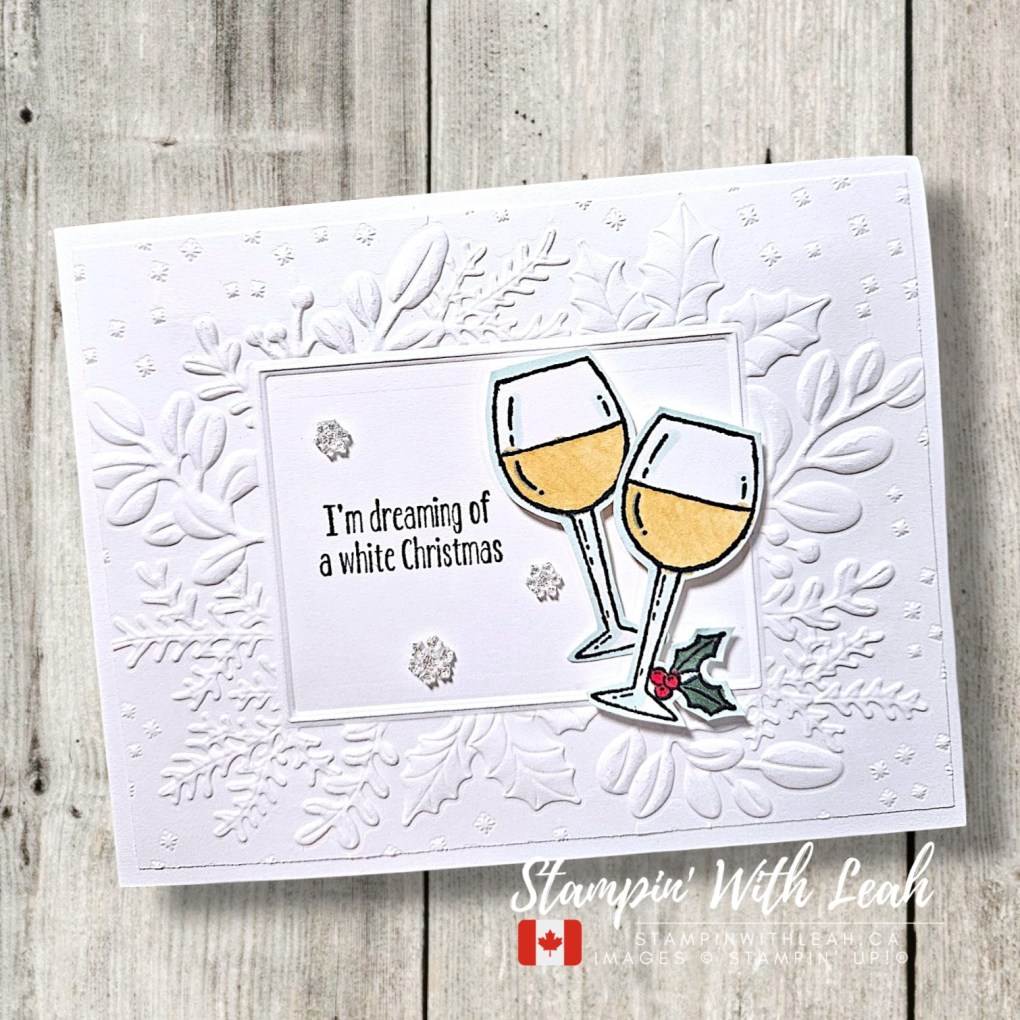
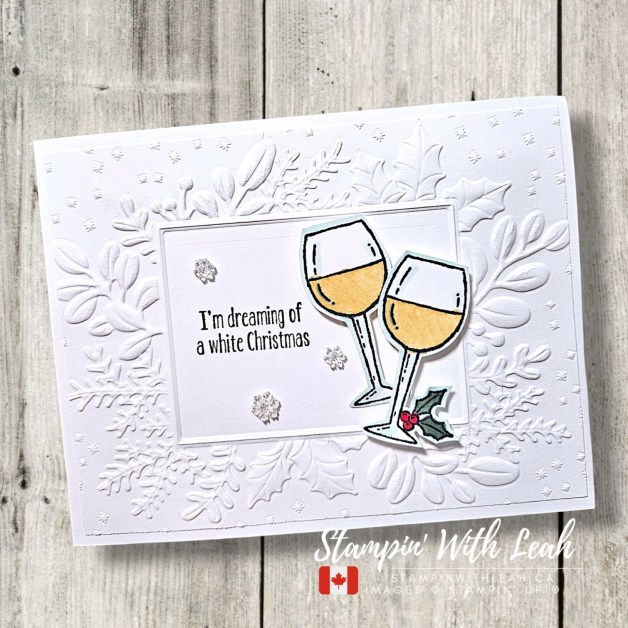
For this card, I went with a mostly white colour palette for a soft, snowy Christmas feel. The embossed background adds lots of texture while keeping the overall design clean and elegant.

The wine glasses are coloured with Golden Glow, while the holly leaves feature Peaceful Pine and a pop of Real Red for the berries.

And then there are those gorgeous Adhesive-Backed Snowflakes! These are a pre-order product that I was able to play with early as a Stampin’ Up! demonstrator. They’ll be available to customers in September, so I thought this card would make a fun little sneak peek.

I love how those tiny snowflakes add just a touch of sparkle without taking away from the focal point.

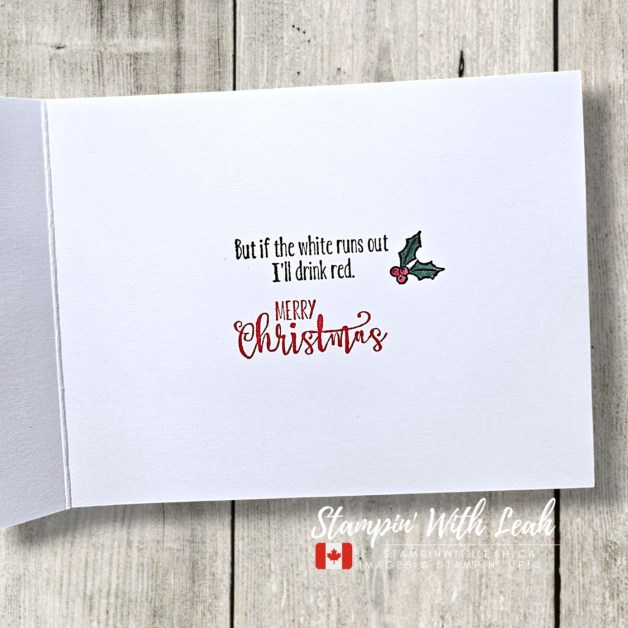
Of course, a card made with the Half Full stamp set needs a little humour!

There’s another fun sentiment waiting inside this card — because sometimes the inside deserves just as much attention as the front. 😉

I’m hoping to build up a good collection of cards for my Christmas Craft Fairs over the next few months. Getting started during summer break means I can enjoy the process instead of scrambling to make everything at the last minute!

And while I’m definitely not ready to give up summer yet… I have to admit, Christmas crafting is pretty fun. 🎄

Are you a Christmas crafter who starts early, or do you wait until the Christmas spirit hits?

Looking for even more ways to enjoy stamping? Join my Stampin’ Up! Ink Pad Pals team! We have a new starter kit offer. See all the details by clicking the image below.

  • Save 15%+ on your orders.
  • Get free access to my monthly card class tutorials.
  • Enjoy our monthly team meetings with stamping fun and collaboration.

Contact me to find out more or see the details on my website.

➡️ Subscribe to my newsletter at https://mailchi.mp/f1809c680508/subscribe-to-stampin-with-leahs-newsletter

Throwback Thursday – Baby Steps

It’s been a little while with a busy September – but I am back and it’s time for another Throwback Thursday. This week, I couldn’t resist pulling out one of my favorite retired wooden block stamps: Baby Steps! These sweet elephants are timeless, and they pair perfectly with today’s Peach Pie Designer Series Paper, matching ribbon, and a few gems for a subtle sparkle.

The sentiment panel is cut using the Peace on Earth Dies, which adds just the right touch of elegance to this playful design. I love how the pop of color and texture make this card feel fresh while still celebrating a bit of Stampin’ Up! history.

Whether you’re celebrating a new baby, a milestone, or any happy occasion — this card brings a smile every time.

🧡 What’s your favorite retired stamp set that you still reach for? Let me know in the comments below!

👉 Looking for other ways to stamp with me?

If you are local – join my in person card class!

Looking for even more ways to enjoy stamping? Join my Stampin’ Up! Ink Pad Pals team! We have two great options for starting right now.

  • Save 20%+ on your orders.
  • Get free access to my monthly card class tutorials.
  • Enjoy our monthly team meetings with stamping fun and collaboration.

Contact me to find out more or see the details on my website.

➡️ Subscribe to my newsletter at https://mailchi.mp/f1809c680508/subscribe-to-stampin-with-leahs-newsletter

Global Design Project #513 – Autumn Colour Challenge Card

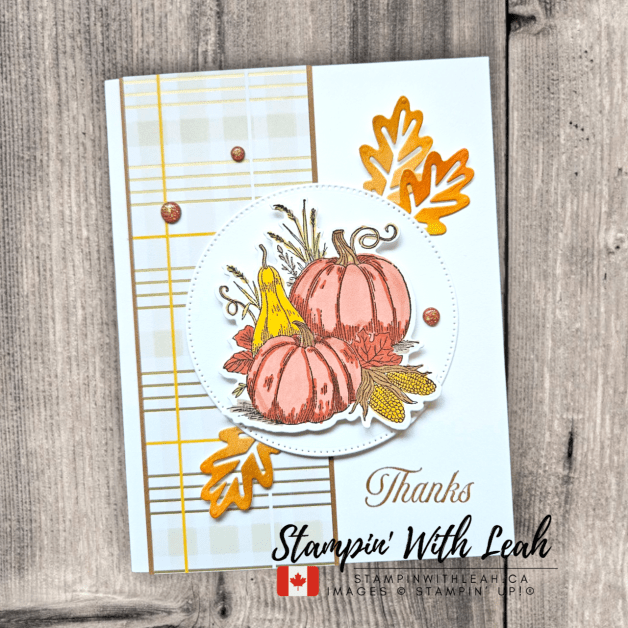
This week I had the honour of being invited as the Guest Designer for the Global Design Project Challenge (#GDP513)! The challenge features a warm and inviting colour palette that instantly made me think of crisp fall days and colourful leaves. I reached for the Amber Autumn Bundle, the Gathering Together 12” x 12” Designer Series Paper, and a mix of rich Stampin’ Blends to create this cozy seasonal card.

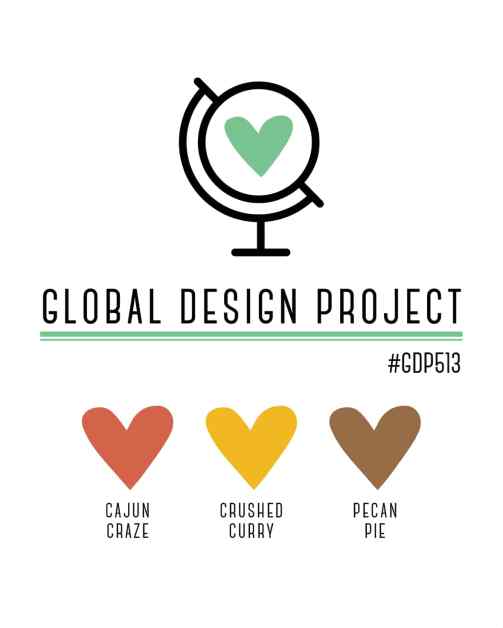
The Global Design Project #513 challenge focused on three stunning colours: Cajun Craze, Crushed Curry, and Pecan Pie. These earthy tones are perfect for fall cardmaking, especially when combined with warm textures and layered leaves.


Card Details & How-To

Stamping & Colouring

  • I used the Amber Autumn stamp set to create my focal image.
  • The pumpkins and leaves were coloured with Cajun Craze and Pecan Pie Stampin’ Blends.
  • To achieve a softer Crushed Curry look, I blended Dark Daffodil Delight with Dark Darling Duckling.

🍂 Die-Cut Leaves

  • On a piece of Basic White cardstock, I blended Cajun Craze, Crushed Curry, and Pecan Pie inks using Blending Brushes.
  • Once dry, I die cut the leaves using the coordinating dies from the Amber Autumn Bundle.
  • This gave the leaves a gorgeous mottled, realistic look.

🖤 Designer Series Paper & Accents

I finished the design with a sprinkling of Cajun Craze & Gold Dots for a little extra texture and shine.

The background features the Gathering Together 12” x 12” DSP, which tied the colours together beautifully.

Here’s a full list of the supplies used.


If you love fall-inspired cards, don’t forget to save this idea to your Pinterest boards for inspiration later.


📹 Want more inspiration? Be sure to follow me on YouTube or Facebook for tutorials, lives, and more!

👉 Looking for other ways to stamp with me?

If you are local – join my in person card class!

Looking for even more ways to enjoy stamping? Join my Stampin’ Up! Ink Pad Pals team!

  • Save 20%+ on your orders.
  • Get free access to my monthly card class tutorials.
  • Enjoy our monthly team meetings with stamping fun and collaboration.

Contact me to find out more or see the details on my website.

➡️ Subscribe to my newsletter at https://mailchi.mp/f1809c680508/subscribe-to-stampin-with-leahs-newsletter

Throwback Thursday | Mountain Air Meets GDP512

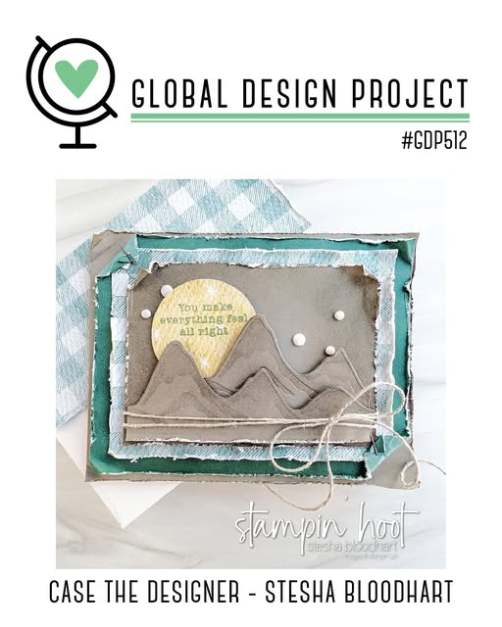
This week’s Throwback Thursday takes me back to one of my all-time favourite bundles—Mountain Air. Though retired, this set still holds a special place on my shelf, and I couldn’t resist bringing it out for the Global Design Project GDP512 challenge. I paired it with current papers and textures for a fresh twist that feels timeless.

✨Card Details:

  • Stamp Set: Retired Mountain Air Bundle
  • DSP: Need for Tweed 12×12
  • Cardstock: Secret Sea Two-Tone and Basic Beige
  • Extras: Linen Thread, Adhesive Sheets (for the tree die)

How To Make This Card:

  1. Base: Start with a standard card base in Basic Beige.
  2. Layer 1: Emboss the 4″ X 5-1/4″ Secret Sea Two-Tone cardstock with the Need for Tweed 3D Embossing Folder.
  3. Layer 2: Add a 3″ X 4-1/4″ piece of Need for Tweed DSP slightly to the embossed panel.
  4. Focal Panel: Stamp the mountains in Pretty Peacock and the tree line in Secret Sea Ink onto Basic Beige. Add the sentiment “You are seriously the best” in Secret Sea Ink.
  5. Die-Cuts: Cut the tall pine tree from the Mountain Air dies in Secret Sea cardstock and adhere to the focal panel.
  6. Finishing Touches: Wrap Linen Thread around the bottom, tie a bow, and adhere all the layers to the card base with Dimensionals.

This design is a mix of rugged and refined—perfect for outdoor lovers or simply letting someone know how much they mean to you.

📹 Want more inspiration? Be sure to follow me on YouTube or Facebook for tutorials, lives, and more!

👉 Looking for other ways to stamp with me?

If you are local – join my in person card class!

Looking for even more ways to enjoy stamping? Join my Stampin’ Up! Ink Pad Pals team!

  • Save 20%+ on your orders.
  • Get free access to my monthly card class tutorials.
  • Enjoy our monthly team meetings with stamping fun and collaboration.

Contact me to find out more or see the details on my website.

➡️ Subscribe to my newsletter at https://mailchi.mp/f1809c680508/subscribe-to-stampin-with-leahs-newsletter

Throwback Thursday: Festive Christmas Truck Card

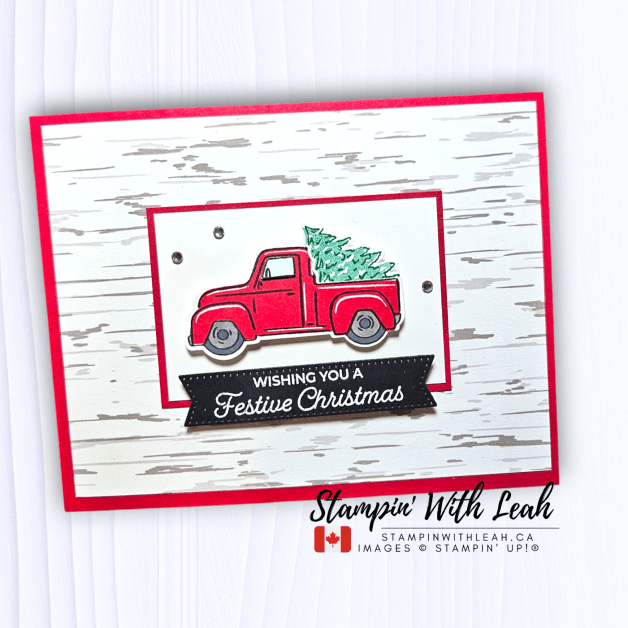
It’s time for another Throwback Thursday card idea, and this week I’m reaching for a favorite retired set—the Trucking Along stamp set and coordinating Truck Builder Punch. I couldn’t resist pairing this cheerful little truck with the current Nests of Winter 12×12 Designer Series Paper for a rustic, woodgrain background.

I finished the card with a few sparkling rhinestones, and of course, that bold red truck carrying a Christmas tree sets the perfect festive mood. This card is the kind you’ll want to recreate for holiday greetings, gift tags, or even a scrapbook layout.

Why you’ll love this card:

  • Combines a beloved retired Stampin’ Up! set with current designer paper
  • Perfect DIY handmade Christmas card inspiration
  • Quick layers and a simple punch make assembly easy
  • The bright red truck adds timeless festive charm

I was inspired to pull this set out because of a new Stampin’ Up! kit coming September 3rd—it features a similar holiday vibe, and I can’t wait to share it with you! 🎄

👉 Be sure to pop back after the long weekend to see the exciting new Kits Collection, fresh Online Exclusives, and the brand-new September–December Mini Catalogue. There’s so much festive inspiration coming your way!

Before the month is over though – make sure to stock up on your favourite in-colors. The In Color Sale ends Aug 31st! Items include all the usual ink, ribbono, cardstock, but it also has kits, DSP packs and more. You’ll earn Stampin’ Rewards on your purchase too!

📹 Want more inspiration? Be sure to follow me on YouTube or Facebook for tutorials, lives, and more!

👉 Looking for other ways to stamp with me?

If you are local – join my in person card class!

Looking for even more ways to enjoy stamping? Join my Stampin’ Up! Ink Pad Pals team!

  • Save 20%+ on your orders.
  • Get free access to my monthly card class tutorials.
  • Enjoy our monthly team meetings with stamping fun and collaboration.

Contact me to find out more or see the details on my website.

Stampin’ Up! Product Update

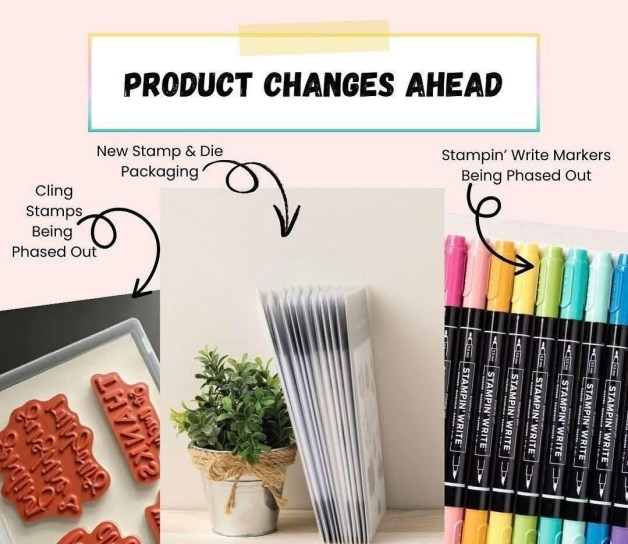
Heads-up: Stampin’ Up! is phasing out red rubber stamps and markers and introducing refreshed packaging as part of ongoing improvements. Contact me for more details.

➡️ Subscribe to my newsletter at https://mailchi.mp/f1809c680508/subscribe-to-stampin-with-leahs-newsletter


Throwback Thursday: Elegant Wedding Card with Word Play

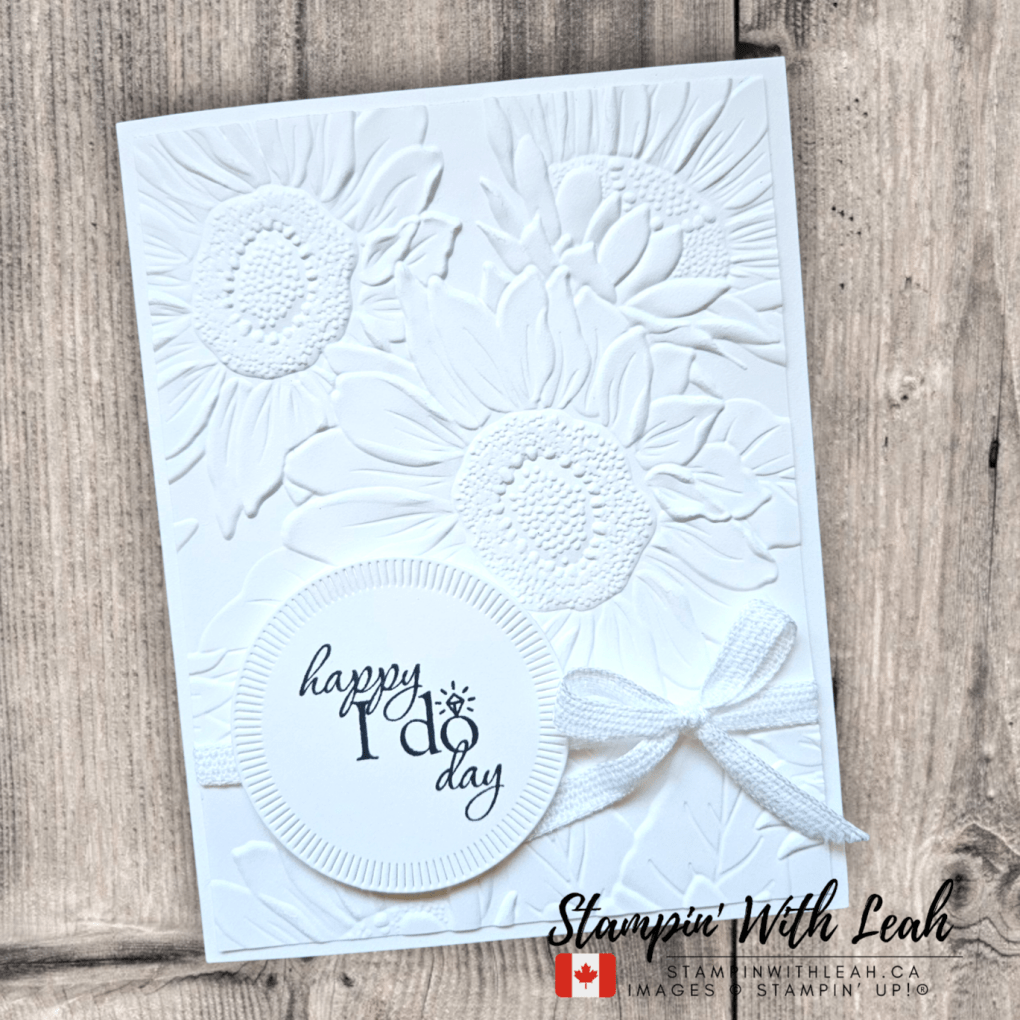
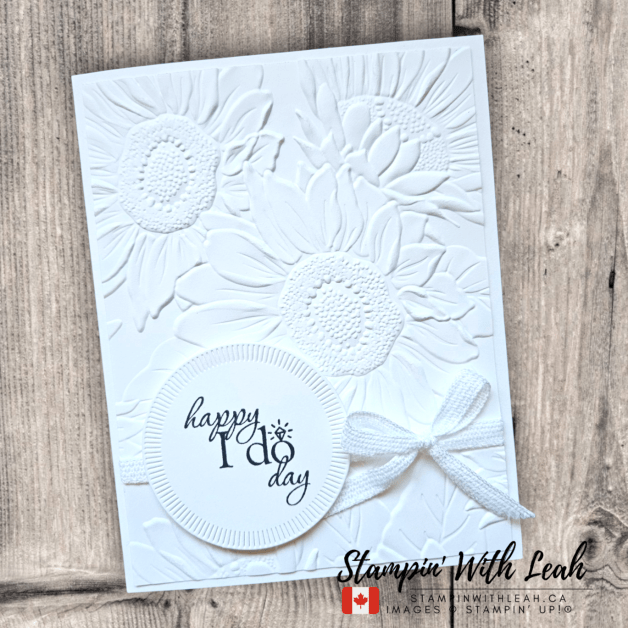
I love a classic white-on-white wedding card—and this one delivers gorgeous texture with timeless typography. For today’s Throwback Thursday, I paired the retired Word Play stamp set with the Sunflower 3D Embossing Folder, a circle from Spotlight on Nature dies, and White 1/4″ Ribbon. It’s headed to a late-August wedding next weekend!

Measurements

  • Card base: 5-1/2″ x 8-1/2″, scored at 4-1/4″
  • Embossed layer: 4″ x 5-1/4″
  • Inside panel (optional): 4″ x 5-1/4″
  • Ribbon: ~14″ to tie a bow
  • Sentiment: largest/second-largest Spotlight on Nature circle

Step-by-Step

  1. Die-cut the circle. Use a ridged circle from Spotlight on Nature.
  2. Stamp the sentiment. Ink “happy I do day” (Word Play) in Memento Black and stamp centered on the circle. Let dry.
  3. Emboss the layer. Lightly mist the 4″ x 5-1/4″ panel with water, place in the Sunflower 3D folder, and run through the machine for a deep impression.
  4. Add ribbon. Wrap White 1/4″ Ribbon around the lower third of the card and tie a side bow (or tie a separate bow and attach with a Glue Dot).
  5. Mount the panel. Adhere the embossed layer to the card base with Liquid Glue.
  6. Place the sentiment. Pop the stamped circle over the ribbon using Dimensionals.
  7. Finish the inside. Add the optional white panel for a clean writing surface; stamp a coordinating sentiment if desired.

Why it Works

All-white layers keep the focus on dimension and detail—the sunflower centers, petal veining, and ridged circle edge. The crisp black sentiment provides elegant contrast without competing with the texture.

Supplies (except for the retired Word Play stamp set):


Don’t forget – you’ll earn Stampin’ Rewards on your purchase too!

📹 Want more inspiration? Be sure to follow me on YouTube or Facebook for tutorials, lives, and more!

👉 Looking for other ways to stamp with me?

If you are local – join my in person card class!

Looking for even more ways to enjoy stamping? Join my Stampin’ Up! Ink Pad Pals team!

  • Save 20%+ on your orders.
  • Get free access to my monthly card class tutorials.
  • Enjoy our monthly team meetings with stamping fun and collaboration.

Contact me to find out more or see the details on my website.

Stampin’ Up! Product Update

Heads-up: Stampin’ Up! is phasing out red rubber stamps and markers and introducing refreshed packaging as part of ongoing improvements. Contact me for more details.

➡️ Subscribe to my newsletter at https://mailchi.mp/f1809c680508/subscribe-to-stampin-with-leahs-newsletter


GDP510 Sketch Challenge with Textured Notes

This week’s GDP510 sketch challenge had me reaching for one of my current favourites – the Textured Notes bundle. I love how versatile this bundle is, and sketch challenges are always such a fun way to spark creativity.

For this design, I kept things clean and simple with a limited colour palette: Petal Pink and Secret Sea. The soft background paired perfectly with the bold leafy details. The bordered rectangle dies in this bundle are truly a standout – they add instant texture and dimension without overwhelming the design.

A few embellishments and a simple linen thread bow finish the look, keeping the sketch at the heart of the design.

How to Make This Card

  1. Start with a Secret Sea card base.
  2. Cut a Basic White panel using the largest Textured Notes Dies and stamp the textured circle image twice in Petal Pink for a soft background.
  3. Stamp the leafy branch image in 2nd generation Secret Sea ink, layering it over the circles.
  4. On a scrap piece of cardstock, stamp a third textured circle in Petal Pink Ink, fussy cut and adhere using Dimensionals.
  5. Stamp the larger leaves in full strength Secret Sea Ink, fussy cut and adhere them with Liquid Glue to the Petal Pink circle only.
  6. Stamp the sentiment in Versamark on Secret Sea cardstock, emboss in white, and use the Textured Notes dies to cut the long rectangle. Attach with Dimensionals.
  7. Tie a bow with Linen Thread and adhere just under the sentiment.
  8. Finish with a few Petal Pink embellishments from the Muted Palette Dots for a subtle touch of shine.

🛍️ Shop the Supplies:


And there you have it – a simple but elegant take on this week’s GDP510 sketch!

👉 Want to save this project? Download my printable recipe card

The Secret Sea Ink, cardstock and Muted Palette Dots are all on sale this month!! Make sure to grab all the In Color items during this sale – you can find ALL the products on the In Color Sale Special page ( or click the image below).

Don’t forget – you’ll earn Stampin’ Rewards on your purchase too!

📹 Want more inspiration? Be sure to follow me on YouTube or Facebook for tutorials, lives, and more!

👉 Looking for other ways to stamp with me?

If you are local – join my in person card class!

Looking for even more ways to enjoy stamping? Join my Stampin’ Up! Ink Pad Pals team!

  • Save 20%+ on your orders.
  • Get free access to my monthly card class tutorials.
  • Enjoy our monthly team meetings with stamping fun and collaboration.

Contact me to find out more or see the details on my website.

See you next week for another Throwback Thursday creation!

➡️ Subscribe to my newsletter at https://mailchi.mp/f1809c680508/subscribe-to-stampin-with-leahs-newsletter

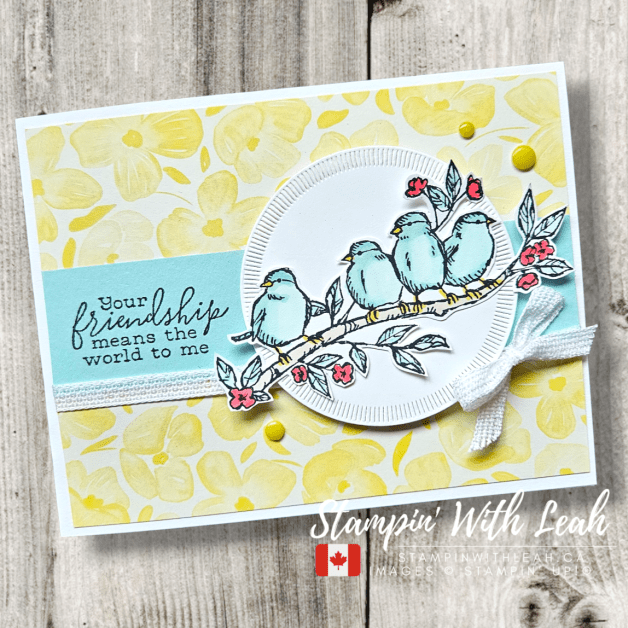
Throwback Thursday: Free as a Bird with Fresh In Colors

If you’ve been crafting with me for a while, you know Free as a Bird is one of my all-time favorite retired Stampin’ Up! stamp sets. This week, I dusted it off for Throwback Thursday and gave it a fresh twist with the 2025–2027 In Color Designer Series Paper, the 2025–2027 In Color Flat Pearls, and the crisp White ¼” Ribbon.

To bring it all together, I reached for the Spotlight on Nature Dies and created a pretty circular focal point for my sweet bluebirds. The color combo of Darling Duckling, Poppy Parade, and Pool Party comes straight from the Global Design Project #509 color challenge – and it’s perfect for a bright, happy friendship card.

Step-by-Step Instructions:

  • Cut a Basic White card base (4 ¼” x 11”, scored at 5 ½”).
  • Cut a Darling Duckling DSP layer to 4” x 5 ¼”.
  • Add a 1 ¾” x 5 ¼” strip of Pool Party cardstock across the card front. Stamp the sentiment in Memento Black.
  • Tie a piece of White ¼” Ribbon and make a bow on the right hand side. Adhere this DSP/ribbon layer to the card base.
  • Die cut a circle from Basic White using the Spotlight on Nature Dies, adhere to the card front using Dimensionals.
  • Stamp the bird image from Free as a Bird in Memento Black on Basic White and color with Pool Party, Poppy Parade, and Darling Duckling Stampin’ Blends. I also used a little bit of light Crumb cake for the branch. Fussy cut.
  • Adhere the birds to the circle with a bit of glue in the center and Mini Dimensionals on the two branch ends.
  • Finish with Darling Duckling 2025–2027 In Color Flat Pearls for a cheerful touch.

Stampin’ Tip: If you don’t have the Free as a Bird stamp set, you can substitute any branch-and-bird image for a similar look – the key is in the color palette and layout.

🛍️ Shop the Supplies:


The DSP and dots are also on sale this month!! Make sure to grab all the In Color items during this sale – you can find ALL the products on the In Color Sale Special page ( or click the image below).

Don’t forget – you’ll earn Stampin’ Rewards on your purchase too!

📹 Want more inspiration? Be sure to follow me on YouTube or Facebook for tutorials, lives, and more!

👉 Looking for other ways to stamp with me?

If you are local – join my in person card class!

Looking for even more ways to enjoy stamping? Join my Stampin’ Up! Ink Pad Pals team!

  • Save 20%+ on your orders.
  • Get free access to my monthly card class tutorials.
  • Enjoy our monthly team meetings with stamping fun and collaboration.

Contact me to find out more or see the details on my website.

See you next week for another Throwback Thursday creation!

➡️ Subscribe to my newsletter at https://mailchi.mp/f1809c680508/subscribe-to-stampin-with-leahs-newsletter