
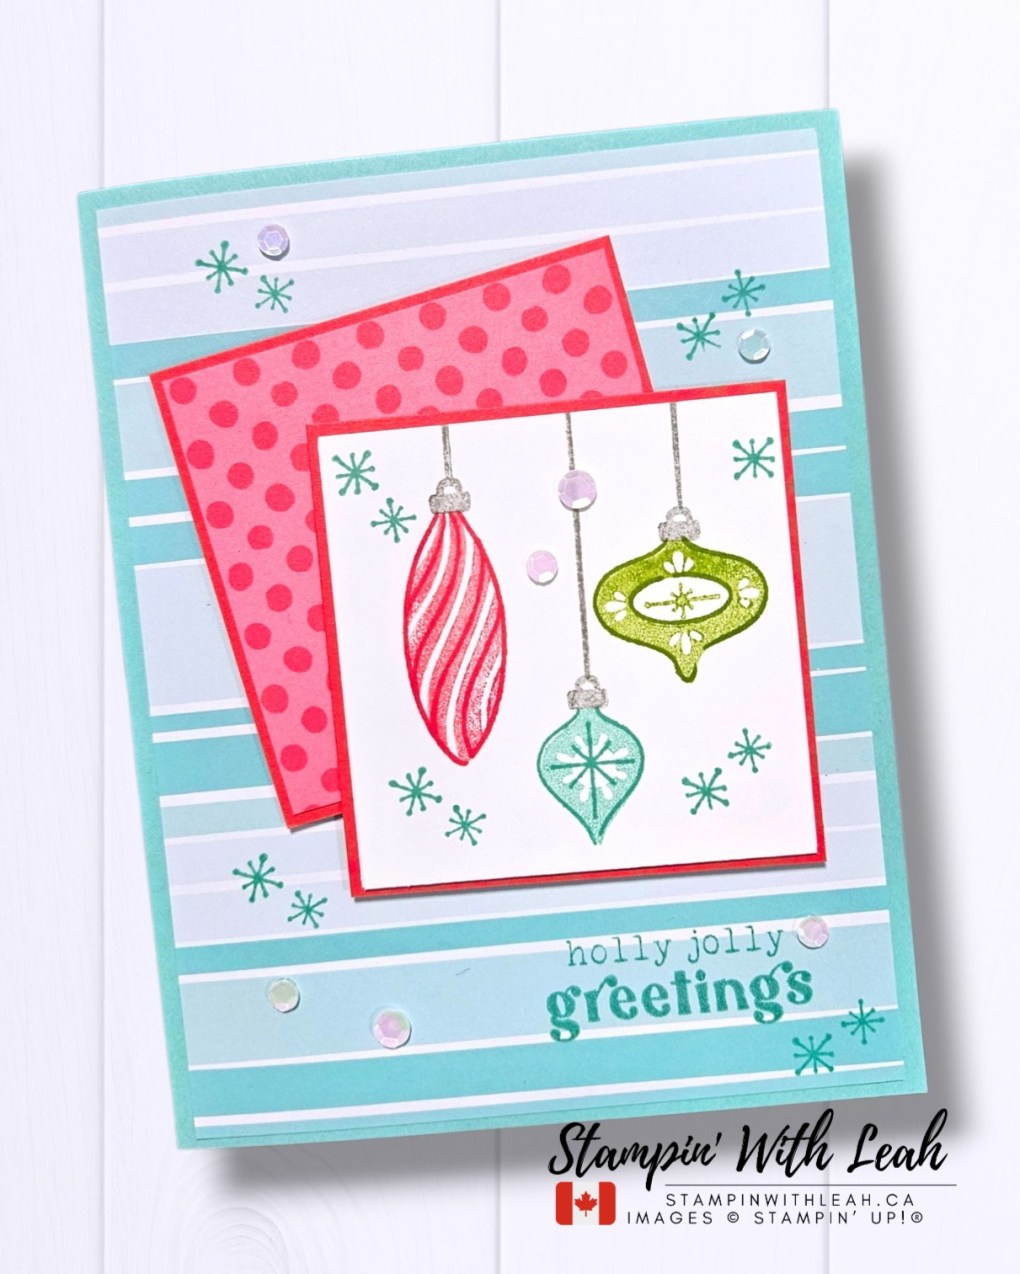
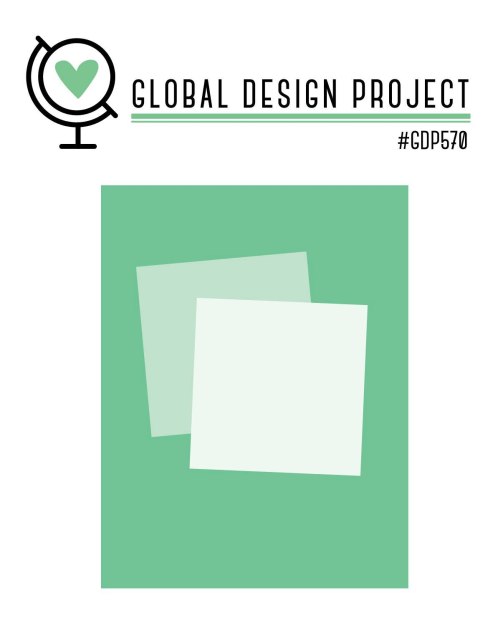
There’s something about retro Christmas decorations that makes me smile! I love the playful patterns and cheerful colours, and that’s exactly the look I was going for with this week’s Global Design Project #GDP570.
For my card, I pulled out the Festive Cheer stamp set from Stampin’ Up! and had some fun creating a whimsical Christmas card with a slightly vintage feel.
A Fun Twist on Christmas Colours
While I love traditional Christmas colours, sometimes it’s fun to mix things up a little!
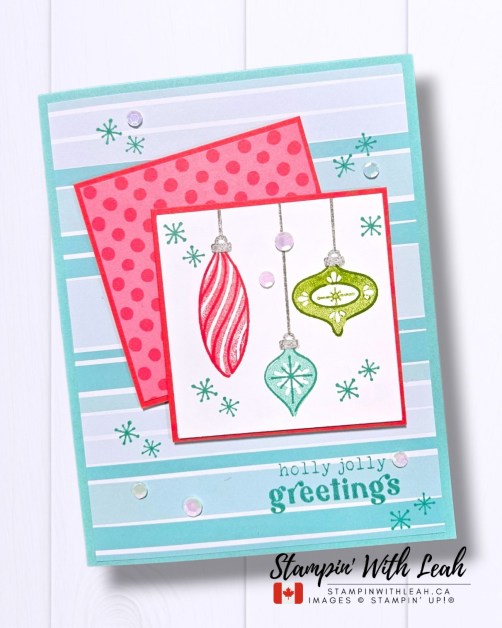
For this card, I chose four Stampin’ Up! colours: Coastal Cabana , Granny Apple Green, Poppy Parade , Smoky Slate.
I love how these colours work together! The combination gives the card a fun, retro Christmas feel without straying too far from the traditional holiday palette.
The whimsical ornaments really steal the show, with their mix of stripes, polka dots, and festive details. A little sparkle adds just the right finishing touch!
Watch the Festive Cheer Cardmaking Tutorial
I shared this card during my regular Wednesday evening crafting time. This week’s video was pre-recorded because of a family commitment, but I still wanted to share a little creative inspiration with you!
In the video, I’ll walk you through how I created the card so you can follow along or use the ideas to inspire your own Christmas creations.
🎥 Watch the video replay below!
Join the Global Design Project Challenge
This card was inspired by Global Design Project Challenge #GDP570.
I always enjoy participating in these challenges because they encourage me to try new ideas, experiment with different products, and sometimes step outside my usual creative comfort zone.
If you’re looking for a little cardmaking inspiration, be sure to visit the Global Design Project to see what the other designers and participants have created!
Ready to Create Some Christmas Cheer?
If the Festive Cheer stamp set has caught your eye, I’d love to help you get started with your own handmade Christmas cards!
You can shop for your favourite Stampin’ Up! supplies through my online store.
✂️Supplies Used:
![Coastal Cabana 8-1/2" X 11" Cardstock [ 131297 ]](https://assets1.tamsnetwork.com/images/EC042017NF/131297s.jpg "Coastal Cabana 8-1/2\" X 11\" Cardstock [ 131297 ]")
![Poppy Parade 8-1/2" X 11" Cardstock [ 119793 ]](https://assets1.tamsnetwork.com/images/EC042017NF/119793s.jpg "Poppy Parade 8-1/2\" X 11\" Cardstock [ 119793 ]")
![Basic White 8 1/2" X 11" Cardstock [ 166780 ]](https://assets1.tamsnetwork.com/images/EC042017NF/166780s.jpg "Basic White 8 1/2\" X 11\" Cardstock [ 166780 ]")
![Brights Painted Patterns 12" X 12" (30.5 X 30.5 Cm) Designer Series Paper [ 167754 ]](https://assets1.tamsnetwork.com/images/EC042017NF/167754s.jpg "Brights Painted Patterns 12\" X 12\" (30.5 X 30.5 Cm) Designer Series Paper [ 167754 ]")
![Festive Cheer Photopolymer Stamp Set (English) [ 168126 ]](https://assets1.tamsnetwork.com/images/EC042017NF/168126s.jpg "Festive Cheer Photopolymer Stamp Set (English) [ 168126 ]")
![Poppy Parade Classic Stampin' Pad [ 147050 ]](https://assets1.tamsnetwork.com/images/EC042017NF/147050s.jpg "Poppy Parade Classic Stampin' Pad [ 147050 ]")
![Granny Apple Green Stampin' Pad [ 147095 ]](https://assets1.tamsnetwork.com/images/EC042017NF/147095s.jpg "Granny Apple Green Stampin' Pad [ 147095 ]")
![Coastal Cabana Classic Stampin' Pad [ 147097 ]](https://assets1.tamsnetwork.com/images/EC042017NF/147097s.jpg "Coastal Cabana Classic Stampin' Pad [ 147097 ]")
![Smoky Slate Classic Stampin' Pad [ 147113 ]](https://assets1.tamsnetwork.com/images/EC042017NF/147113s.jpg "Smoky Slate Classic Stampin' Pad [ 147113 ]")
![Adhesive Backed Sparkle Sequins [ 168488 ]](https://assets1.tamsnetwork.com/images/EC042017NF/168488s.jpg "Adhesive Backed Sparkle Sequins [ 168488 ]")
![Multipurpose Liquid Glue [ 110755 ]](https://assets1.tamsnetwork.com/images/EC042017NF/110755s.jpg "Multipurpose Liquid Glue [ 110755 ]")
![Stampin' Dimensionals [ 104430 ]](https://assets1.tamsnetwork.com/images/EC042017NF/104430s.jpg "Stampin' Dimensionals [ 104430 ]")
![Paper Trimmer [ 152392 ]](https://assets1.tamsnetwork.com/images/EC042017NF/152392s.jpg "Paper Trimmer [ 152392 ]")
✂️ A Little Extra Crafting Excitement — 3-Day Die Sale!

Speaking of creative possibilities, Stampin’ Up! has a special offer happening right now!
From October 21–23, 2026, you can save 15% on select dies and die cutting tools!
If you’ve had a die set on your wish list, this might be the perfect time to treat yourself. Dies are one of my favourite tools for adding beautiful details, layers, and dimension to handmade cards.
A few things to know:
- The sale runs for just three days, October 21–23.
- The 15% discount applies to select dies and die cutting tools, while supplies last.
- The Stampin’ Cut & Emboss Machine is not included.
- You can see all qualifying products in the online store.
Don’t wait too long to check out your wish list — the sale ends Friday, October 23!
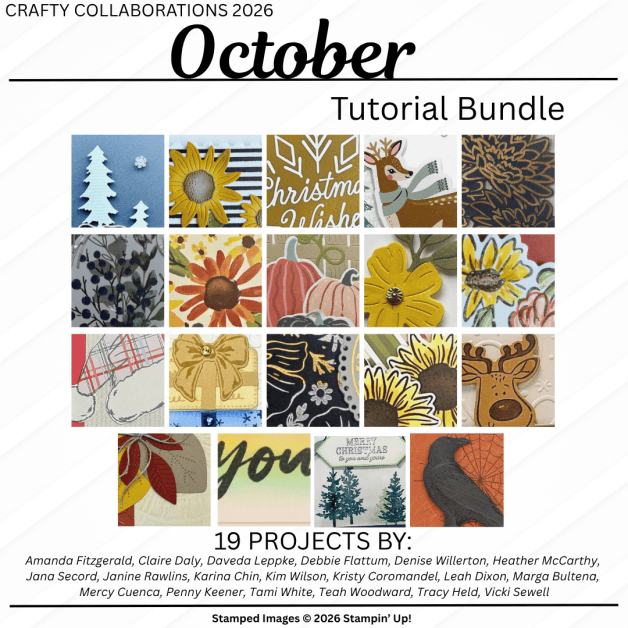
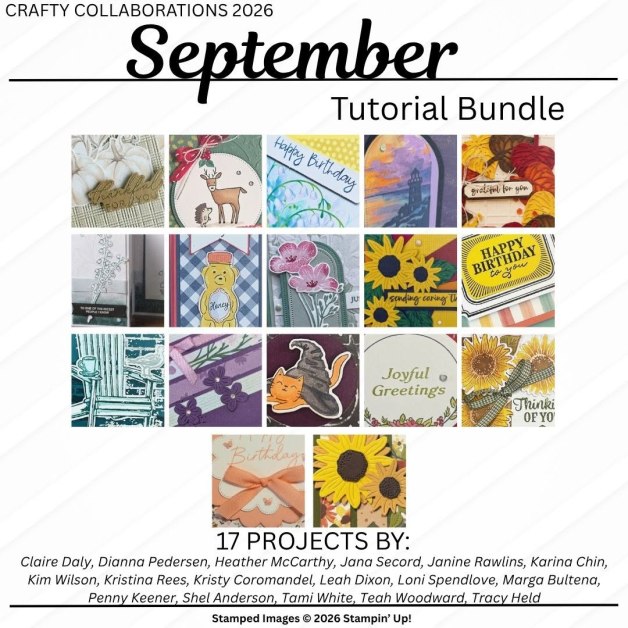
When you place a $65+ order with me I will also send you this fabulous 19 project PDF Tutorial . This bundle is filled with inspiration and is a FREE gift from me to say thanks for your order!
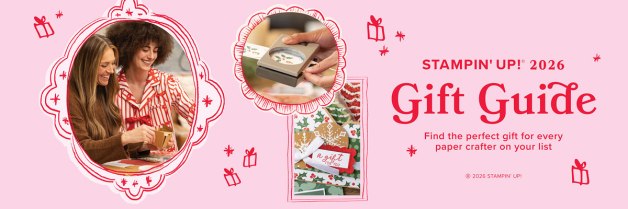
And if you’re looking for Christmas gift inspiration for the crafty people on your list, don’t forget to check out the 2026 Stampin’ Up! Gift Guide!
Looking for even more inspiration and more ways to enjoy stamping? Join my Stampin’ Up! Ink Pad Pals team!
The join process has changed a bit (sign up for $135 and get a $170 coupon) and you now get a fantastic Welcome Box too. PLUS from Oct 6-31 you get an ADDITIONAL $70 Stampin’ Rewards!!! What a fantastic BONUS!
The perks once you’ve joined remain the same.
- Save 15%+ on your orders.
- Get free access to my monthly card class tutorials.
- Enjoy our monthly team meetings with stamping fun and collaboration.
Contact me to find out more or see the details on my website.

Thank you so much for stopping by today! I hope this card inspires you to have a little fun with your Christmas colours and create something that makes you smile.



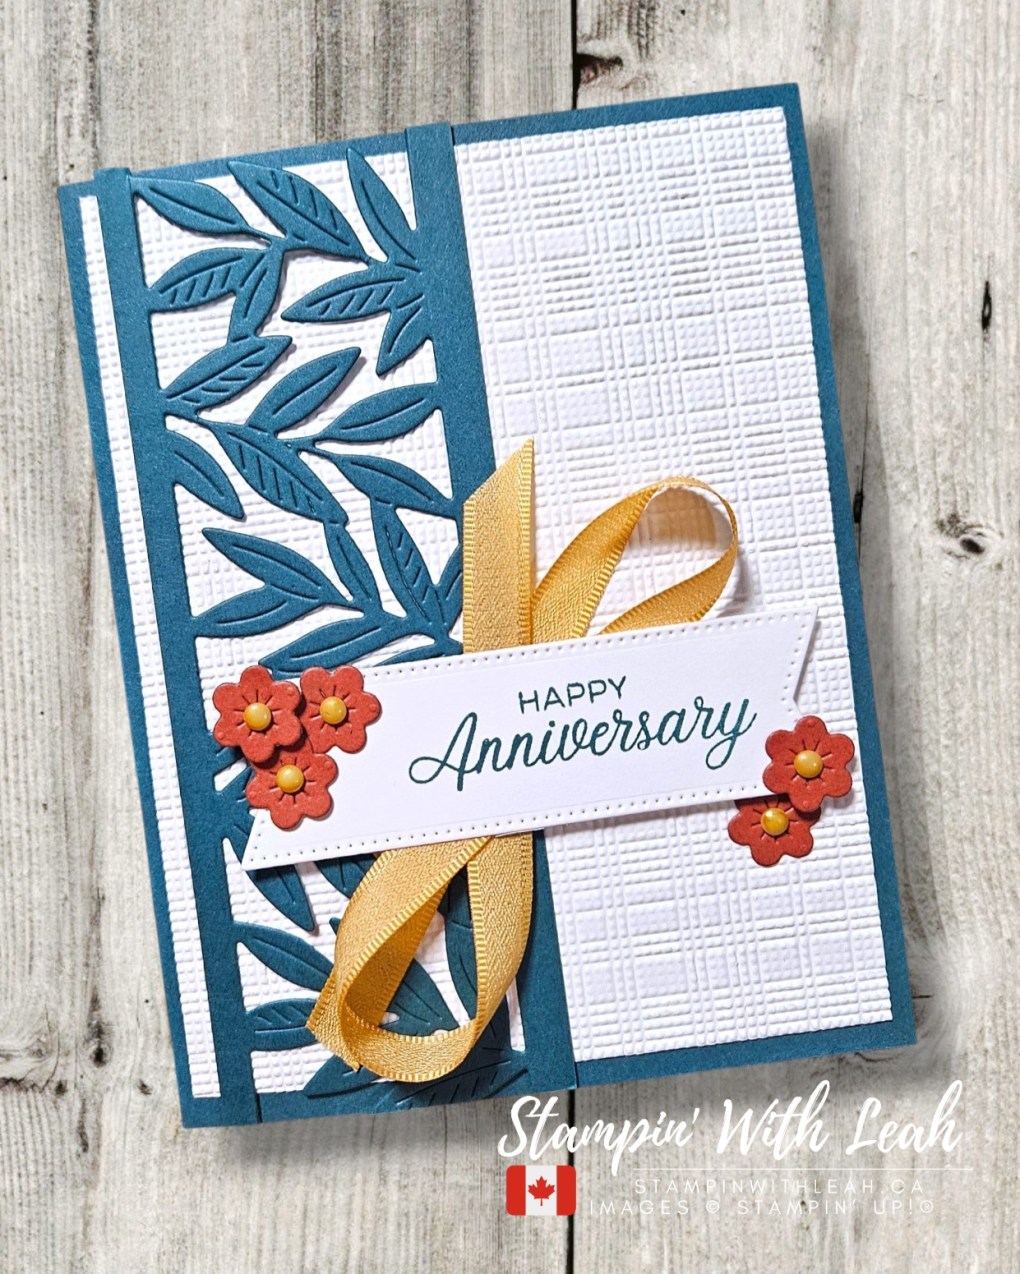
![Pretty Peacock 8-1/2" X 11" Cardstock [ 150880 ]](https://assets1.tamsnetwork.com/images/EC042017NF/150880s.jpg "Pretty Peacock 8-1/2\" X 11\" Cardstock [ 150880 ]")
![Cajun Craze 8-1/2" X 11" Cardstock [ 119684 ]](https://assets1.tamsnetwork.com/images/EC042017NF/119684s.jpg "Cajun Craze 8-1/2\" X 11\" Cardstock [ 119684 ]")
![Phrases & Frames Photopolymer Stamp Set (English) [ 167581 ]](https://assets1.tamsnetwork.com/images/EC042017NF/167581s.jpg "Phrases & Frames Photopolymer Stamp Set (English) [ 167581 ]")
![Pretty Peacock Classic Stampin’ Pad [ 150083 ]](https://assets1.tamsnetwork.com/images/EC042017NF/150083s.jpg "Pretty Peacock Classic Stampin’ Pad [ 150083 ]")
![Botanical Expressions Die [ 168152 ]](https://assets1.tamsnetwork.com/images/EC042017NF/168152s.jpg "Botanical Expressions Die [ 168152 ]")
![Softly Woven 3 D Embossing Folder [ 168466 ]](https://assets1.tamsnetwork.com/images/EC042017NF/168466s.jpg "Softly Woven 3 D Embossing Folder [ 168466 ]")
![Stylish Shapes Dies [ 159183 ]](https://assets1.tamsnetwork.com/images/EC042017NF/159183s.jpg "Stylish Shapes Dies [ 159183 ]")
![Hope Love & Joy Dies [ 166857 ]](https://assets1.tamsnetwork.com/images/EC042017NF/166857s.jpg "Hope Love & Joy Dies [ 166857 ]")
![Golden Glow 3/8" (1 Cm) Bordered Ribbon [ 167548 ]](https://assets1.tamsnetwork.com/images/EC042017NF/167548s.jpg "Golden Glow 3/8\" (1 Cm) Bordered Ribbon [ 167548 ]")
![2026–2028 In Color™ Dots [ 167546 ]](https://assets1.tamsnetwork.com/images/EC042017NF/167546s.jpg "2026–2028 In Color™ Dots [ 167546 ]")
![Tear & Tape Adhesive [ 154031 ]](https://assets1.tamsnetwork.com/images/EC042017NF/154031s.jpg "Tear & Tape Adhesive [ 154031 ]")
![Stampin' Cut & Emboss Machine [ 149653 ]](https://assets1.tamsnetwork.com/images/EC042017NF/149653s.jpg "Stampin' Cut & Emboss Machine [ 149653 ]")
![Basic White 12" X 12" (30.5 X 30.5 Cm) Thick Cardstock [ 166782 ]](https://assets1.tamsnetwork.com/images/EC042017NF/166782s.jpg "Basic White 12\" X 12\" (30.5 X 30.5 Cm) Thick Cardstock [ 166782 ]")
![Hydrangea Hue 8 1/2" X 11" Cardstock [ 167687 ]](https://assets1.tamsnetwork.com/images/EC042017NF/167687s.jpg "Hydrangea Hue 8 1/2\" X 11\" Cardstock [ 167687 ]")
![Whispering Woods 12" X 12" (30.5 X 30.5 Cm) Designer Series Paper [ 168368 ]](https://assets1.tamsnetwork.com/images/EC042017NF/168368s.jpg "Whispering Woods 12\" X 12\" (30.5 X 30.5 Cm) Designer Series Paper [ 168368 ]")
![Holly Jolly Branches Bundle (English) [ 168280 ]](https://assets1.tamsnetwork.com/images/EC042017NF/168280s.jpg "Holly Jolly Branches Bundle (English) [ 168280 ]")
![Cloud Cover 5/8" (1.6 Cm) Textured Ribbon [ 167182 ]](https://assets1.tamsnetwork.com/images/EC042017NF/167182s.jpg "Cloud Cover 5/8\" (1.6 Cm) Textured Ribbon [ 167182 ]")
![Adhesive Backed Snowflakes [ 168316 ]](https://assets1.tamsnetwork.com/images/EC042017NF/168316s.jpg "Adhesive Backed Snowflakes [ 168316 ]")
![Basic White Medium Envelopes [ 159236 ]](https://assets1.tamsnetwork.com/images/EC042017NF/159236s.jpg "Basic White Medium Envelopes [ 159236 ]")
![Timid Tiger 8 1/2" X 11" Cardstock [ 165626 ]](https://assets1.tamsnetwork.com/images/EC042017NF/165626s.jpg "Timid Tiger 8 1/2\" X 11\" Cardstock [ 165626 ]")
![Shimmering Stripes 12" X 12" (30.5 X 30.5 Cm) Specialty Paper [ 168197 ]](https://assets1.tamsnetwork.com/images/EC042017NF/168197s.jpg "Shimmering Stripes 12\" X 12\" (30.5 X 30.5 Cm) Specialty Paper [ 168197 ]")
![Harvest Hues Mix & Match Ephemera Pack [ 168495 ]](https://assets1.tamsnetwork.com/images/EC042017NF/168495s.jpg "Harvest Hues Mix & Match Ephemera Pack [ 168495 ]")
![Simple Alphabet Photopolymer Stamp Set [ 167541 ]](https://assets1.tamsnetwork.com/images/EC042017NF/167541s.jpg "Simple Alphabet Photopolymer Stamp Set [ 167541 ]")
![Timid Tiger Classic Stampin' Pad [ 165278 ]](https://assets1.tamsnetwork.com/images/EC042017NF/165278s.jpg "Timid Tiger Classic Stampin' Pad [ 165278 ]")
![Secret Sea Classic Stampin' Pad [ 165285 ]](https://assets1.tamsnetwork.com/images/EC042017NF/165285s.jpg "Secret Sea Classic Stampin' Pad [ 165285 ]")
![Swirls Of Magic Embossing Folder [ 168179 ]](https://assets1.tamsnetwork.com/images/EC042017NF/168179s.jpg "Swirls Of Magic Embossing Folder [ 168179 ]")
![2025–2027 In Color™ Flat Pearls [ 165192 ]](https://assets1.tamsnetwork.com/images/EC042017NF/165192s.jpg "2025–2027 In Color™ Flat Pearls [ 165192 ]")
![Detail Scissors [ 170902 ]](https://assets1.tamsnetwork.com/images/EC042017NF/170902s.jpg "Detail Scissors [ 170902 ]")
![Mini Stampin' Dimensionals [ 144108 ]](https://assets1.tamsnetwork.com/images/EC042017NF/144108s.jpg "Mini Stampin' Dimensionals [ 144108 ]")

![Secret Sea 8 1/2" X 11" Cardstock [ 165624 ]](https://assets1.tamsnetwork.com/images/EC042017NF/165624s.jpg "Secret Sea 8 1/2\" X 11\" Cardstock [ 165624 ]")
![Luxe Foliage 12" X 12" (30.5 X 30.5 Cm) Specialty Designer Series Paper [ 168599 ]](https://assets1.tamsnetwork.com/images/EC042017NF/168599s.jpg "Luxe Foliage 12\" X 12\" (30.5 X 30.5 Cm) Specialty Designer Series Paper [ 168599 ]")
![Exciting Times Photopolymer Stamp Set (English) [ 167875 ]](https://assets1.tamsnetwork.com/images/EC042017NF/167875s.jpg "Exciting Times Photopolymer Stamp Set (English) [ 167875 ]")
![Basic White 8 1/2" X 11" Thick Cardstock [ 159229 ]](https://assets1.tamsnetwork.com/images/EC042017NF/159229s.jpg "Basic White 8 1/2\" X 11\" Thick Cardstock [ 159229 ]")
![A Christmas Wish Hot Foil Dies [ 170591 ]](https://assets1.tamsnetwork.com/images/EC042017NF/170591s.jpg "A Christmas Wish Hot Foil Dies [ 170591 ]")
![Holly Jolly Branches Photopolymer Stamp Set (English) [ 168273 ]](https://assets1.tamsnetwork.com/images/EC042017NF/168273s.jpg "Holly Jolly Branches Photopolymer Stamp Set (English) [ 168273 ]")
![Gold Stampin' Hot Foil Rolls [ 170066 ]](https://assets1.tamsnetwork.com/images/EC042017NF/170066s.jpg "Gold Stampin' Hot Foil Rolls [ 170066 ]")
![Metallics Wow! Embossing Powder [ 165678 ]](https://assets1.tamsnetwork.com/images/EC042017NF/165678s.jpg "Metallics Wow! Embossing Powder [ 165678 ]")
![Embossing Additions Tool Kit [ 159971 ]](https://assets1.tamsnetwork.com/images/EC042017NF/159971s.jpg "Embossing Additions Tool Kit [ 159971 ]")
![Heat Tool (Us And Canada) [ 129053 ]](https://assets1.tamsnetwork.com/images/EC042017NF/129053s.jpg "Heat Tool (Us And Canada) [ 129053 ]")
![Stampin' Hot Foil System Na & Craft Class [ 170009 ]](https://assets1.tamsnetwork.com/images/EC042017NF/170009s.jpg "Stampin' Hot Foil System Na & Craft Class [ 170009 ]")
![Gold Striped 3/8" (1 Cm) Mesh Ribbon [ 165599 ]](https://assets1.tamsnetwork.com/images/EC042017NF/165599s.jpg "Gold Striped 3/8\" (1 Cm) Mesh Ribbon [ 165599 ]")
![Gold Adhesive Backed Dots [ 168467 ]](https://assets1.tamsnetwork.com/images/EC042017NF/168467s.jpg "Gold Adhesive Backed Dots [ 168467 ]")
![Beautiful Ordinary Life 12" X 12" (30.5 X 30.5 Cm) Designer Series Paper [ 167553 ]](https://assets1.tamsnetwork.com/images/EC042017NF/167553s.jpg "Beautiful Ordinary Life 12\" X 12\" (30.5 X 30.5 Cm) Designer Series Paper [ 167553 ]")
![Cutest Crew Bundle (English) [ 167149 ]](https://assets1.tamsnetwork.com/images/EC042017NF/167149s.jpg "Cutest Crew Bundle (English) [ 167149 ]")
![Tuxedo Black Memento Ink Pad [ 132708 ]](https://assets1.tamsnetwork.com/images/EC042017NF/132708s.jpg "Tuxedo Black Memento Ink Pad [ 132708 ]")
![Smoky Slate Stampin' Blends Combo Pack [ 154904 ]](https://assets1.tamsnetwork.com/images/EC042017NF/154904s.jpg "Smoky Slate Stampin' Blends Combo Pack [ 154904 ]")
![Flirty Flamingo Stampin' Blends Combo Pack [ 154884 ]](https://assets1.tamsnetwork.com/images/EC042017NF/154884s.jpg "Flirty Flamingo Stampin' Blends Combo Pack [ 154884 ]")
![Daffodil Delight Classic Stampin' Pad [ 147094 ]](https://assets1.tamsnetwork.com/images/EC042017NF/147094s.jpg "Daffodil Delight Classic Stampin' Pad [ 147094 ]")
![Blending Brushes [ 153611 ]](https://assets1.tamsnetwork.com/images/EC042017NF/153611s.jpg "Blending Brushes [ 153611 ]")
![Baker's Twine Essentials Pack [ 155475 ]](https://assets1.tamsnetwork.com/images/EC042017NF/155475s.jpg "Baker's Twine Essentials Pack [ 155475 ]")
![2026–2028 In Color™ Butterflies [ 167656 ]](https://assets1.tamsnetwork.com/images/EC042017NF/167656s.jpg "2026–2028 In Color™ Butterflies [ 167656 ]")
![Tile Garden Dies [ 168573 ]](https://assets1.tamsnetwork.com/images/EC042017NF/168573s.jpg "Tile Garden Dies [ 168573 ]")
![Lost Lagoon 8-1/2" X 11" Cardstock [ 133679 ]](https://assets1.tamsnetwork.com/images/EC042017NF/133679s.jpg "Lost Lagoon 8-1/2\" X 11\" Cardstock [ 133679 ]")
![Glow Of Harvest 12" X 12" (30.5 X 30.5 Cm) Specialty Designer Series Paper [ 168598 ]](https://assets1.tamsnetwork.com/images/EC042017NF/168598s.jpg "Glow Of Harvest 12\" X 12\" (30.5 X 30.5 Cm) Specialty Designer Series Paper [ 168598 ]")
![Addressed To You Photopolymer Stamp Set (English) [ 167010 ]](https://assets1.tamsnetwork.com/images/EC042017NF/167010s.jpg "Addressed To You Photopolymer Stamp Set (English) [ 167010 ]")
![Pecan Pie Classic Stampin' Pad [ 161665 ]](https://assets1.tamsnetwork.com/images/EC042017NF/161665s.jpg "Pecan Pie Classic Stampin' Pad [ 161665 ]")
![Lost Lagoon Classic Stampin' Pad [ 161678 ]](https://assets1.tamsnetwork.com/images/EC042017NF/161678s.jpg "Lost Lagoon Classic Stampin' Pad [ 161678 ]")
![Mini Glue Dots [ 103683 ]](https://assets1.tamsnetwork.com/images/EC042017NF/103683s.jpg "Mini Glue Dots [ 103683 ]")
![Take Your Pick [ 144107 ]](https://assets1.tamsnetwork.com/images/EC042017NF/144107s.jpg "Take Your Pick [ 144107 ]")
![Crumb Cake 8-1/2" X 11" Cardstock [ 120953 ]](https://assets1.tamsnetwork.com/images/EC042017NF/120953s.jpg "Crumb Cake 8-1/2\" X 11\" Cardstock [ 120953 ]")
![Golden Glow 8 1/2" X 11" Cardstock [ 167685 ]](https://assets1.tamsnetwork.com/images/EC042017NF/167685s.jpg "Golden Glow 8 1/2\" X 11\" Cardstock [ 167685 ]")
![Crumb Cake Stampin' Blends Combo Pack [ 154882 ]](https://assets1.tamsnetwork.com/images/EC042017NF/154882s.jpg "Crumb Cake Stampin' Blends Combo Pack [ 154882 ]")
![Crisp Cantaloupe Stampin’ Blends Combo Pack [ 167669 ]](https://assets1.tamsnetwork.com/images/EC042017NF/167669s.jpg "Crisp Cantaloupe Stampin’ Blends Combo Pack [ 167669 ]")
![Golden Glow Stampin’ Blends Combo Pack [ 167682 ]](https://assets1.tamsnetwork.com/images/EC042017NF/167682s.jpg "Golden Glow Stampin’ Blends Combo Pack [ 167682 ]")
![Peaceful Pine Stampin’ Blends Combo Pack [ 167668 ]](https://assets1.tamsnetwork.com/images/EC042017NF/167668s.jpg "Peaceful Pine Stampin’ Blends Combo Pack [ 167668 ]")
![Basic Black Hybrid Stampin' Pad [ 166648 ]](https://assets1.tamsnetwork.com/images/EC042017NF/166648s.jpg "Basic Black Hybrid Stampin' Pad [ 166648 ]")
![Early Espresso Classic Stampin' Pad [ 147114 ]](https://assets1.tamsnetwork.com/images/EC042017NF/147114s.jpg "Early Espresso Classic Stampin' Pad [ 147114 ]")
![White Gel Pens [ 166642 ]](https://assets1.tamsnetwork.com/images/EC042017NF/166642s.jpg "White Gel Pens [ 166642 ]")
![Sunflower 3 D Embossing Folder [ 166145 ]](https://assets1.tamsnetwork.com/images/EC042017NF/166145s.jpg "Sunflower 3 D Embossing Folder [ 166145 ]")
![Linen Thread [ 104199 ]](https://assets1.tamsnetwork.com/images/EC042017NF/104199s.jpg "Linen Thread [ 104199 ]")
![Soft Sea Foam 8-1/2" X 11" Cardstock [ 146988 ]](https://assets1.tamsnetwork.com/images/EC042017NF/146988s.jpg "Soft Sea Foam 8-1/2\" X 11\" Cardstock [ 146988 ]")
![Hope Love & Joy Bundle (English) [ 166858 ]](https://assets1.tamsnetwork.com/images/EC042017NF/166858s.jpg "Hope Love & Joy Bundle (English) [ 166858 ]")
![Peaceful Pine Classic Stampin Pad [ 167679 ]](https://assets1.tamsnetwork.com/images/EC042017NF/167679s.jpg "Peaceful Pine Classic Stampin Pad [ 167679 ]")
![Hydrangea Hue Classic Stampin' Pad [ 167677 ]](https://assets1.tamsnetwork.com/images/EC042017NF/167677s.jpg "Hydrangea Hue Classic Stampin' Pad [ 167677 ]")
![Peaceful Pine 3/8" (1 Cm) Bordered Ribbon [ 167551 ]](https://assets1.tamsnetwork.com/images/EC042017NF/167551s.jpg "Peaceful Pine 3/8\" (1 Cm) Bordered Ribbon [ 167551 ]")
![Mini Stampin' Cut & Emboss Machine [ 150673 ]](https://assets1.tamsnetwork.com/images/EC042017NF/150673s.jpg "Mini Stampin' Cut & Emboss Machine [ 150673 ]")

